WordPress Theme Development: Building the Blog
This is Part 7 of the 9 part Course about developing a WordPress theme from scratch.
Here is the access to the other parts of the Course in the sequential order:
- Developing a WordPress Theme From Scratch
- WordPress Theme Development: The best way to enqueue scripts and styles
- WordPress Theme Development: Creating the header and making our theme translation ready
- WordPress Theme Development: Site footer with social navigation, dynamic copyright statement
- WordPress Theme Development: The Loop, the main content, Google Fonts, and the Custom Fields
- Building a WordPress Theme From Scratch: Internal Pages
- WordPress Theme Development: Building the Blog (Current Part)
- WordPress Theme Development: Search page, 404 error template, Custom Queries, and custom post types
- WordPress Theme Development: WordPress Customizer and it’s API
During WordPress Theme Development, you have to code templates for at least three types of the blog page for more control over the look and feel of the website.
WordPress Theme Development: Three Types of Blog pages
1) The blog posts index page with all the blog posts irrespective of their category, tag, author or published year.

2) Multiple archive pages which contain blog posts belonging to a particular category, tag, author or published year
2.1) A Category Archive Page which just displays blog posts belonging to a particular category like Friendship Goals
2.2) A Tag Archive Page which just displays blog posts belonging to a particular tag like Friendship

2.3) A Monthly or Yearly Archive Page which just displays all the blog posts belonging to a particular month like January 2019 or just 2019

2.4) An Author Archive Page which just displays blog posts belonging to a particular author like Sarah Mitchell

3) A single blog post page
WordPress automatically builds all these pages for us based on the URL.
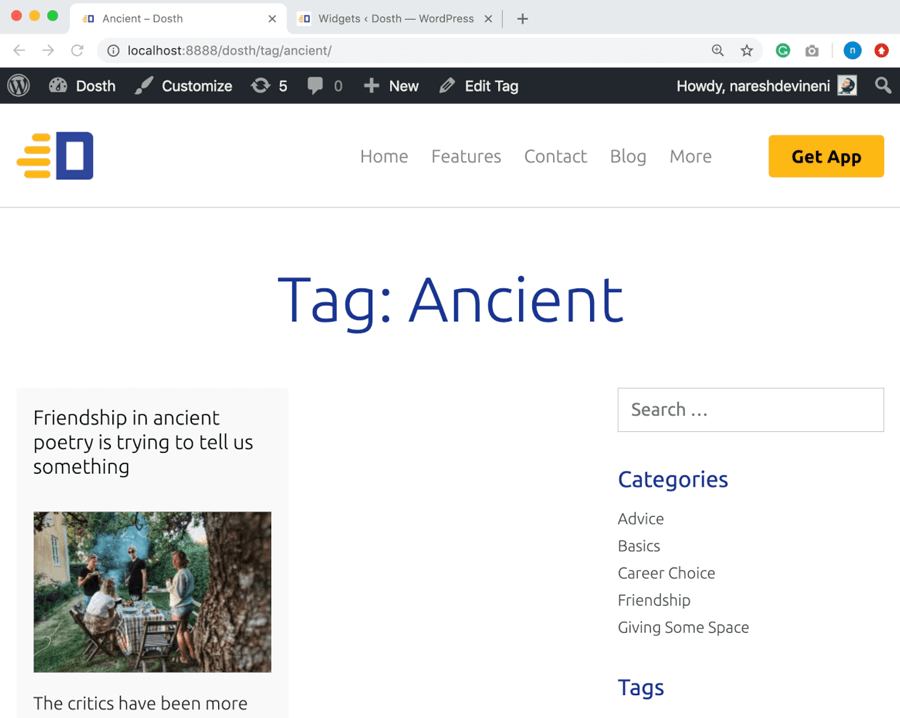
For example, if a user visits:
http://localhost:8888/dosth/tag/ancient/
WordPress will pull all the blog posts belonging to the “ancient” tag from the database and picks a template file from our theme based on the WordPress template hierarchy and renders those blog posts to the frontend.
And as a theme developer who follows proper standards, we have to support all the above-mentioned pages by creating template files for them. That’s all we need to do. Nothing else.
Anyway, next, we will discuss how to prepare content for our blog.
Preparing the content for the blog
To get the most out of this module, you need to create at least five to eight blog posts so that we can play around with various features of a WordPress blog like pagination.
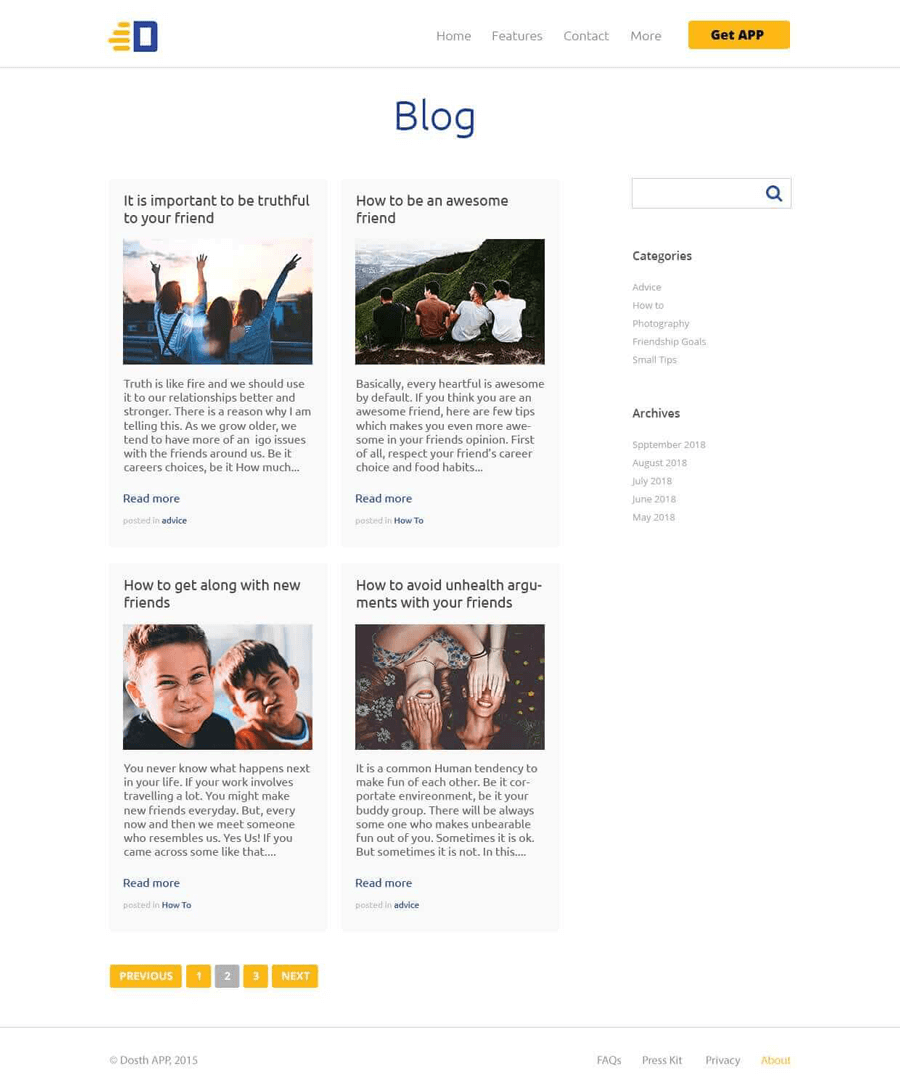
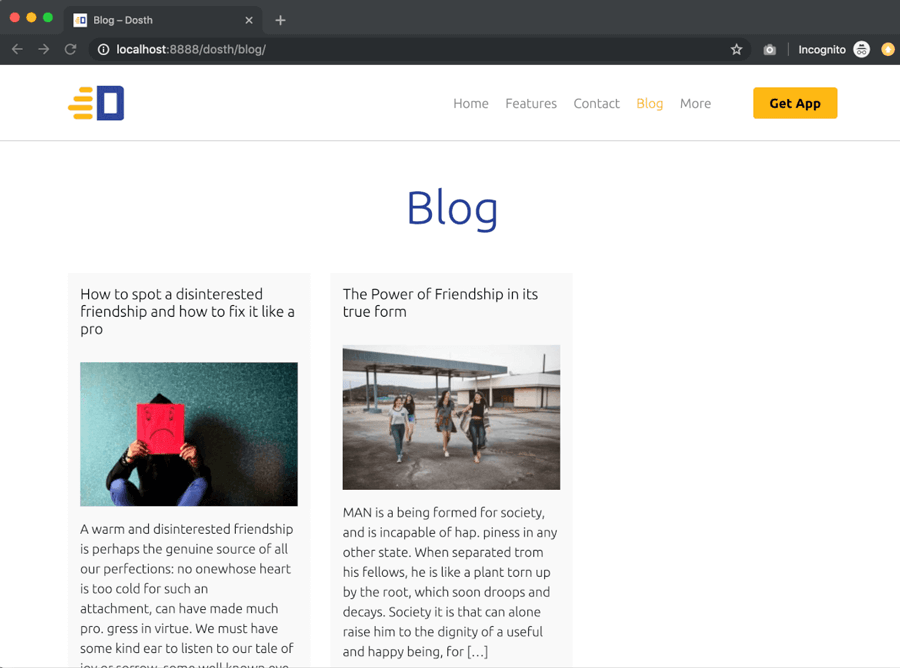
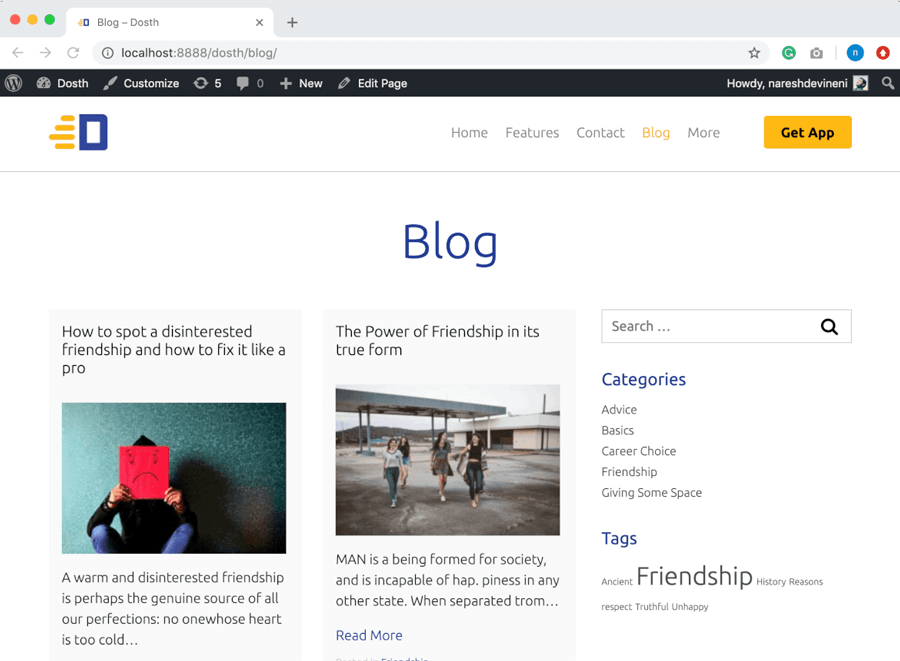
I have created eight blog posts for you by taking featured images from both Pixabay and Unsplash.
You can find these blog posts in the link below:
http://dosth.usablewp.com/blog
Please re-create these blog posts by taking some time. It’s important.
Feel free to use your own content too.
Having said that, for the rest of the article, I am gonna assume that you have enough blog posts to play with.
Next, we will start building our blog by creating the blog index page.
How to create the blog posts index page in WordPress
As I have said before, the blog posts index page displays all the blog posts irrespective of their category, tag, author or published year.
Based on the type of the Website, A blog posts index page could be a Homepage or an Internal Page.
WordPress Blog Posts Index page as the Homepage
For example, If it is a news-based website, usually, the blog posts index page is the homepage.

It might look complex, but it is a pretty straight forward Blog posts index page with a ton of custom queries. That’s all.
We will discuss custom queries in a future module.
The thing with the Blog Posts Index page as Homepage is, we don’t have to create a separate page in the Admin Dashboard -> Pages panel.
If the “Your Homepage Displays” option from the Settings -> Reading panel is set to “Your latest posts”, WordPress will render the Homepage with a bunch of blog posts using a default theme template file like index.php or home.php file.
Blog Posts Index page as Internal Page
If it is a business based website like the one we are building right now, the Blog Posts index page is definitely an internal page.
Unlike Homepage based blog, we have to implement the following steps to build this blog posts index page which gets displayed as an internal page.
Step 1) Create a page called “Blog” or “Articles” or “Name it what-ever-you-want”.
step 2) Select this newly created page for “Your Homepage Displays” option from the Settings -> Reading panel
step 3) That’s all. WordPress will use index.php or home.php file to render the above created internal page with all the blog posts.
Common, let’s start with the first step.
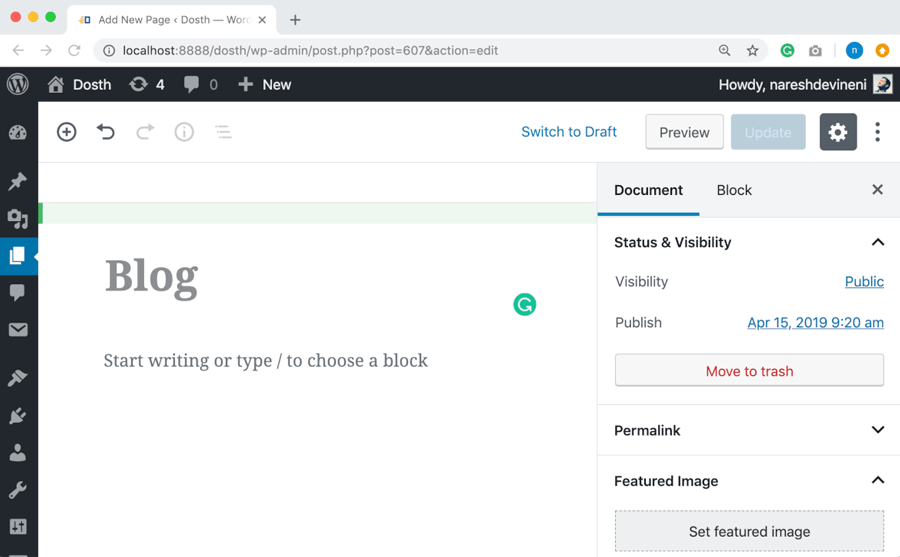
Step 1) Creating a page for the blog
Go to Admin Dashboard -> Pages -> Add New
Majority of the sites on the web will name this page as “Blog”. So, I am gonna follow the convention as well.
You don’t have to add any content to this page. You’ll understand “the why” part in a moment.
Also, you can ignore all page options and just click on the Publish button to create the page.
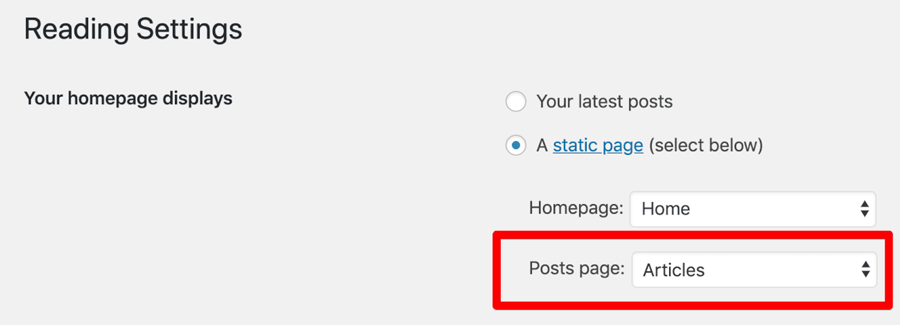
Step 2) Tell WordPress to use the newly created page for displaying blog posts index
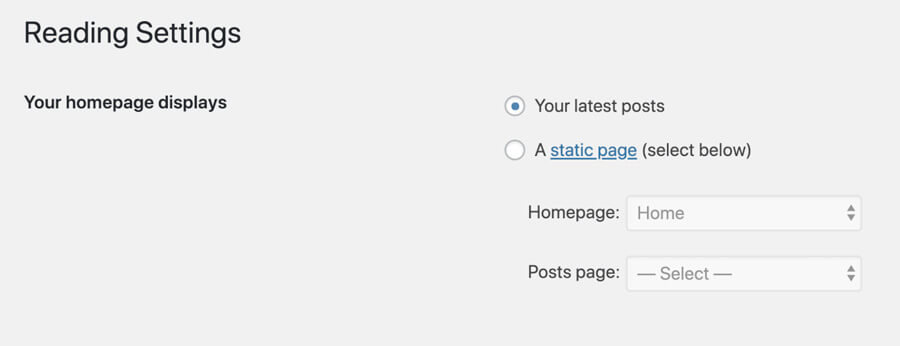
Go to Admin Dashboard -> Settings -> Reading
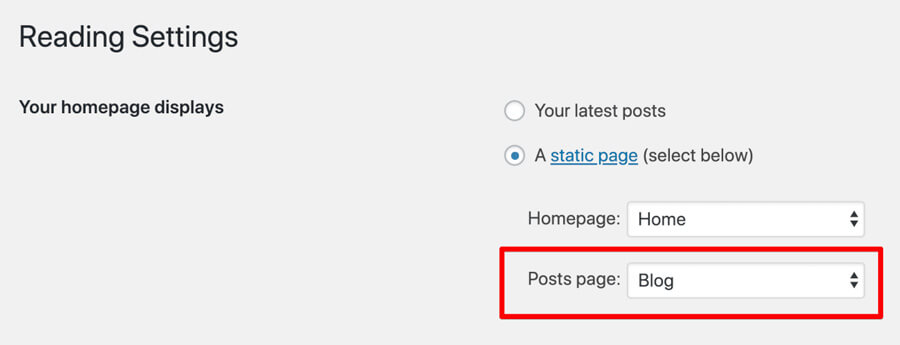
During the earlier module of this course, For “Your homepage displays” We have selected “A Static Page” as our Homepage and selected “Home” page as the Homepage of our site. But during that time, we did not pay attention to the “Posts page” dropdown at all.
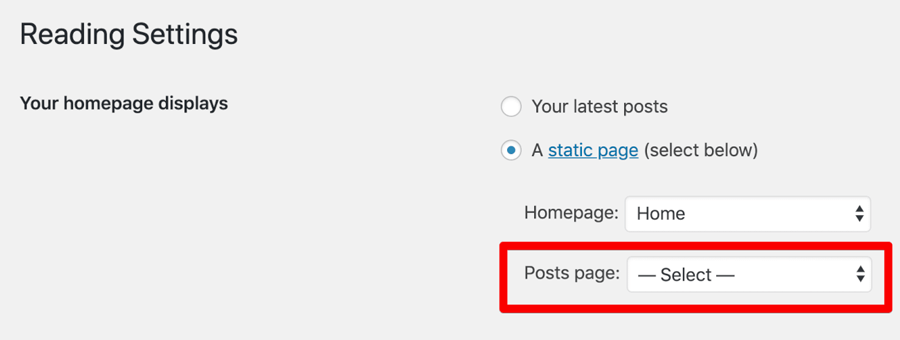
Now it is time to select our Posts page too.
Click on the Posts page dropdown and select the newly created “Blog” page from the list.
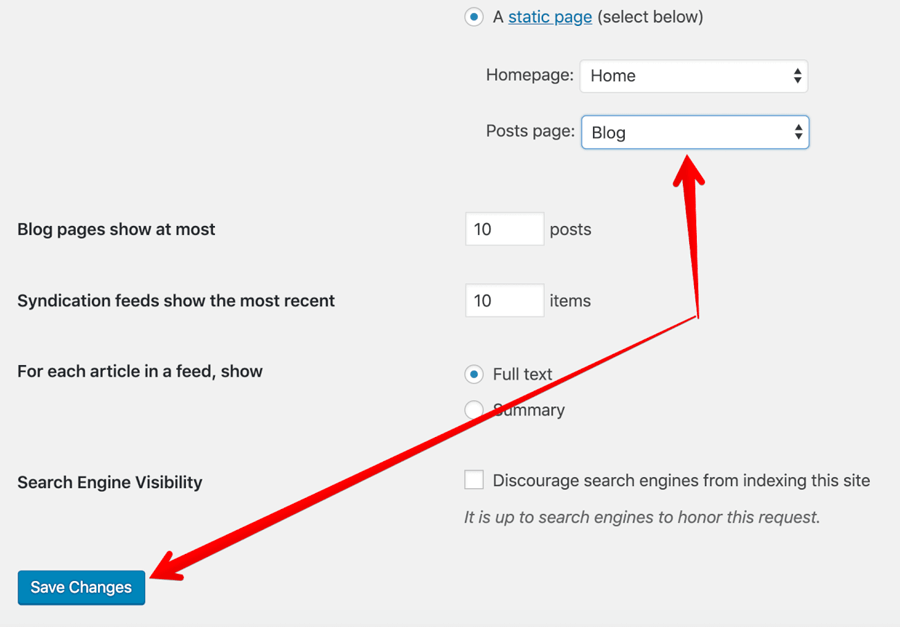
Finally, don’t forget to save the changes.
Now, if you go back to the “Blog” page edit screen in the admin dashboard, you’ll find something interesting.
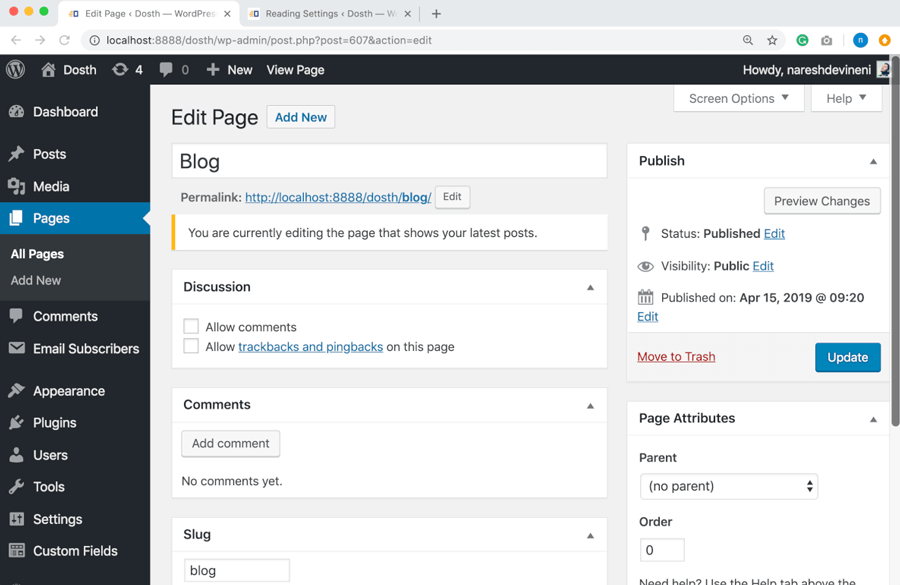
First of all, WordPress switched to its classic interface and it is displaying a message saying
“You are currently editing the page that shows your latest posts.”
Cool, right?
WordPress also removed the content editor altogether. This way, content editors or site administrators doesn’t accidentally edit this page trying to put content in it.
Anyway, that’s all you need to do.
Step 3) WordPress takes care of the rest
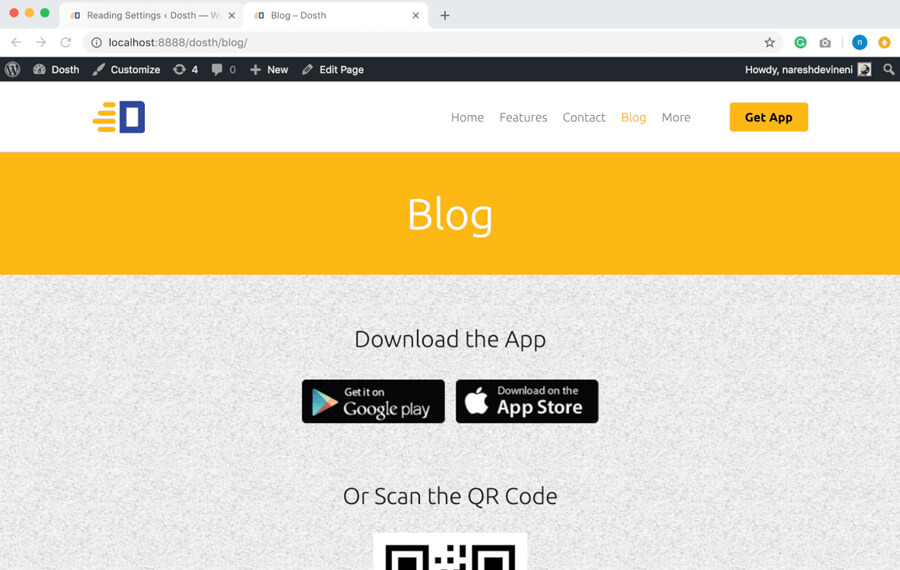
If you now visit the Blog page in the frontend, you can see all the blog posts that you have added using:
Admin Dashboard -> Posts
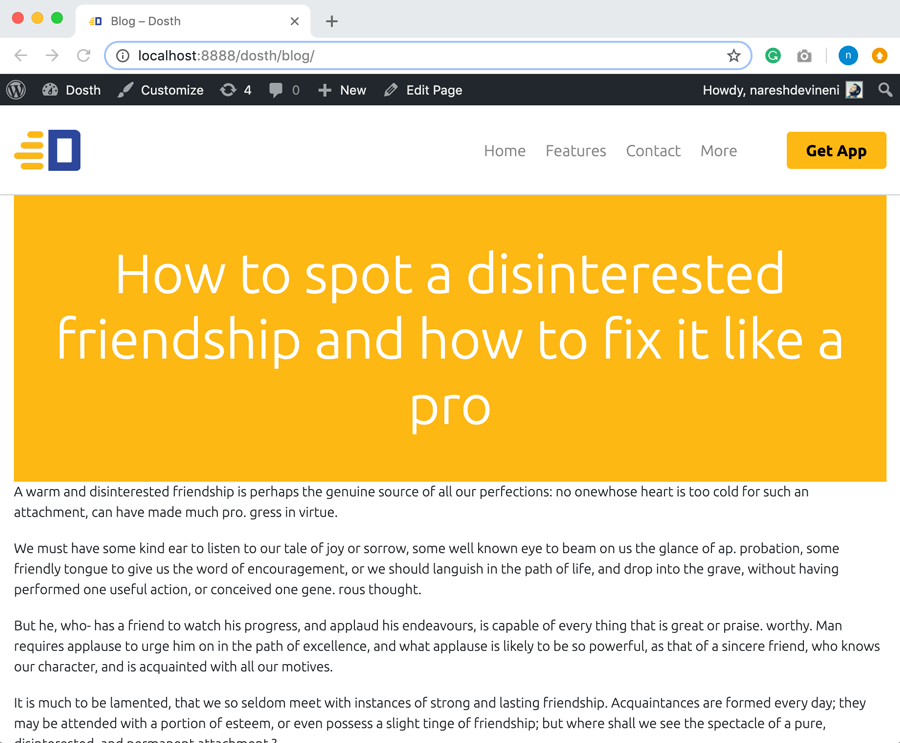
That’s pretty much what it takes to create a Blog Posts Index page in WordPress. Nothing complicated at all.
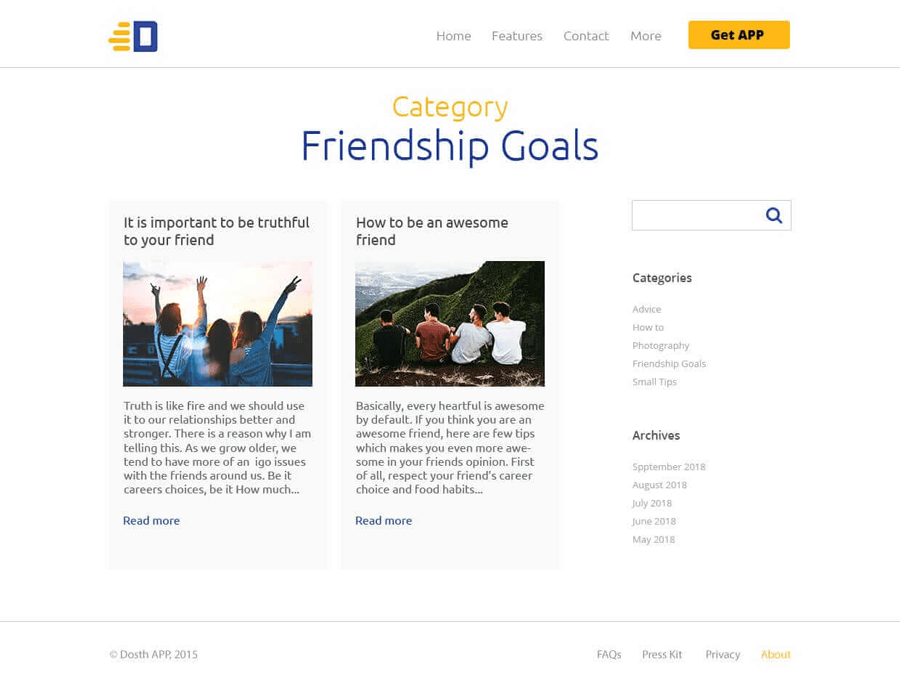
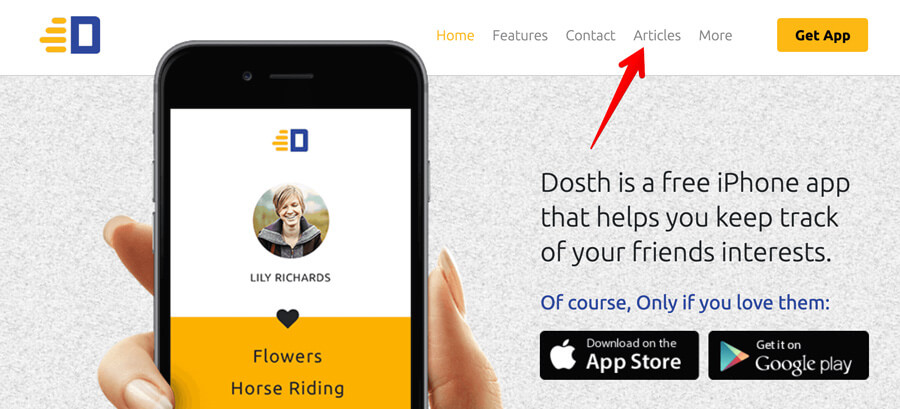
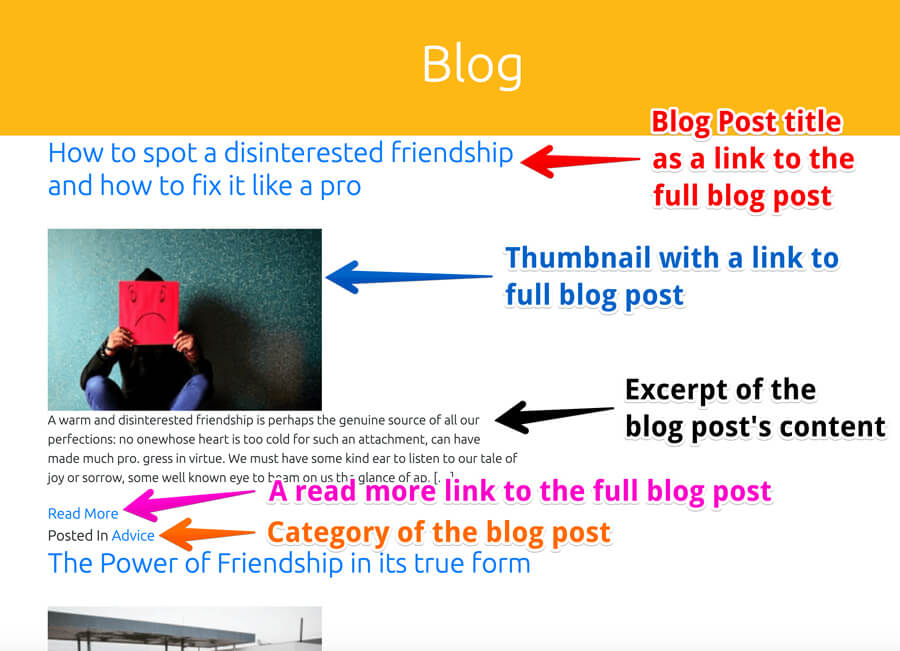
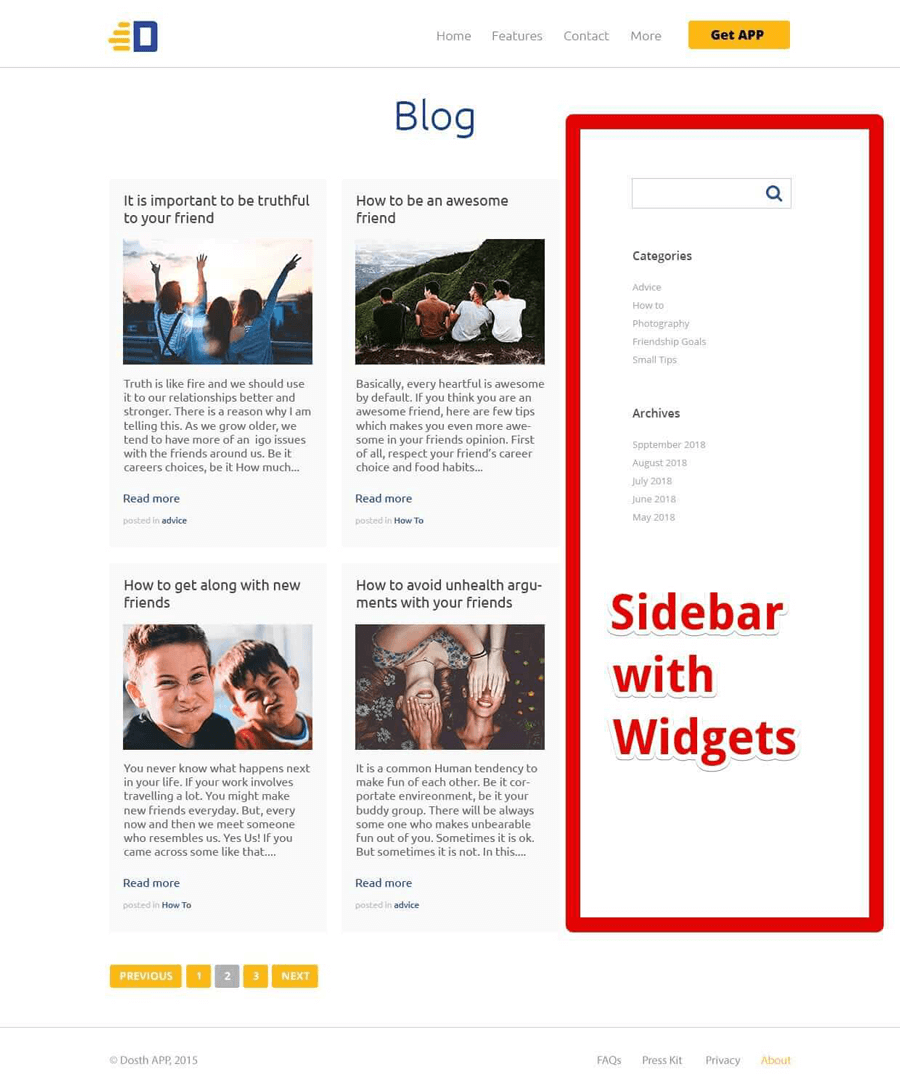
However, the Blog page doesn’t look anything like the below Mockup.
Currently, WordPress is using the index.php file to render the Blog page. WordPress is using this file because it can not find home.php file inside our nd-dosth theme.
But, we are not going to create the home.php file.
Remember? I said that it is totally ok to skip some template files from the WordPress Template Hierarchy.
So, We will modify the code inside the index.php file to make the Blog page look like the above mockup. And, we will do that in the next lesson.
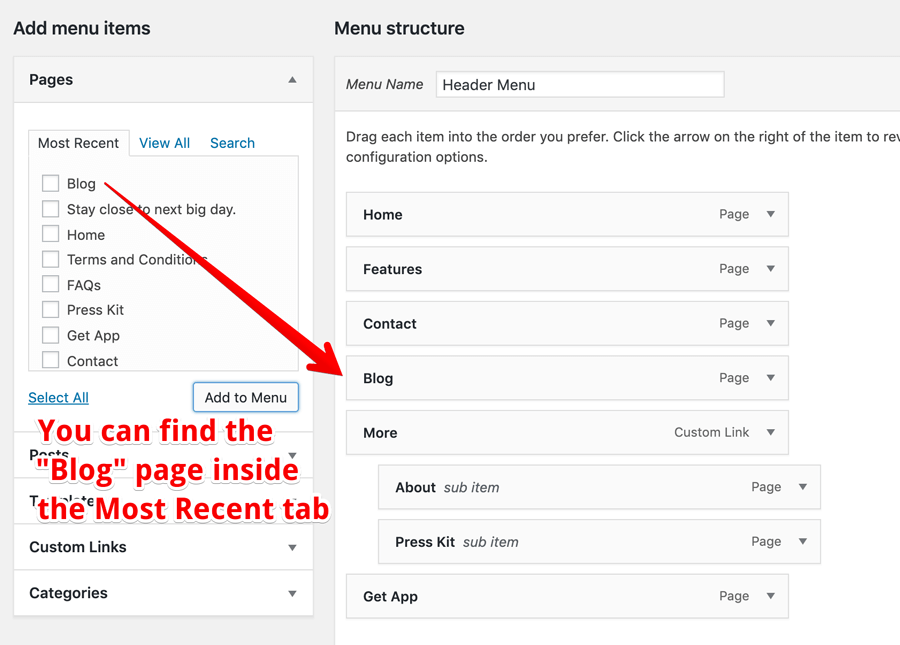
Before that, let’s add the “Blog” page to the menu. The client asked to add it to the Header Navigation. So, we will do just that.
Go to Admin Dashboard -> Appearance -> Menus
Select the Header Navigation if it not already selected.
Finally, add the “Blog” page to the menu and save the menu.
And, it looks like this on the frontend.

“Hey! What if we change the title or slug of the blog page? Does the blog break?”
What if we edit the title or slug of the Blog page?
If you want to edit the slug or title of the page to something else, for example, “Articles”, feel free to do so without any worries.
You don’t have to do this, but for the demonstration purposes, I just changed the Page title and slug of the “Blog” page to “articles”.
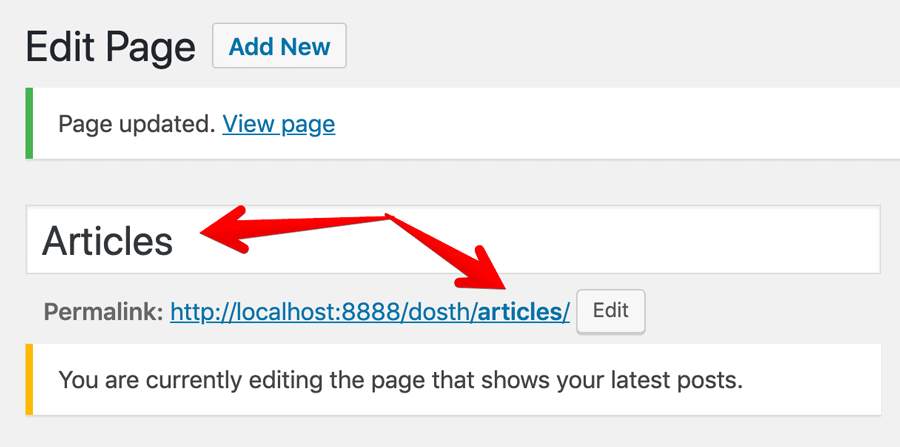
And, WordPress automatically adjusted the “Posts page” setting along with the Header menu.
Cool, right?
In fact, the only reason why WordPress forces you to select a “Posts page” is to give you control over the title and slug of the Blog Index page.
Get it?
Anyway, I reverted back the title and slug from “Articles” to “Blog” again.
Next, we will deal with the index.php file to adjust the look and feel of the blog index page.
Using the index.php to render the Blog posts index page
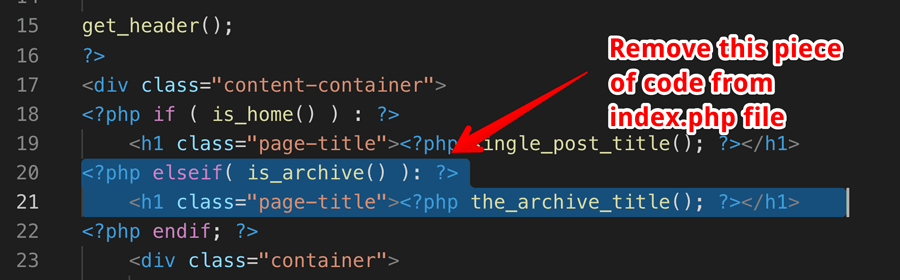
Open up the index.php file and remove the loop entirely.
This is the leftover code.
<?php
/**
 * The main template file
 *
 * This is the most generic template file in a WordPress theme
 * and one of the two required files for a theme (the other being style.css).
 * It is used to display a page when nothing more specific matches a query.
 * E.g., it puts together the home page when no home.php file exists.
 *
 * @link https://developer.wordpress.org/themes/basics/template-hierarchy/
 *
 * @package Dosth
 */
get_header();
?>
<?php get_footer(); ?>
Next, place the following code after the get_header() function call:
<div class="content-container">
    <?php if ( is_home() ) : ?>
        <h1 class="page-title"><?php single_post_title(); ?></h1>
    <?php endif; ?>
</div>
We could end up using the index.php file for rendering the various types of archives. But, we just want to display the “Blog” title if we are viewing the Blog Homepage.
So, with the help of is_home() function call, we are checking whether we are viewing the Blog Homepage or not. The is_home() returns true only when viewing the Blog Homepage.
The is_home() is dependent on the “Your Homepage displays” option and if the “Posts Page” option is set to a particular page, this function will return true only on when viewing the page that is set as the “Posts page”.
However, if the “Your Homepage displays” option is set to “Your Latest Posts”, The is_home() returns true when someone visits the Homepage of our site as well.
In our case, we have set the “Blog” page as the “Posts page”, so is_home() function returns true when viewing the “Blog” page.
<div class="content-container">
    <?php if ( is_home() ) : ?>
        <h1 class="page-title"><?php single_post_title(); ?></h1>
    <?php endif; ?>
</div>
Then, only if the is_home() function returns true, we are printing the “Blog” page title with the help single_post_title() function.
The single_post_title() function will display the title of a particular static page when that static page is set to show blog posts index. So, we can not use this function to display the title of any other static page.
For example, if “Your Homepage displays” option is set to “Your Latest Posts”, Blog posts index will be shown when someone visits the Homepage. No static page with a title is involved here. So, the single_post_title() function will not print anything.
But, if “Your Homepage displays” option is set to “A Static Page” and if the “Posts Page” is set to some static page, the single_post_title() function will print the title of that static page.
In our case, We have set the “Blog” static page to show the blog posts index. Hence, the single_post_title() function is printing the title “Blog”.
That’s all. Nothing more. Nothing less. We call this a Single purpose function.
Common, let’s verify whether the code is working or not by visiting the “Blog” page on the frontend.
“Yay! It’s working!”
Yep! Let’s do one more verification.
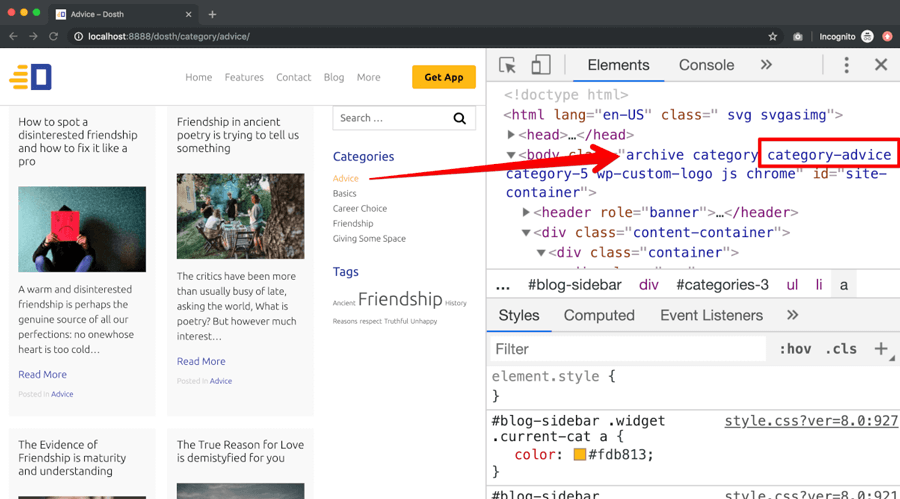
Because, currently, there is no archive.php file inside our theme, WordPress will use the index.php file to render the category archive as well. So, if you visit the below archive URL for category “Advice”, you shouldn’t see the big yellow box with “Blog” as the title.
http://localhost:8888/dosth/category/advice/
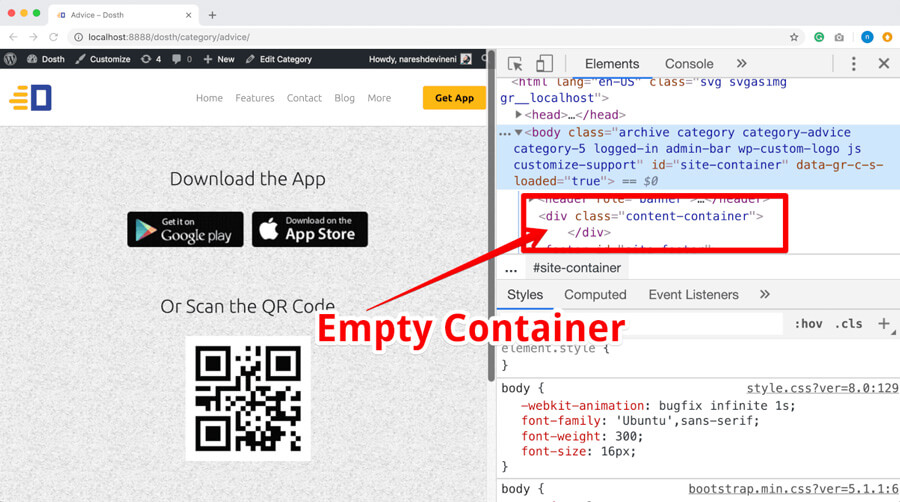
Indeed, we are not seeing the title.
“Yep! Now I understand the purpose of the is_home IF condition! “
Great!
What follows now is the usual Loop with a bunch of template tags
Put the following Loop code right after the IF condition and test it in the browser.
<div class="container">
    <div class="row">
        <div class="blog-posts col-md-8">
        <?php if ( have_posts() ): ?>
            <?php while( have_posts() ): ?>
                <?php the_post(); ?>
                <div class="blog-post">
                    <h2><a href="<?php the_permalink(); ?>"><?php the_title(); ?></a></h2>
                    <?php if ( has_post_thumbnail() ) :
                        $featured_image = wp_get_attachment_image_src( get_post_thumbnail_id( get_the_ID() ), 'medium' ); ?>
                        <div class="blog-post-thumb">
                            <a href="<?php the_permalink(); ?>"><img src="<?php echo $featured_image[0]; ?>" alt='' /></a>
                        </div>
                    <?php endif; ?>
                    <?php the_excerpt(); ?>
                    <a class="read-more-link" href="<?php the_permalink(); ?>"><?php _e( 'Read More' ); ?></a>
                    <div class="posted-in">
                        <span><?php _e( 'Posted In', 'nd_dosth' ); ?></span>
                        <span><?php the_category( ', ' ); ?></span>
                    </div>
                </div>
            <?php endwhile; ?>
        <?php else: ?>
            <p><?php _e( 'No Blog Posts found', 'nd_dosth' ); ?></p>
        <?php endif; ?>
        </div>
        <div id="blog-sidebar" class="col-md-4">

        </div>
    </div>
</div>
If you now visit the “Blog” page in the browser, you should see all the blog posts we have added till now:
So, Nothing much going on in the above code. Just a bootstrap based two column layout.
In the first column, we are outputting the blog posts with the help of the Loop.
Inside the second column, we will output the blog sidebar in the upcoming lesson.
Anyway, now let’s breakdown the above Loop code piece by piece.
First of all, we are checking whether are any blog post by using:
<?php if ( have_posts() ): ?>If there any blog posts, we will go inside the loop, but if there aren’t any, the else condition would get executed and prints “No Blog Posts found” text to the screen.
<?php else: ?>
      <p><?php _e( 'No Blog Posts found', 'nd_dosth' ); ?></p>
<?php endif; ?>
In our case, there are a handful of blog posts, so we are now inside the loop.
Introducing the_permalink() template tag
Once we are inside the Loop, we are outputting the title of the blog post. But this time, we are not simply outputting the title. Instead, we are wrapping the title inside a link that takes the visitor to the full blog post.
<h2><a href="<?php the_permalink(); ?>"><?php the_title(); ?></a></h2>
Inside the Loop, to get the permalink of the blog post, we use the_permalink() template tag. This function just outputs the permalink of the blog post, like this:
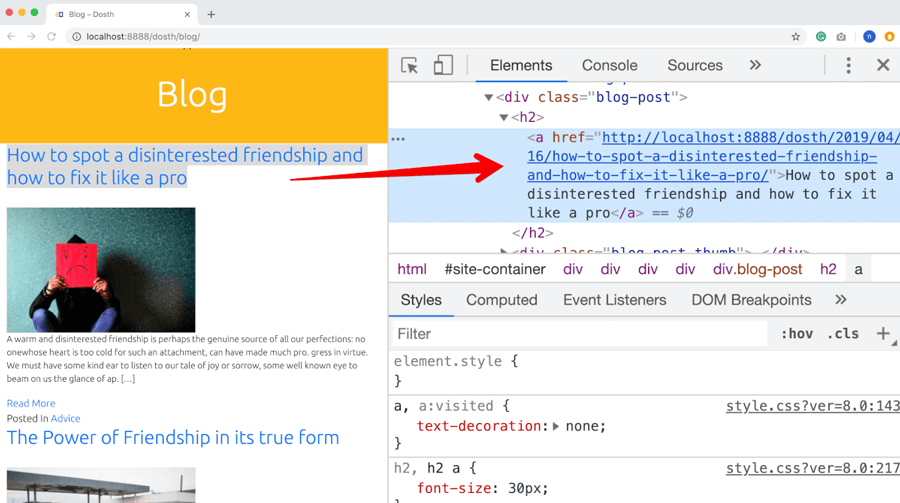
So, technically, we someone clicks on the title of a particular blog post, it will take them to the full blog post a.k.a single post in the terminology of WordPress.
Remember, in the eyes of WordPress, there are three types of posts.
- A blog post
- A page
- A custom post type like an event, a book, etc.
the_permalink() template tag works the same for just about any post type.
Dealing with the thumbnail
<?php if ( has_post_thumbnail() ) :
    $featured_image = wp_get_attachment_image_src( get_post_thumbnail_id( get_the_ID() ), 'medium' ); ?>
    <div class="blog-post-thumb">
        <a href="<?php the_permalink(); ?>"><img src="<?php echo $featured_image[0]; ?>" alt='' /></a>
    </div>
<?php endif; ?>
Nothing new happening with the thumbnail too. We are outputting a medium version of the featured image and wrapped the image inside a link so that when someone clicks on the image of a particular blog post, it will take them to the full blog post.
Introducing the_excerpt() template tag
<?php the_excerpt(); ?>Next, we are outputting the trimmed down version of the blog post’s content with the help of the_excerpt() template tag.
The Excerpt of a blog post is nothing but the trimmed down version of the blog post’s content. Typically, the first few lines of the entire content. That’s all.
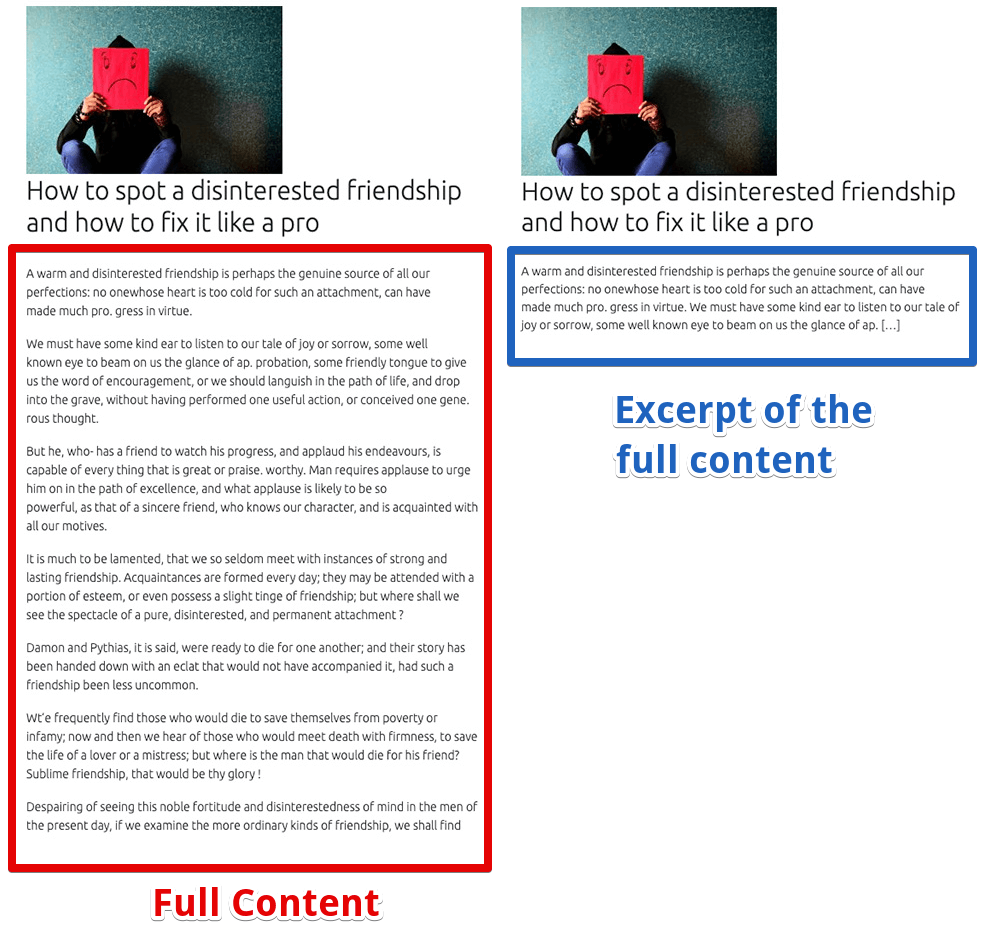
The thing with the_excerpt() template tag is, it first looks whether the Excerpt field in the Post edit screen is set. If it is set, it will the display that.
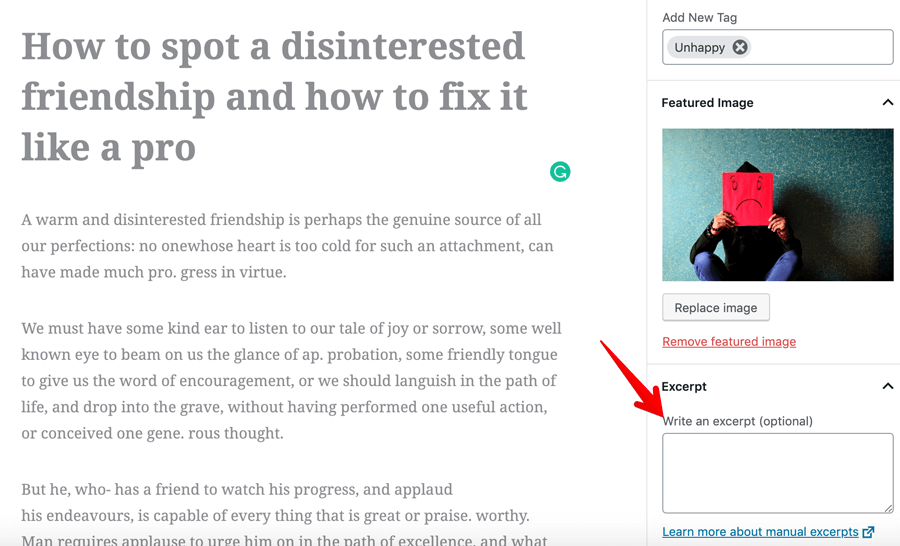
If the Excerpt field is empty, WordPress will automatically generate the excerpt from the first couple of paragraphs.
We usually display the excerpt of the individual blog post on the Homepage, blog posts index page and archive pages of the site to give the visitor a glimpse of the article.
You already know what’s happening with the “Read More” link, so I am gonna skip that.
Introducing the_category() template tag
<div class="posted-in">
    <span><?php _e( 'Posted In', 'nd_dosth' ); ?></span>
    <span><?php the_category( ', ' ); ?></span>
</div>
Finally, we are outputting the categories that a particular blog post is assigned to and if a particular blog is assigned to multiple categories, we are separating each category with a comma (,).
<?php the_category( ', ' ); ?>
Now, you don’t have to use comma (,). You can use any glyph you want.
Let’s fix the look and feel
As usual, the “Blog” page doesn’t look anything like the mockup and let’s write some CSS to fix it.
Now, we are not going to write CSS that is specific to the blog posts index of “Blog” page.
Remember? In the first lesson of this module, we saw the designs of the blog posts index page and various archive pages.
They all look the same from the design perspective.
So, we have to write universal CSS which applies to both blog posts index page and archive pages.
Don’t worry if you did not understand what I am saying. It will make sense by the end of this module.
Add the following CSS code to the end of the style.css file:
*-------------------------------------------------------------------------------
  13.Blog Index / Archive Styling
-------------------------------------------------------------------------------*/
.blog .page-title, .archive .page-title{
    background-color:transparent;
    color:#1a3794;
}
@media only screen and (min-width:767px){
    .blog-posts{
        display:flex;
        justify-content:space-between;
        flex-wrap: wrap;
    }
    .blog-posts .blog-post{
        width:48%;
    }
}
.blog-posts .blog-post{
    background-color:#f9f9f9;
    padding:15px;
    margin-bottom:20px;
}
.blog-posts .blog-post h2 a{
    color:black;
    font-size:18px;
}
.blog-posts .blog-post h2 a:hover{
    color:#1a3794;
}
.blog-posts .blog-post h2{
    line-height:1.2;
    font-size:18px;
}
.blog-post-thumb{
    margin-bottom:15px;
}
.blog-posts .blog-post p{
    font-size:16px;
}
.read-more-link, .posted-in a{
    color:#1a3794;
    margin-bottom:10px;
    display:inline-block;
    border-bottom:1px solid transparent;
}
.posted-in{
    font-size:12px;
}
.posted-in span{
    color:#ccc;
}
.read-more-link:hover, .posted-in a:hover{
    color:black;
    border-bottom-color:#333;
}
And here is the output in the browser:
However, there a few problems we need to address before we build the sidebar. We will address them one by one in the upcoming sections of this part.
Taking control over thumbnail dimensions using the add_image_size() function
The first problem we are going to deal with is the height of the thumbnails.
Currently, we are outputting the “medium” image size of the Original image.
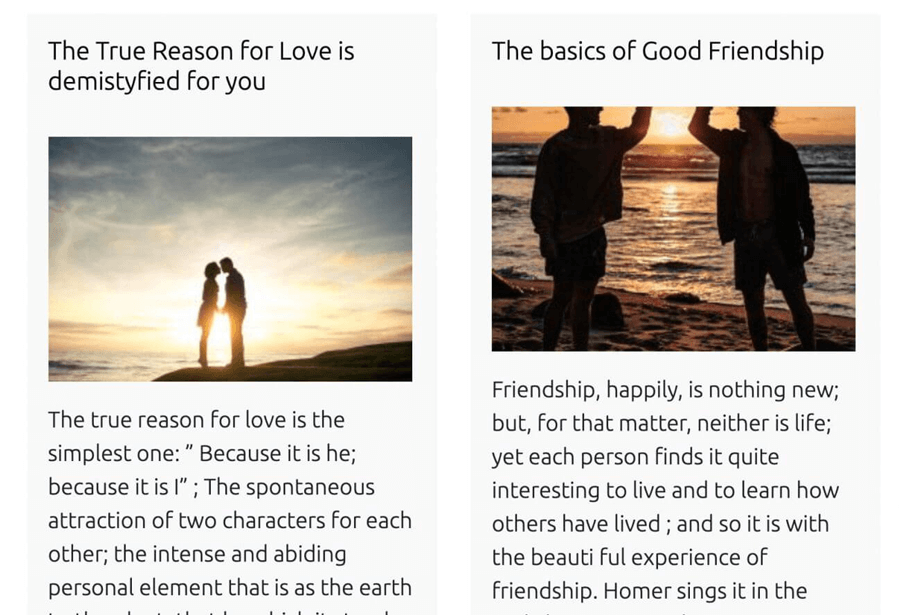
But the problem with the “medium” image size is, it only worries about the width by leaving out the height. So, if the client uploads original images with varied aspect ratios, blog post thumbnails end up having different heights which causes layout issues as you see in the above image.
Also, If you observe the mockup, all the thumbnails have the same aspect ratio.
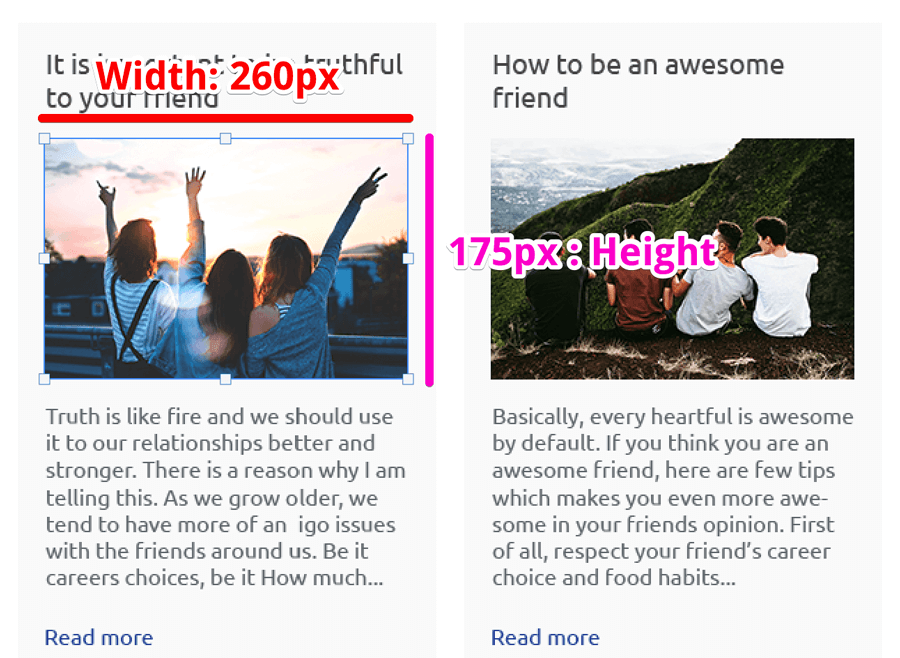
And, none of the default image sizes like large, thumbnail, etc. would generate the post thumbnails with the exact dimensions mentioned above in the picture.
So, to fix this issue, we have to create a custom image size to fit our needs and WordPress lets us easily do it by providing us with:
add_image_size( $image_size_name, $width, $height, $crop );
This function accepts four parameters.
1) Custom Image Size Name: String (required)
First, we have to provide the name of our custom image size. You can name it whatever you want. But it is a good idea to give it a descriptive name.
In our case, I want to give ‘dosth-blog-thumbnail’ as the image size name.
add_image_size( 'dosth-blog-thumbnail', 260, 175, true );
2) Width of the image in pixels: Integer (optional)
Although it is optional to provide the width parameter, I never came across the situation where I would leave this out.
In our case, we want our thumbnail to be exactly 260px width, so I want to provide 260 for this parameter.
add_image_size( 'dosth-blog-thumbnail', 260, 175, true );
3) Height of the image in pixels: Integer (optional)
If you leave out the height parameter, the image will be resized to whatever the width specified by keeping the height proportional. If you are adding an image size for a masonry layout, you should set the height parameter to 0.
add_image_size( 'dosth-blog-thumbnail', 260, 0, true );
In our case, we want our thumbnail height to be exactly 175px height, so I want to provide 175 for this parameter.
add_image_size( 'dosth-blog-thumbnail', 260, 175, true );
4) $crop: boolean
This parameter allows us to determine Whether to crop the image or just resize it by keeping the original aspect ratio of the image )
If we omit this value, the image will be resized instead of getting cropped based on the $width and $height parameters.
In our case, we want to crop the image. So, I want to provide true for this parameter
add_image_size( 'dosth-blog-thumbnail', 260, 175, true );
Putting the add_image_size function to use
We can not call the add_image_size() function directly. We have to hook it to one of the following actions hooks:
- after_theme_setup
- init
We can pick any.
Basically, the init action hook gets triggered after the after_theme_setup action hook.
The after_theme_setup action hook is my personal preference. So, Let’s go with that.
Go ahead and open up the functions.php file and put the above line of code inside the nd_dosth_theme_setup action, like this:
function nd_dosth_theme_setup() {
    /*
    * Make theme available for translation.
    * Translations can be filed in the /languages/ directory.
    */
    load_theme_textdomain( 'nd_dosth', get_stylesheet_directory() . '/languages' );

    // Add <title> tag support
    add_theme_support( 'title-tag' );

    // Add custom-logo support
    add_theme_support( 'custom-logo' );

    // Add widgets support
    add_theme_support( 'widgets' );

    // Add Featured Image support
    add_theme_support( 'post-thumbnails' );

    // Add image sizes
    add_image_size( 'dosth-blog-thumbnail', 260, 175, true );

    // Register Navigation Menus
    register_nav_menus( array(
        'header'   => esc_html__( 'Display this menu in Header', 'nd_dosth' ),
        'footer'   => esc_html__( 'Display this menu in Footer', 'nd_dosth')
    ) );
}
add_action( 'after_setup_theme', 'nd_dosth_theme_setup');
Next, go back to the featured image section of index.php file and change the image size of the thumbnail to our newly added custom image size by replacing “medium” with “dosth-blog-thumbnail”, like this:
$featured_image = wp_get_attachment_image_src( get_post_thumbnail_id( get_the_ID() ), 'dosth-blog-thumbnail' );
Now let’s check out updated thumbnail size in the frontend again.
Oops, nothing changed!
“Why?”
The problem with WordPress is if we have added a new image size, it doesn’t automatically generate thumbnails for the new image size.
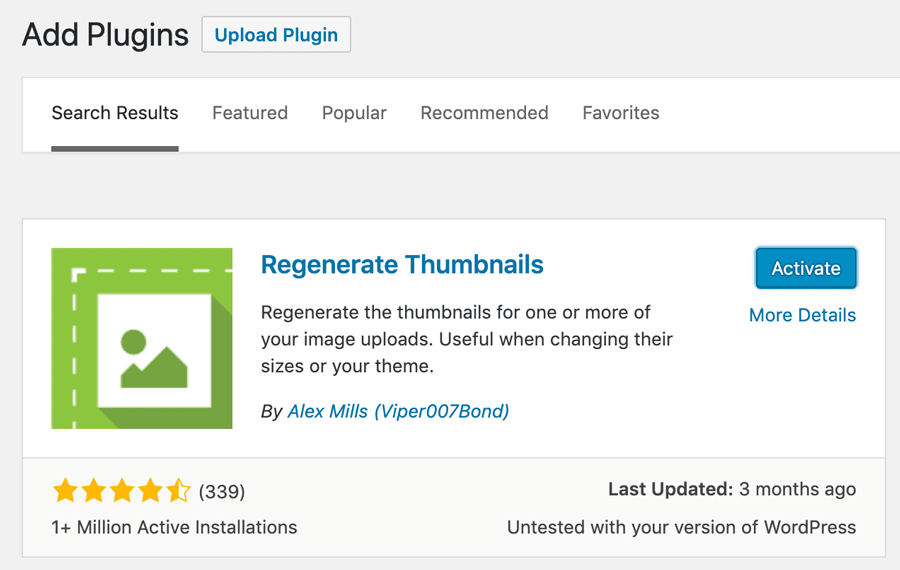
We have to do it ourselves with the help of a plugin called “Regenerate Thumbnails”.
How to Regenerate thumbnails in WordPress
So, Let’s go ahead and install the plugin by going to:
Admin Dashboard -> Plugins -> Add New
Next, search for the “Regenerate Thumbnails” by Alex Mills and activate it.
Then, go to Admin Dashboard -> Tools -> Generate Thumbnails

Finally, click on the “regenerate thumbnails for the featured images only” button because we don’t want to generate the 260x175px thumbnails for all the attachments in the media library. We only want this for the featured images.
Also, we don’t have control over the post type of the “Featured Images”. So, we can not skip generating the new thumbnails for the featured images of the pages. But that’s ok most of the times.
Anyway, as soon as you click on the button, the “Regenerate Thumbnails” plugin forces WordPress to generate the new image size based thumbnails.
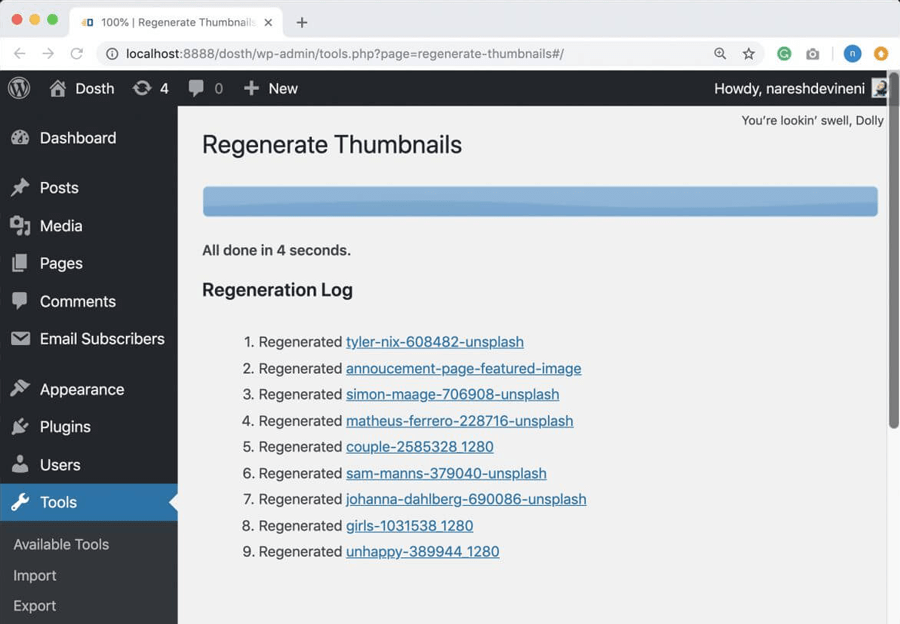
As you can see in the above image, after 4 seconds, the new set of thumbnails of size 260x175px are generated successfully.
Now, let’s go back to the “Blog” page in the frontend and refresh it.
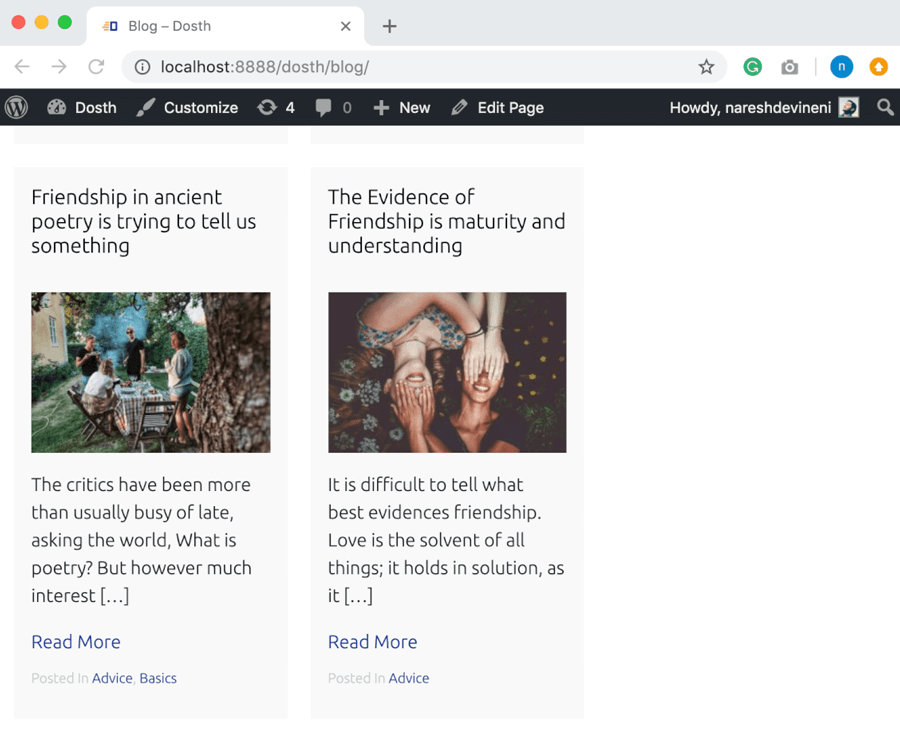
Oh Yeah!
It’s working, which is great actually!
But there is one problem. If you notice the image on the right, the heads of persons are cutting off.
This problem is due to the crop position which defaults to “center center”.
We can change the crop position by modifying the fourth parameter of the add_image_size() function like this:
add_image_size( 'dosth-blog-thumbnail', 260, 175, array('center', 'top' ) );
Instead of specifying “True” for the fourth parameter, we can specify the crop position in the form of an arrat and these are the possible values you can go with:
- x_crop_position accepts ‘left’ ‘center’, or ‘right’.
- y_crop_position accepts ‘top’, ‘center’, or ‘bottom’.
However, I am not going to do this because we have no control over what kind of images the client will upload. So, a new crop position could bring more problems.
So, all we can do is suggest the client upload the same aspect ratio images.
Next, we will deal with the length of the excerpt. Currently its too big when compared to the mockup design.
Introducing the WordPress excerpt_length filter hook
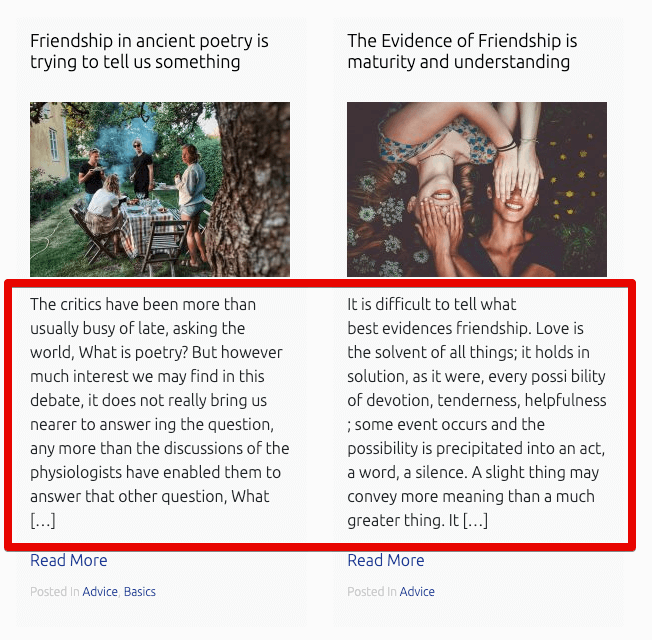
If you notice the above image, the length of the excerpt is too big.
Thankfully, we can reduce the length( number of words ) of the excerpt using the excerpt_length filter hook.
Common, go ahead and paste the following code at the end of the functions.php file:
/*
 * Custom Excerpt Length
 */
function nd_dosth_custom_excerpt_length() {
    return 20;
}
add_filter( 'excerpt_length', 'nd_dosth_custom_excerpt_length' );
In the above code, we are hooking our nd_dosth_custom_excerpt_length filter to the excerpt_length filter hook.
And inside our filter, we are limiting the excerpt length to 20 words. That’s all.
Now, this excerpt length applies all the archives. Not just the blog posts index.
The excerpt_length filter hook is universal. You’ll know what I mean in a future module.
Anyway, here is how the excerpt looks in the browser.
Neat, right?
Also, currently, I don’t really like the default […] at the end of the excerpt, I want to remove those brackets by keeping them just the three dots.
To achieve this, we have to use another filter hook called:
excerpt_more
So, put the following code at the end of the functions.php file:
/*
 * Remove brackets at the end of each excerpt
 */
function nd_dosth_custom_excerpt_more() {
    return '...';
}
add_filter( 'excerpt_more', 'nd_dosth_custom_excerpt_more' );
Easy, right?
Next, we will fix the problem with categories.
WordPress Theme Development: Accessing the post data inside filters

Let’s just say you want to replace those three dots (…) with a read more link. And, This is a perfect real-world scenario.
We can actually do this by accessing the global $post variable and other template tags that we usually use inside the loop.
Yep! If it is a filter hook that handles the data that belongs to a particular post, you can access every piece of that post inside that filter with the help of the template tags that we usually inside the loop.
For example:
/*
 * Remove brackets at the end of each excerpt and read more link
 */
function nd_dosth_custom_excerpt_more() {
    return '' . ' Read More »' . '';
}
add_filter( 'excerpt_more', 'nd_dosth_custom_excerpt_more' );
The above code might look complicated for a beginner PHP developer, but it is just some basic PHP concatenation.

Powerful, right?
Anyway, I don’t want this filter based read more like, I am reverting it back to the three dots I love.
Next, we will fix a problem related to the categories located at the bottom of every blog post.
Introducing the power of “get_” alternatives of the template tags of the Loop
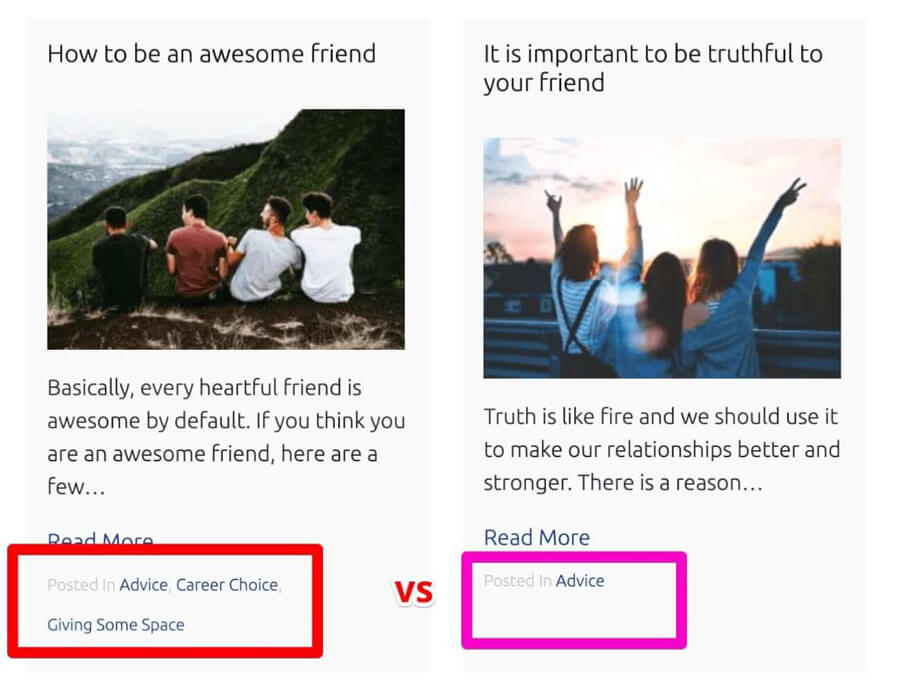
The problem with the_category() function is, it outputs all the categories of a post. As you can see in the above image, one of the posts is assigned to three categories and the layout is getting disturbed.
Also, the designer from the client side prefers to showcase only one category in the index, So, we should output only one category.
To achieve this we have to go with the get_the_category() function.
The only difference between both the functions is, while the_category() function directly outputs the categories with hyperlinks, the get_the_category() function returns a PHP array with the categories instead of outputting them.
So, with the help of get_the_category() function, we should be able to output just a single category even if the post is assigned to multiple categories.
Go back to the index.php file and replace the following line of code:
<div class="posted-in">
    <span><?php _e( 'Posted In', 'nd_dosth' ); ?></span>
    <span><?php the_category( ', ' ); ?></span>
</div>
With this code:
<?php $categories = get_the_category(); ?>
<?php if ( ! empty( $categories ) ) : ?>
    <div class="posted-in">
        <span><?php _e( 'Posted In', 'nd_dosth' ); ?></span>
        <a href="<?php echo get_category_link( $categories[0]->term_id ); ?>">
            <?php echo $categories[0]->name; ?>
        </a>
    </div>
<?php endif; ?>
Now let’s break it down.
We are getting the categories in the form of an array using the get_the_category() function and saving it to a variable called $categories.
Then we are checking if there any categories assigned to a particular blog post. If our check turns true, Inside the IF condition, we are building the hyperlink for the first category from the $categories array by leaving out others.
Here is the output in the browser:

Did you see that? Our new code is just outputting a single category with hyperlink.
If you understood the above code, feel free to skip the rest of the lesson.
If not, let me elaborate on it.
The variable $categories is an array and every item inside this array is an individual category with a bunch of information.
If we var_dump the $categories variable now, we will see the following output:
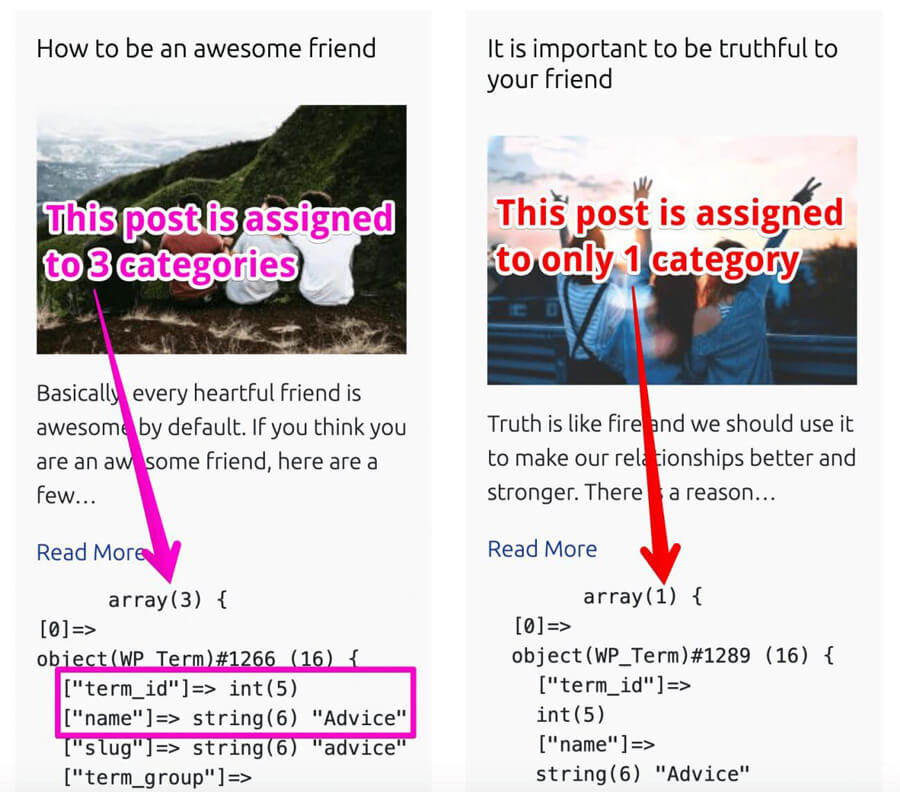
The blog post on the left is assigned to three categories, so the $categories has three items in the array.
array(3) {
    //First Item
    [0]=> object(WP_Term)#1266 (16) {
        ["term_id"]=> int(5)
        ["name"]=> string(6) "Advice"
        ["slug"]=> string(6) "advice"
        ["term_group"]=> int(0)
        ["term_taxonomy_id"]=> int(5)
        ["taxonomy"]=> string(8) "category"
        ["description"]=> string(0) ""
        ["parent"]=> int(0)
        ["count"]=> int(6)
        ["filter"]=> string(3) "raw"
        ["cat_ID"]=> int(5)
        ["category_count"]=> int(6)
        ["category_description"]=> string(0) ""
        ["cat_name"]=> string(6) "Advice"
        ["category_nicename"]=> string(6) "advice"
        ["category_parent"]=> int(0)
    }
    //Second Item
    [1]=> object(WP_Term)#1262 (16) {
        ["term_id"]=> int(8)
        ["name"]=> string(13) "Career Choice"
        ["slug"]=> string(13) "career-choice"
        ["term_group"]=> int(0)
        ["term_taxonomy_id"]=> int(8)
        ["taxonomy"]=> string(8) "category"
        ["description"]=> string(0) ""
        ["parent"]=> int(0) ["count"]=> int(1)
        ["filter"]=> string(3) "raw"
        ["cat_ID"]=> int(8)
        ["category_count"]=> int(1)
        ["category_description"]=> string(0) ""
        ["cat_name"]=> string(13) "Career Choice"
        ["category_nicename"]=> string(13) "career-choice"
        ["category_parent"]=> int(0)
    }
    // Third Item
    [2]=> object(WP_Term)#1261 (16) {
        ["term_id"]=> int(9)
        ["name"]=> string(17) "Giving Some Space"
        ["slug"]=> string(17) "giving-some-space"
        ["term_group"]=> int(0)
        ["term_taxonomy_id"]=> int(9)
        ["taxonomy"]=> string(8) "category"
        ["description"]=> string(0) ""
        ["parent"]=> int(0) ["count"]=> int(1)
        ["filter"]=> string(3) "raw"
        ["cat_ID"]=> int(9) ["category_count"]=> int(1)
        ["category_description"]=> string(0) ""
        ["cat_name"]=> string(17) "Giving Some Space"
        ["category_nicename"]=> string(17) "giving-some-space"
        ["category_parent"]=> int(0)
    }
}
As you can see in the var_dump information, for every category in the array, WordPress is giving us access to a bunch of information in the form of a PHP object.
But for the problem at hand, we only need two pieces of information about an individual category object.
1) Term ID: From a coding standpoint, WordPress internally calls individual categories like “advice” as a term. And every term will have an ID.
Basically, if we have the ID of a term, we can get its permalink and other important information from the database.
2) Name: Name is nothing but the name of the category like “advice”
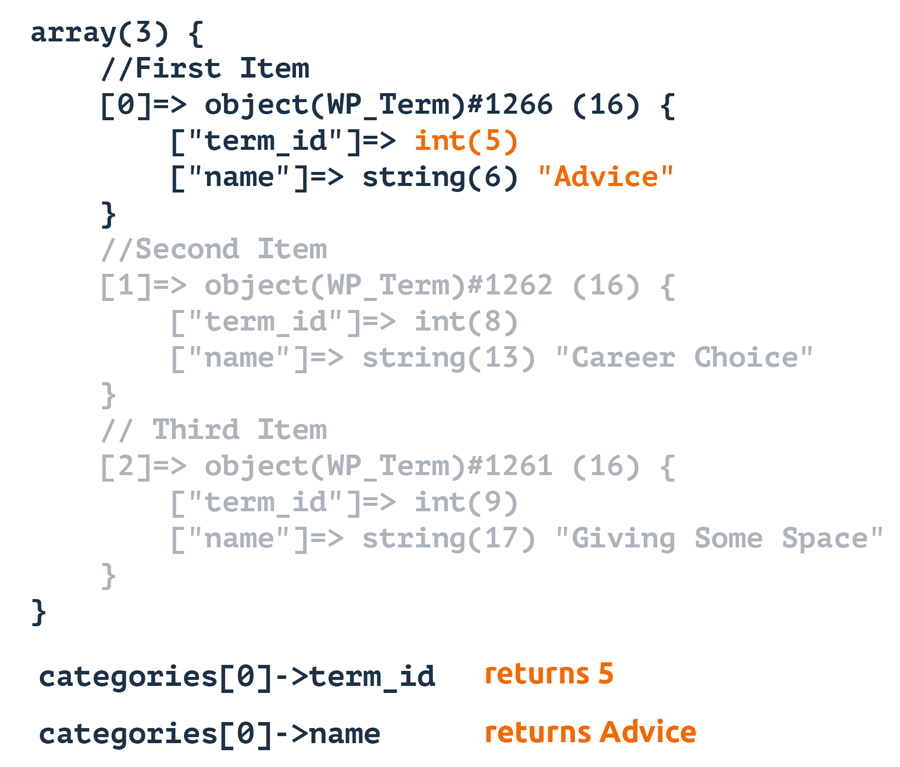
Also, because we are interested in outputting only one category from the above $categories array, inside the IF condition, we are accessing the first category of the array via:
$categories[0]
That means, we are outputting the hyperlink of “advice” category from the above array:
So, inside the IF condition, The first thing we are doing is getting the URL of the first category( advice ) like this:
<a href="<?php echo get_category_link( $categories[0]->term_id ); ?>">
   <?php echo $categories[0]->name; ?>
</a>
The get_category_link() function does what it says. It will get the permalink of a particular category when the ID of that category is provided.
And we are accessing the ID of the category via “term_id” attribute. Remember, every item inside the array is a WordPress object.
get_category_link( $categories[0]->term_id )
Finally, we are outputting the name of the first category by accessing the “name” attribute:
<a href="<?php echo get_category_link( $categories[0]->term_id ); ?>">
   <?php echo $categories[0]->name; ?>
</a>
That’s all.
This solves our problem with the categories output.
Here is the final index.php file for this lesson:
<?php
/**
 * The main template file
 *
 * This is the most generic template file in a WordPress theme
 * and one of the two required files for a theme (the other being style.css).
 * It is used to display a page when nothing more specific matches a query.
 * E.g., it puts together the home page when no home.php file exists.
 *
 * @link https://developer.wordpress.org/themes/basics/template-hierarchy/
 *
 * @package Dosth
 */
get_header();
?>
<div class="content-container">
    <?php if ( is_home() ) : ?>
        <h1 class="page-title"><?php single_post_title(); ?></h1>
    <?php endif; ?>
    <div class="container">
        <div class="row">
            <div class="blog-posts col-md-8">
            <?php if ( have_posts() ): ?>
                <?php while( have_posts() ): ?>
                    <?php the_post(); ?>
                    <div class="blog-post">
                        <h2><a href="<?php the_permalink(); ?>"><?php the_title(); ?></a></h2>
                        <?php if ( has_post_thumbnail() ) :
                            $featured_image = wp_get_attachment_image_src( get_post_thumbnail_id( get_the_ID() ), 'dosth-blog-thumbnail' ); ?>
                            <div class="blog-post-thumb">
                                <a href="<?php the_permalink(); ?>"><img src="<?php echo $featured_image[0]; ?>" alt='' /></a>
                            </div>
                        <?php endif; ?>
                        <?php the_excerpt(); ?>
                        <a class="read-more-link" href="<?php the_permalink(); ?>"><?php _e( 'Read More', 'nd_dosth' ); ?></a>
                        <?php $categories = get_the_category(); ?>
                        <?php if ( ! empty( $categories ) ) : ?>
                            <div class="posted-in">
                                <span><?php _e( 'Posted In', 'nd_dosth' ); ?></span>
                                <a href="<?php echo get_category_link( $categories[0]->term_id ); ?>">
                                    <?php echo $categories[0]->name; ?>
                                </a>
                            </div>
                        <?php endif; ?>
                    </div>
                <?php endwhile; ?>
            <?php else: ?>
                <p><?php _e( 'No Blog Posts found', 'nd_dosth' ); ?></p>
            <?php endif; ?>
            </div>
            <div id="blog-sidebar" class="col-md-4">

            </div>
        </div>
    </div>
</div>
<?php get_footer(); ?>
Next, we will deal with the pagination of the blog posts index.
How to add pagination to blog posts index
Currently, we are outputting 10 blogs posts at a time on the blog index page.
Let’s change it to 3 so that we can play around with the pagination.
Go to Admin Dashboard -> Settings -> Reading
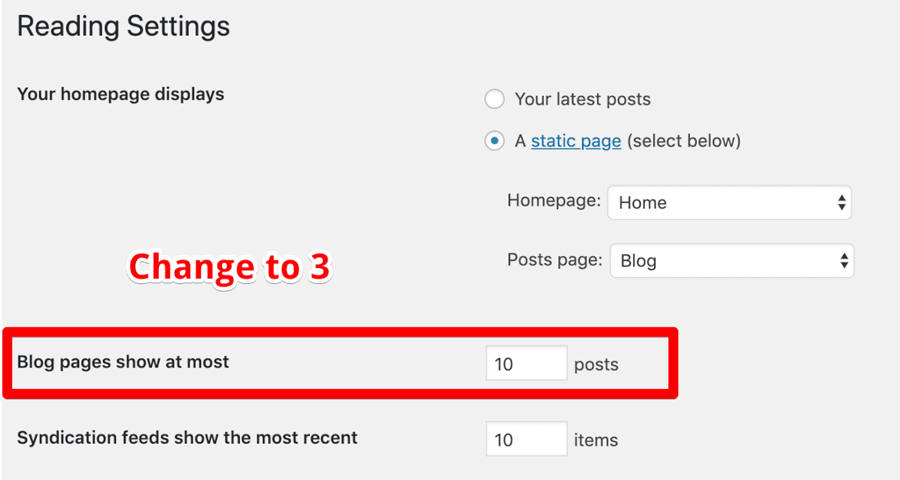
And change the “Blog pages show at most” option to 3 and save changes.
Note: This is temporary. Once we are done testing and styling the pagination, we will change this option to 6.
Now, if you go to the “Blog” page in the browser, the blog posts index shows only 3 posts out of 8 posts we have created.
To access the remaining 5 posts, we have to create the pagination.
And to do that, open up the index.php file and put the following code right after the endwhile statement like this:
<?php endwhile; ?>
<?php the_posts_pagination(); ?>
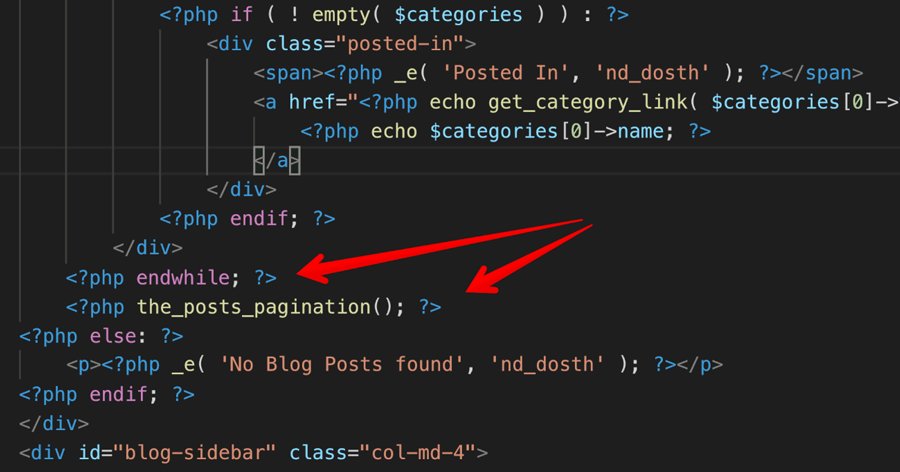
“Wait! That’s all?”
Yep! the_posts_pagination() function is all you need to create pagination in WordPress.
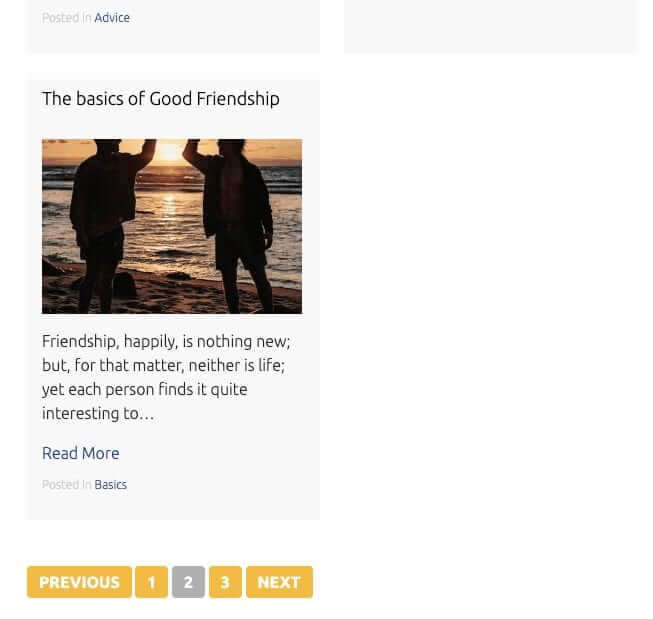
Here is the output. The screenshot belongs to page 2 of Blog posts index.
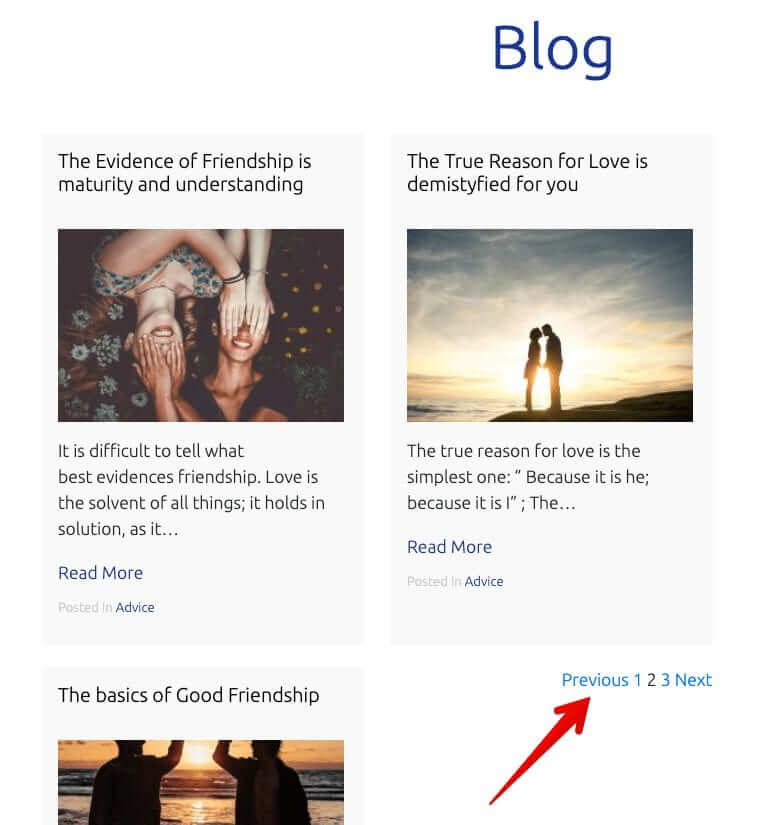
Easy, right?
We created pagination for our blog in less than a minute!
This also works the same for archives too!
In fact, the archive of custom post types too!
No doubt! WordPress always make our life easier.
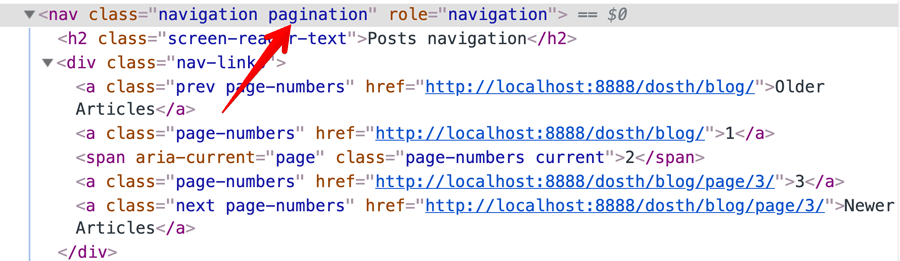
And here is the markup that the the_posts_pagination() function is outputting:

But, what if you want to change the text from “Previous” to “Older Posts”?
Simple! the the_posts_pagination() function accepts an array of arguments to adjust the wording as needed.
For example:
the_posts_pagination( array(
    'prev_text' => __( 'Older Articles', 'textdomain' ),
    'next_text' => __( 'Newer Articles', 'textdomain' ),
) );
In the above code snippet, we are changing the wording of the “Previous” and “Next” to “Older Articles” and “Newer articles” respectively.
Now, you not limited to only two arguments. There are more. Please explore them in your free time.
Let’s style the pagination
Currently, the pagination is looking the way it is because the Bootstrap’s pagination CSS styles are getting applied. This is happening because WordPress has added “pagination” as a class to the pagination container.
But the pagination design from the mockup looks totally different.
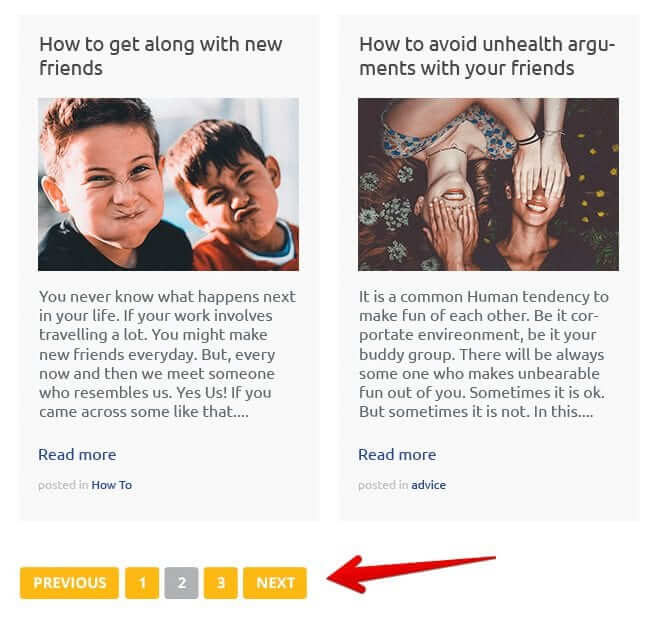
Go ahead and add the following CSS to the end of the style.css file:
/*-------------------------------------------------------------------------------
  14.Pagination Styling
-------------------------------------------------------------------------------*/
.pagination{
    width:100%;
}
.pagination .nav-links a, .pagination .nav-links .current{
    background-color:#fdb813;
    padding:7px 12px;
    color:white;
    border-radius:4px;
    text-transform: uppercase;
    font-weight:bold;
}
.pagination .nav-links .current{
    background-color:#b1b1b1;
}
Here is output in the browser:
Now that we are done with testing and styling the pagination, let’s go back to the Settings -> Reading screen and change the “Blog pages show at most” option to 6.
Neat!
Next, we will deal with the sidebar of Blog posts index page.
WordPress Theme Development: Creating a dynamic sidebar for the Blog posts index page
Building a sidebar for blog posts index page is not at all different from building a sidebar for the footer.
First, let’s register a new sidebar for our blog posts index page.
Open up the functions.php file and put the following code inside nd_dosth_register_sidebars action:
register_sidebar( array(
    'name'          => esc_html__( 'Blog', 'nd_dosth' ),
    'id'            => 'blog',
    'description'   => esc_html__( 'Widgets added here would appear inside the all the blog pages', 'nd_dosth' ),
    'before_widget' => '',
    'after_widget'  => '',
    'before_title'  => '',
    'after_title'   => '',
) );
You already know what’s going on. So, I am gonna skip the explanation.
Next, open up the index.php file and put the following dynamic sidebar code inside the container with ID “blog-sidebar”, like this:
<div id="blog-sidebar" class="col-md-4">
    <?php if ( is_active_sidebar( 'blog' ) ) : ?>
        <div class="blog-widgets-container">
            <?php dynamic_sidebar( 'blog' ); ?>
        </div>
    <?php endif; ?>
</div>
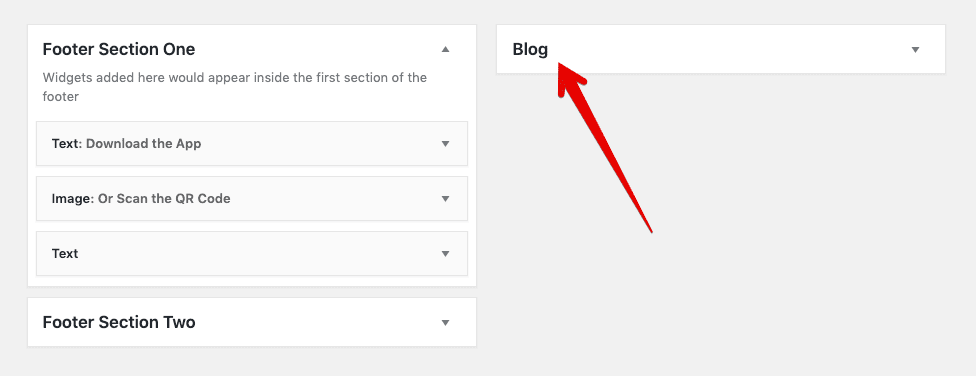
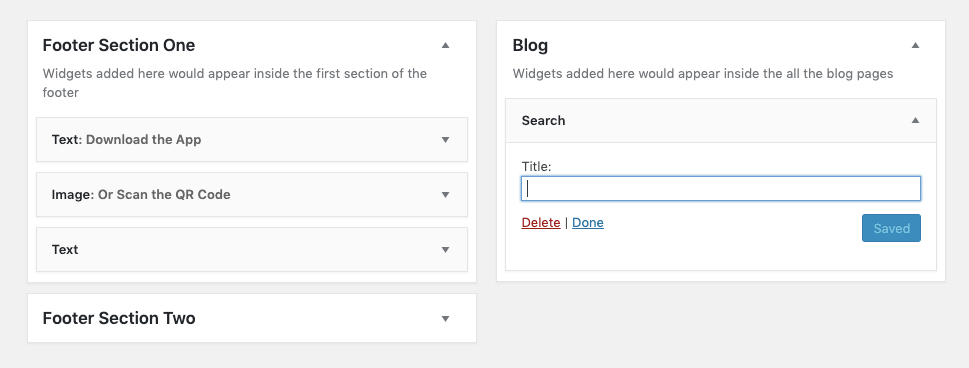
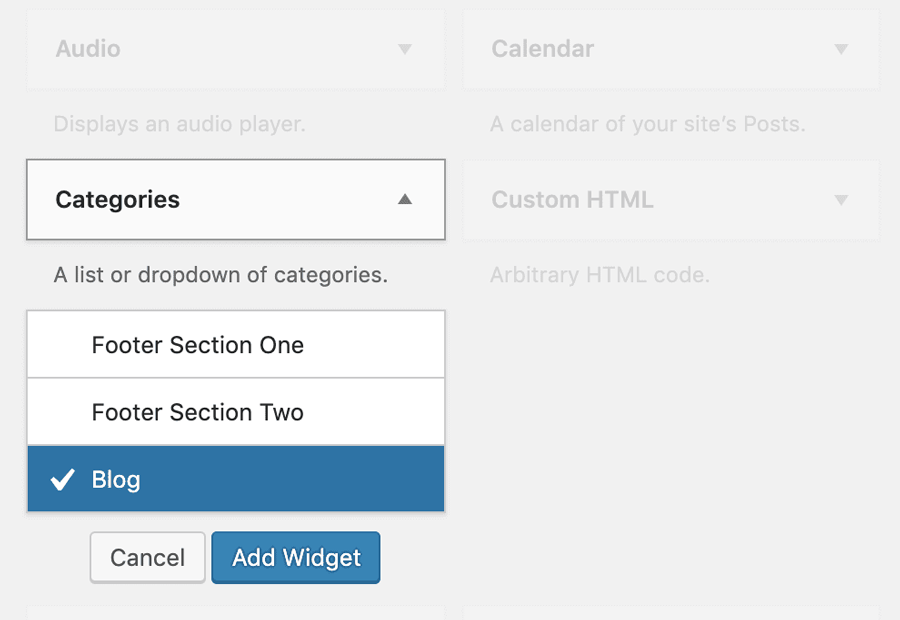
If we now go to Admin Dashboard -> Appearance -> Widgets, we should see our newly created sidebar called “Blog”.
Now let’s put some widgets in it. If you observe the mockup design at the top of the page, the first item in the sidebar is Search form.
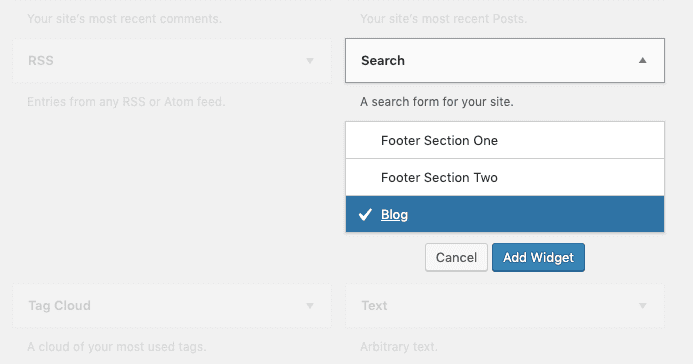
Common, let’s put the search widget inside “Blog” sidebar.
That’s all. That’s all it takes to put a fully functioning search form on a WordPress site.
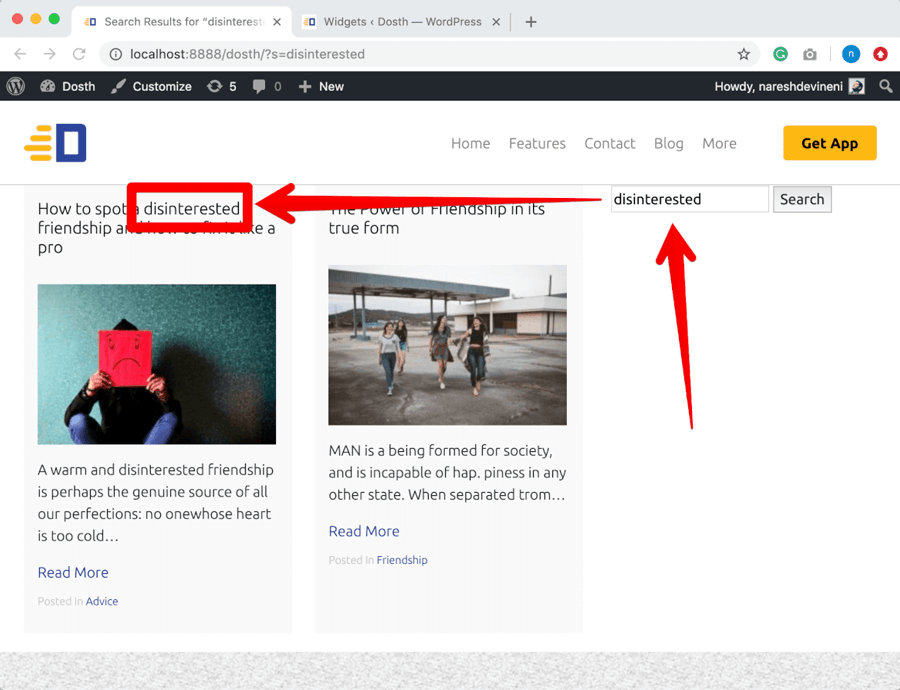
Common, Let’s check out the search widget on the frontend.
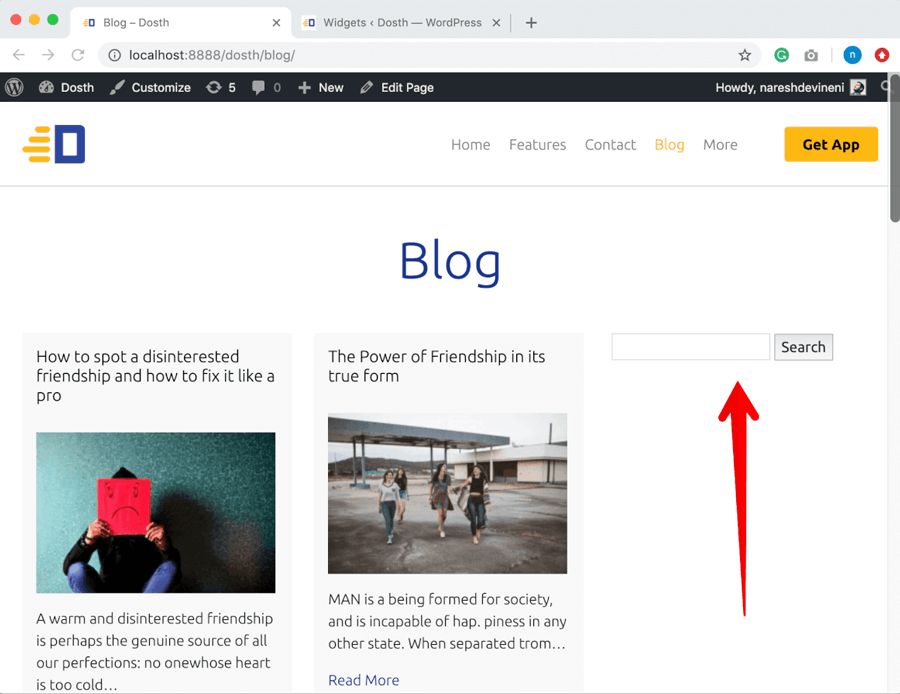
And It works pretty darn good!
Currently, because there is no search.php file inside our theme, WordPress is using index.php file to render the search results. We will fix this template problem in a future lesson.
But right now, there is one more problem we have to shift our focus to. And we will do that in the next.
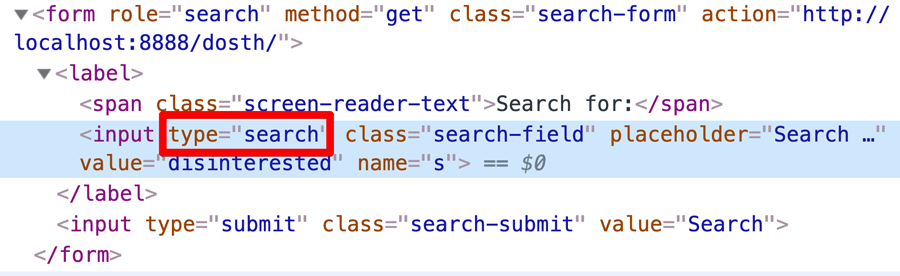
How to add HTML5 support for WordPress forms
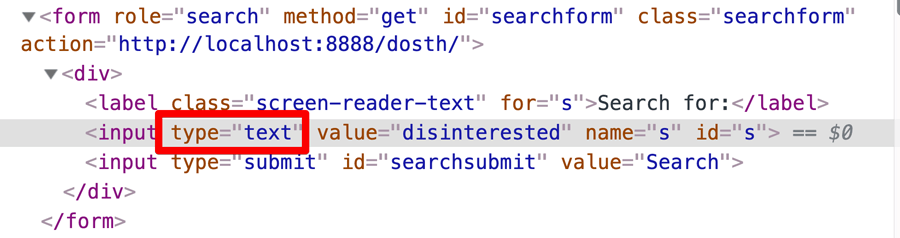
If you inspect the markup for the search form, you’ll notice that the search input field is using an input type of “text” instead of input type of “search”, like this:
<input type="search" name="s" id="s">
Because we are web developers who follow proper standards, it is our responsibility to convert the search form to use HTML5’s search input field.
To achieve this, all we have to do is add theme support for HTML5.
So, open up the functions.php file and put the following code inside the nd_dosth_theme_setup action:
// Add HTML5 support
add_theme_support( 'html5', array( 'search-form', 'comment-list', 'comment-form', 'gallery', 'caption' ) );
In the above line of code, we are telling WordPress to generate HTML5 based mark up for:
- Search form
- Comment list of a blog post or any other post type that supports comments
- Comment Form of a blog post or any other post type that supports comments
- Gallery markup that WordPress generates.
- Image captions
If we now refresh the blog page and inspect the search form one more time, this time WordPress outputs input type of search for the search field.
Neat, right?
Next, we will add couple more widgets to the Blog sidebar and will style the sidebar.
Finishing the WordPress blog sidebar
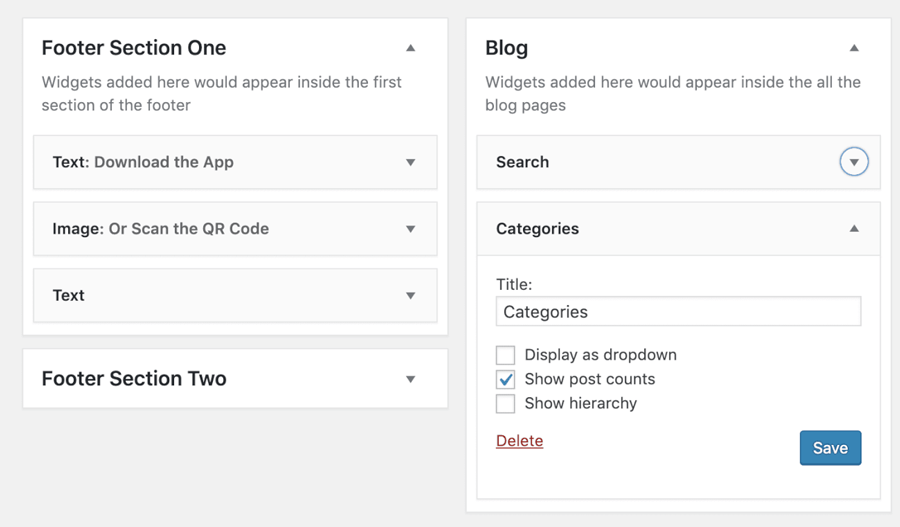
Let’s add a couple more widgets to the blog sidebar.
First, let’s add the blog categories menu.
Then add tag cloud widget.
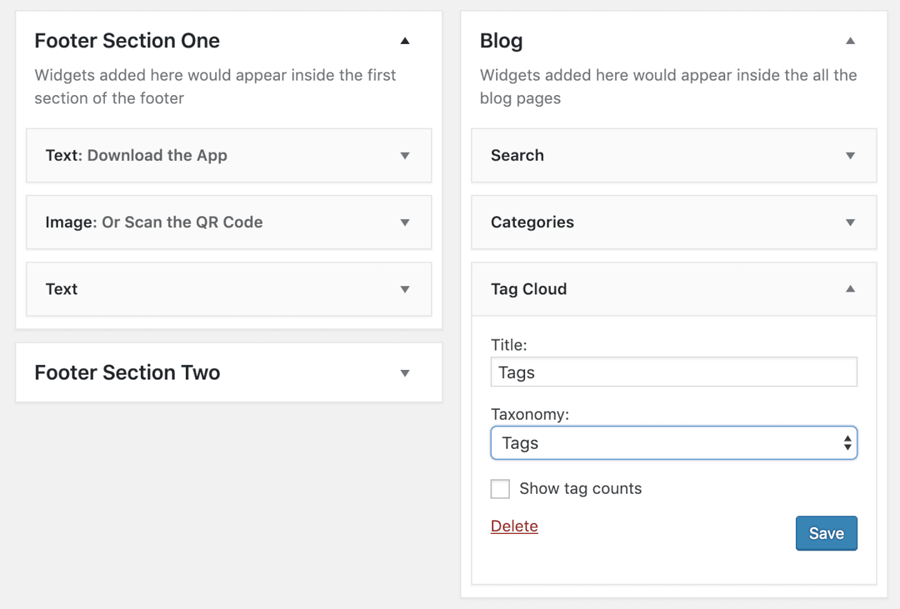
And here is the output of the blog page in the browser:

As usual, it’s not looking anything like the mockup.
First, go ahead and download the SVG and PNG icons for Search and put them inside the assets/images directory.
Once again, I generated the search icons using the infamous IcoMoon website.
If you are following along, I’d love it if you can try the IcoMoon app. It is really handy and powerful.
Finally, add the following CSS to the end of the style.css file:
/*-------------------------------------------------------------------------------
  15.Blog Sidebar Styles
-------------------------------------------------------------------------------*/
#blog-sidebar .widget{
    margin-bottom:30px;
}
#blog-sidebar .widget-title{
    font-size:20px;
    font-weight:500;
    color:#1a3794;
    margin-bottom:10px;
}
#blog-sidebar .widget.widget_categories a{
    font-size:14px;
}
#blog-sidebar .widget a{
    color:#4e4e4e;
}
.search-form{
    border:1px solid #ccc;
    padding:5px 10px;
    display:flex;
    justify-content: space-between;
}
.search-form label{
    margin-bottom:0;
}
.search-form input{
    border:0;
}
.search-form input[type="submit"]{
    text-indent:-9999px;
    background-image:url(assets/images/search.svg);
    background-repeat: no-repeat;
    background-position:center center;
    width:30px;
    background-size:20px;
}
.no-svg .search-form input[type="submit"]{
    background-image:url(assets/images/search.png);
}
And here is output in the browser:
That’s it. This is pretty much how you will build a blog posts index page in WordPress.
Next, we will deal with the archive pages.
WordPress Theme Development: How to build archive pages in WordPress
When it comes to WordPress, an archive is nothing but a posts index belonging to a particular category, tag, author, published month or published year.
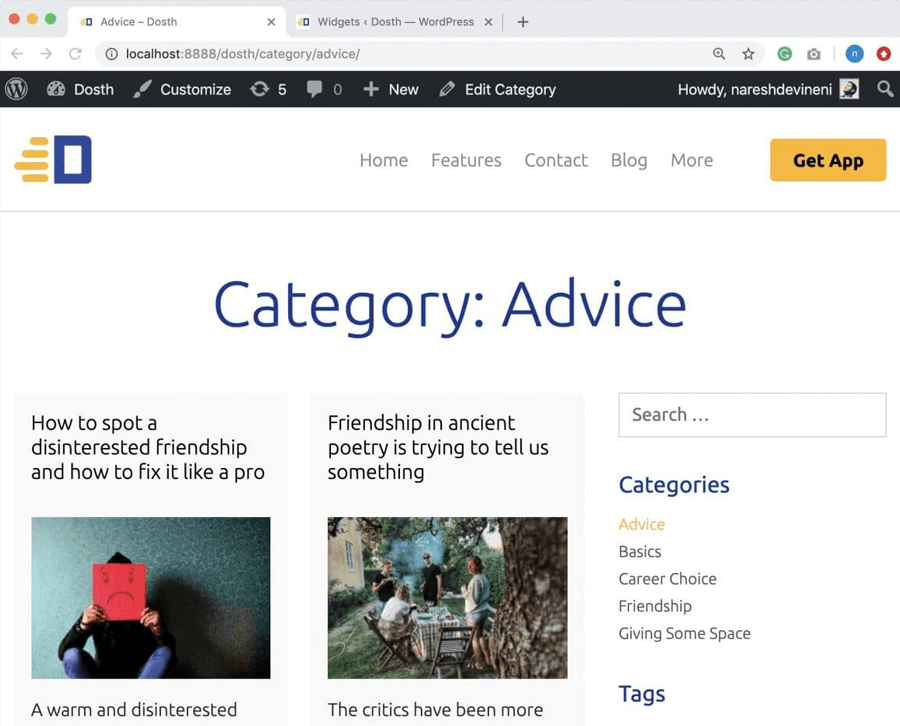
For example, if you go to the “Blog” page and click on a particular category such as “Advice”:
WordPress will take you to the archive of the “Advice” category.
And, in this archive, only the posts belonging to the “Advice” category will be displayed.
Similarly, if you click on a tag such as “Ancient”, WordPress will take you to the archive of blog posts that are tagged with the word “Ancient”.
This applies to every other type of archive! Powerful!
WordPress is doing this automatically for us based on the URL.
For example, if a user visits:
http://localhost:8888/dosth/tag/ancient/
WordPress will pull all the blog posts belonging to the “ancient” tag from the database and picks a template file from our theme based on the WordPress template hierarchy and renders those blog posts to the frontend.
Simple and straight forward.
Now comes the actual question for the theme developers!
what template files we have to create to render these archive pages?
currently, WordPress is rendering all the archive pages using the index.php file because our theme doesn’t have a more specific template file, and this is totally fine because the blog posts index page and the archive pages of our blog are looking the same from a design perspective.
So, technically and logically, we don’t have to create any other template file for rendering archive pages. The index.php file is doing a great job!
But there is a small problem.
If you observe the above screenshot for “Ancient” tag archive or any other archive, there is no archive-title that we see in the mockup:
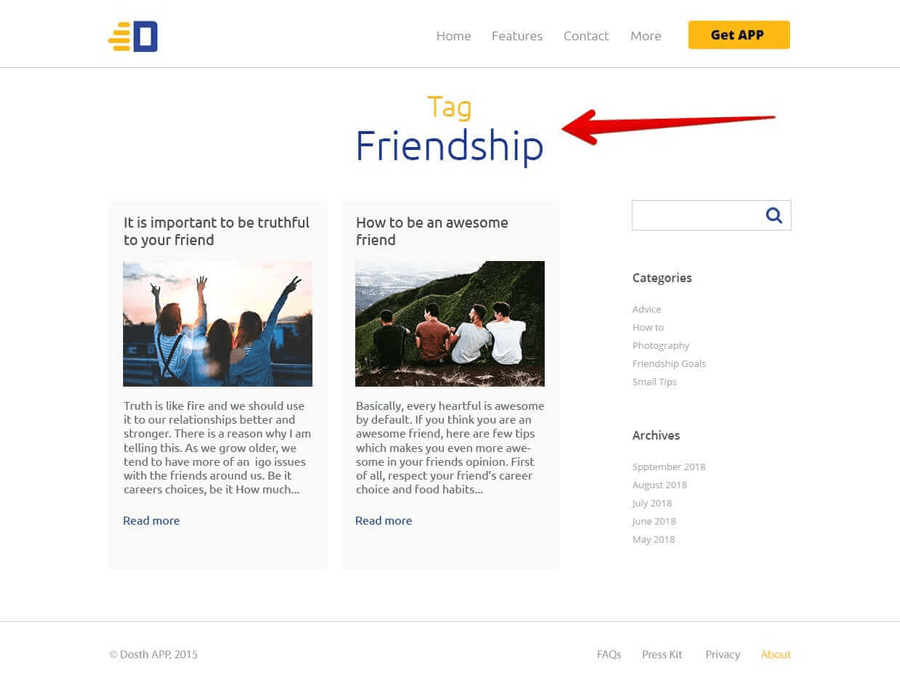
We can fix this problem easily!
All we have to do is check if it is an archive and use the_archive_title() function to output the archive title. This function detects the archive type and outputs the archive title accordingly.
We can check for an archive using the is_archive() function. This function will return true on all types of archive pages.
So, go ahead and open the index.php file and add an ELSEIF condition to the IF condition that is outputting the page title at the top of the file:
<?php if ( is_home() ) : ?>
    <h1 class="page-title"><?php single_post_title(); ?></h1>
<?php elseif( is_archive() ): ?>
    <h1 class="page-title"><?php the_archive_title(); ?></h1>
<?php endif; ?>
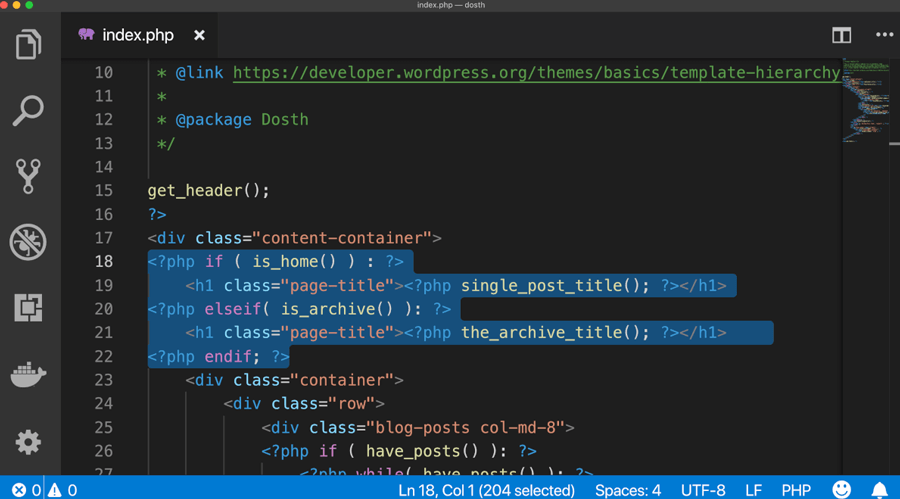
Let’s break it down.
First, as you already know, we are checking if it is the Blog Posts Index page using is_home() and if it is, weareprinting the title.
If a user visits an archive like “Ancitent” tag, the is_home() will return false and ELSEIF condition is tried and inside the ELSEIF condition, we are checking if it an archive using is_archive() function and if it is, weareprinting the archive title.
That’s all. Easy, right?
If we now check out some archive, for example, the “Ancient” tag archive, we can indeed see the Archive title.
The the_archive_title() function outputs the archive title in the following format:
Archive Type: Archive Title
So, if we check out some category archives, for example, “Advice”, we can indeed see the word “category:” in the Archive title.
Great! Our archive pages are perfect.
Also, we are using the same sidebar for archive pages too. Most sites on the web do this. So, we did not a create a different sidebar for just archive pages.
But, if the sidebar of the archive pages must hold different content, feel free to create a new sidebar and display in the archive pages.
But it is a good idea to use a more specific template file
With more IF and ELSEIF conditions, we could have rendered all the pages on our site using the index.php file.
But we did not do it. If we do it, the code inside the index.php file will become difficult to maintain and read.
So, it is always a good idea to create a more specific template file as it helps to maintain the code better and we will get more control over markup.
Now, we can create archive-type specific template files like:
- category.php
- tag.php
- date.php
- author.php
There is nothing wrong with it. It is totally up to you. You’ll not be judged by other developers or WordPress.
But, in my opinion, we should only create archive-type specific template files when they look totally unique from each other. According to me, it’s more of a design call.
Also, creating more template files also increases maintenance. For example, what if there is a change in the archive page markup? We have to update all those files, right?
“So, what is the solution?”
If you take a look at the WordPress template hierarchy for archive pages, for rendering a particular type of archive, no matter what archive type it is, WordPress will look for archive.php file.
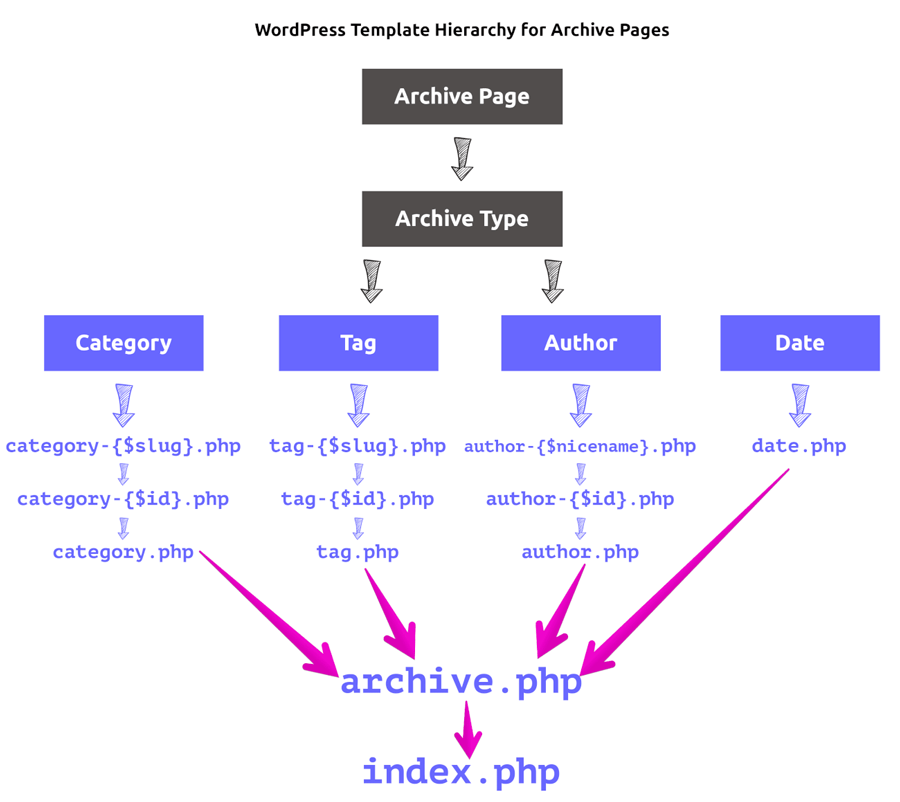
So, We can just create archive.php file and save a lot of time.
Again, I am not saying that archive type-specific templates are bad. If they all look unique, you have to create them. But most of the time, the archive.php file is all we need to create.
So, create archive.php file inside our theme and put the following inside it:
<?php
/**
 * The template for displaying archive pages
 *
 * @link https://developer.wordpress.org/themes/basics/template-hierarchy/
 *
 * @package Dosth
 */
get_header();
?>
<div class="content-container">
    <h1 class="page-title"><?php the_archive_title(); ?></h1>
    <div class="container">
        <div class="row">
            <div class="blog-posts col-md-8">
            <?php if ( have_posts() ): ?>
                <?php while( have_posts() ): ?>
                    <?php the_post(); ?>
                    <div class="blog-post">
                        <h2><a href="<?php the_permalink(); ?>"><?php the_title(); ?></a></h2>
                        <?php if ( has_post_thumbnail() ) :
                            $featured_image = wp_get_attachment_image_src( get_post_thumbnail_id( get_the_ID() ), 'dosth-blog-thumbnail' ); ?>
                            <div class="blog-post-thumb">
                                <a href="<?php the_permalink(); ?>"><img src="<?php echo $featured_image[0]; ?>" alt='' /></a>
                            </div>
                        <?php endif; ?>
                        <?php the_excerpt(); ?>
                        <a class="read-more-link" href="<?php the_permalink(); ?>"><?php _e( 'Read More', 'nd_dosth' ); ?></a>
                        <?php $categories = get_the_category(); ?>
                        <?php if ( ! empty( $categories ) ) : ?>
                            <div class="posted-in">
                                <span><?php _e( 'Posted In', 'nd_dosth' ); ?></span>
                                <a href="<?php echo get_category_link( $categories[0]->term_id ); ?>">
                                    <?php echo $categories[0]->name; ?>
                                </a>
                            </div>
                        <?php endif; ?>
                    </div>
                <?php endwhile; ?>
                <?php the_posts_pagination(); ?>
            <?php else: ?>
                <p><?php _e( 'No Blog Posts found', 'nd_dosth' ); ?></p>
            <?php endif; ?>
            </div>
            <div id="blog-sidebar" class="col-md-4">
                <?php if ( is_active_sidebar( 'blog' ) ) : ?>
                    <div class="blog-widgets-container">
                        <?php dynamic_sidebar( 'blog' ); ?>
                    </div>
                <?php endif; ?>
            </div>
        </div>
    </div>
</div>
<?php get_footer(); ?>
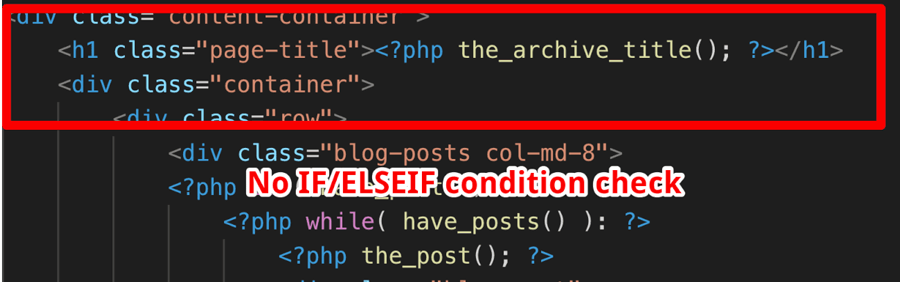
Now, The only difference between this file and the index.php file is, I removed the IF/ELSEIF Condition check altogether and directly outputting the archive title. I am doing this because WordPress will use the archive.php file only when rendering the archive pages.
Everything else is the same. Especially, the PHP code and markup inside the LOOP is ditto.
Anyway, from now on, WordPress will use archive.php file to render archive pages.
Get it?
“So, we can now remove the archive based ELSEIF condition from the index.php file?”
Yep! Without any doubt! We no longer need it.
That’s all you need to know for creating archive pages in WordPress.
Next, we will perform some code clean up.
Introducing get_template_part() for modular WordPress
Why did we put the header code of the website in a separate file?
“The header code is same on every page of the site!”
Correct!
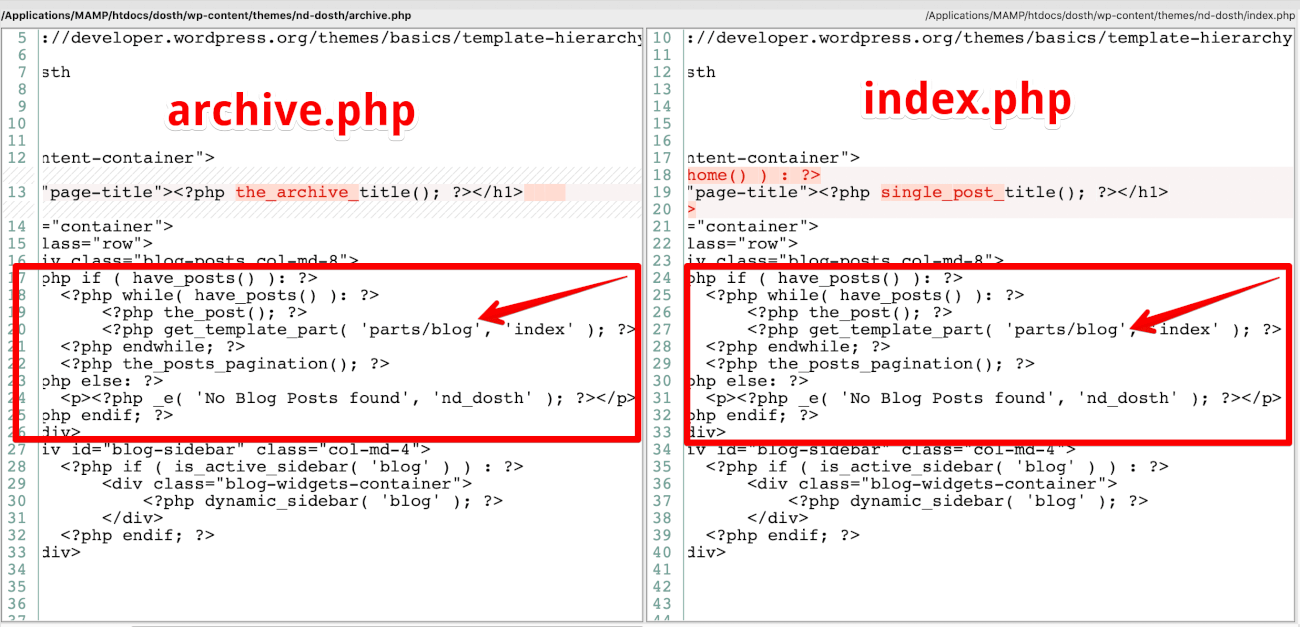
If you notice, the posts section of the Blog posts index page and archive pages look exactly the same too. This is because of the code inside the Loop in both index.php and archive.php is exactly the same.
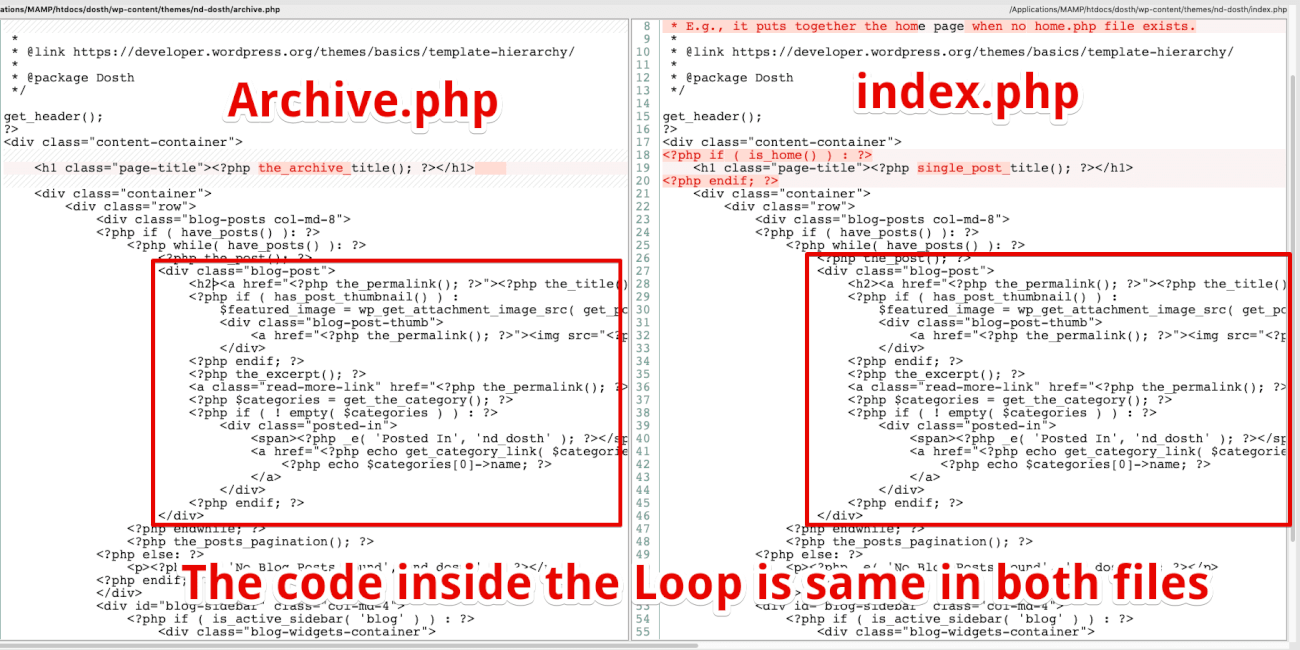
Once we have enough maturity as a theme developer, we should start looking for the duplicate code inside our theme and modularize it to avoid some duplicate maintenance work in the future.
So, Just like the header code, let’s move the Loop code inside both index.php and archive.php to a separate file.
WordPress allows us to create modular template parts by providing us with an invaluable get_template_part() function.
This function is similar to get_header(). While get_header() looks for files starting with header.php and loads them in other template files, the get_template_part() function gives us the freedom to load any kind of PHP file inside other template files.
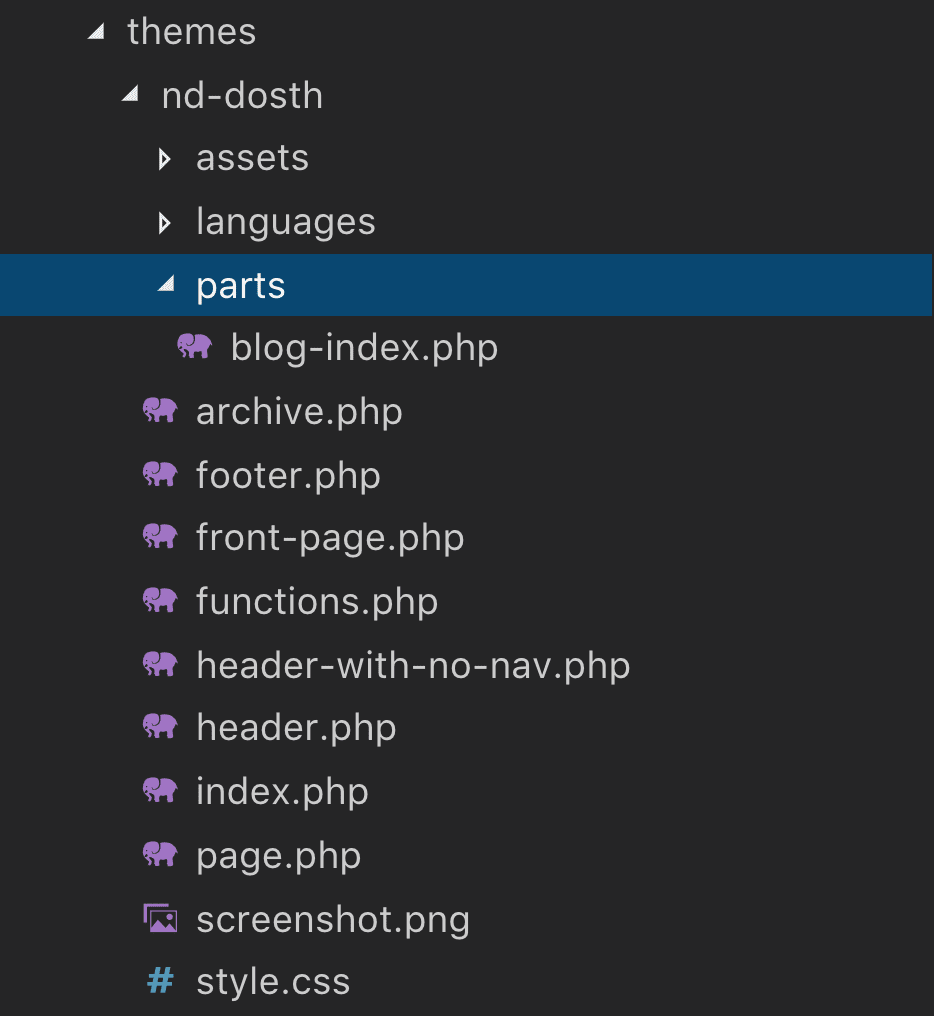
First of all, let’s create a new directory called “parts” inside our theme directory. And inside this directory, create a file called blog-index.php.
You can name the directory and the file whatever you want.
Here is the updated directory structure:
Next, from the index.php file, copy all the code inside the Loop to the newly created blog-index.php file.
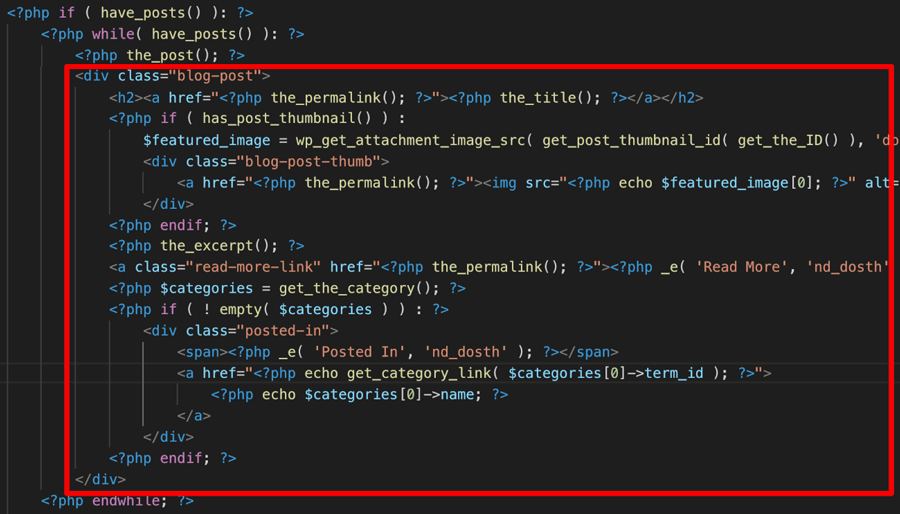
Here is the final code for blog-index.php file:
<div class="blog-post">
    <h2><a href="<?php the_permalink(); ?>"><?php the_title(); ?></a></h2>
    <?php if ( has_post_thumbnail() ) :
        $featured_image = wp_get_attachment_image_src( get_post_thumbnail_id( get_the_ID() ), 'dosth-blog-thumbnail' ); ?>
        <div class="blog-post-thumb">
            <a href="<?php the_permalink(); ?>"><img src="<?php echo $featured_image[0]; ?>" alt='' /></a>
        </div>
    <?php endif; ?>
    <?php the_excerpt(); ?>
    <a class="read-more-link" href="<?php the_permalink(); ?>"><?php _e( 'Read More', 'nd_dosth' ); ?></a>
    <?php $categories = get_the_category(); ?>
    <?php if ( ! empty( $categories ) ) : ?>
        <div class="posted-in">
            <span><?php _e( 'Posted In', 'nd_dosth' ); ?></span>
            <a href="<?php echo get_category_link( $categories[0]->term_id ); ?>">
                <?php echo $categories[0]->name; ?>
            </a>
        </div>
    <?php endif; ?>
</div>
Next, remove the above code from both index.php and archive.php files.
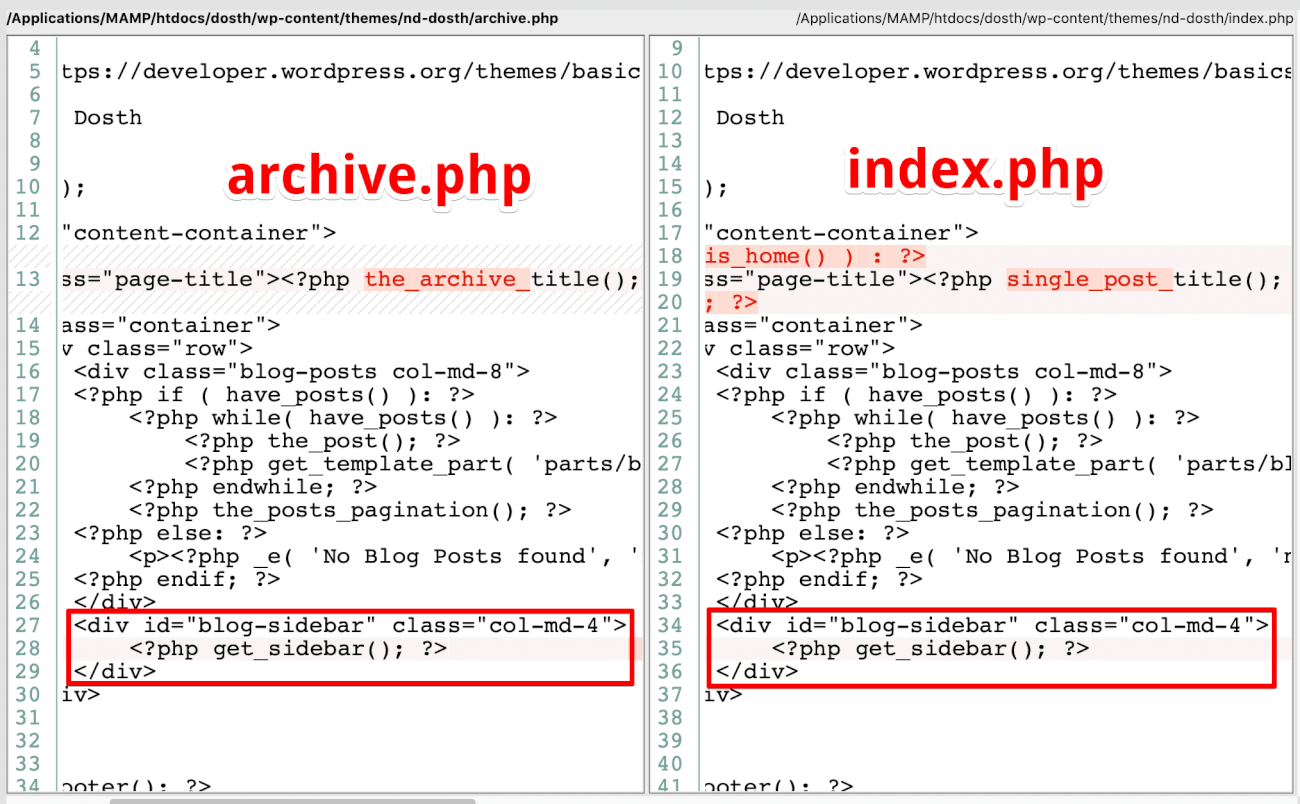
And here is the updated Loop of both index.php and archive.php files after removing the above code:
<?php if ( have_posts() ): ?>
    <?php while( have_posts() ): ?>
        <?php the_post(); ?>

    <?php endwhile; ?>
    <?php the_posts_pagination(); ?>
<?php else: ?>
    <p><?php _e( 'No Blog Posts found', 'nd_dosth' ); ?></p>
<?php endif; ?>
Finally, put the following line of code right underneath the the_post() function call inside both index.php and archive.php files.
<?php get_template_part( 'parts/blog', 'index' ); ?>
And if you now check out the “Blog” page and archive pages in the browser, everything works as usual.
Anyway, here is how the get_template_part() function works.
This function accepts two parameters called $slug and $name
For example, if you are trying to load a file called comments.php, you only have to provide the $slug parameter like this:
<?php get_template_part( 'comments' ); ?>
But, if you are trying to load a file called blog-index.php have to provide both the $slug and $name parameters like this:
<?php get_template_part( 'blog', 'index' ); ?>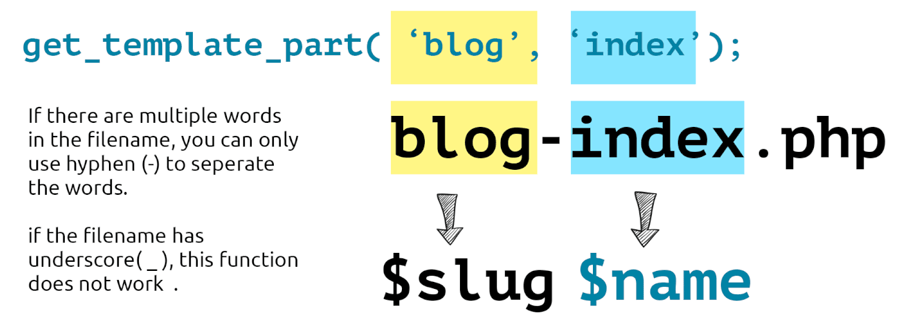
See? We are not including the .php extension.
Also, you can not load the file name that has an underscore( _ ) in it, for example: blog_index.php, it just doesn’t work! So make sure to only hyphens in the filenames.
Anyway, if you are trying to load a file from a sub-directory of your theme, you have to prepend the sub-directory name before the slug:
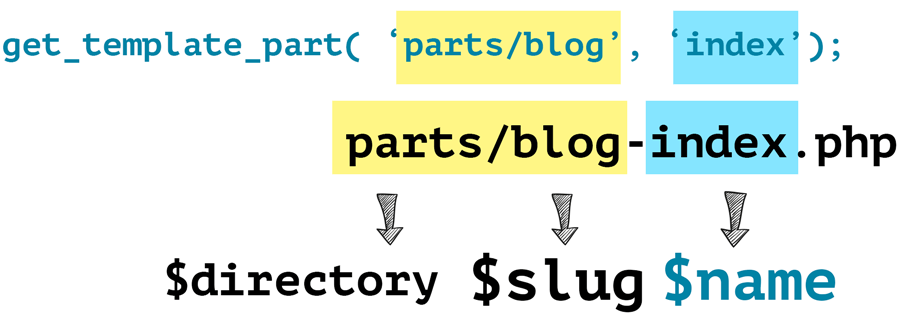
For example, in our case, inside our index.php file, we are trying to load the blog-index.php file that is located inside a sub-directory called “parts”:
parts/blog-index.php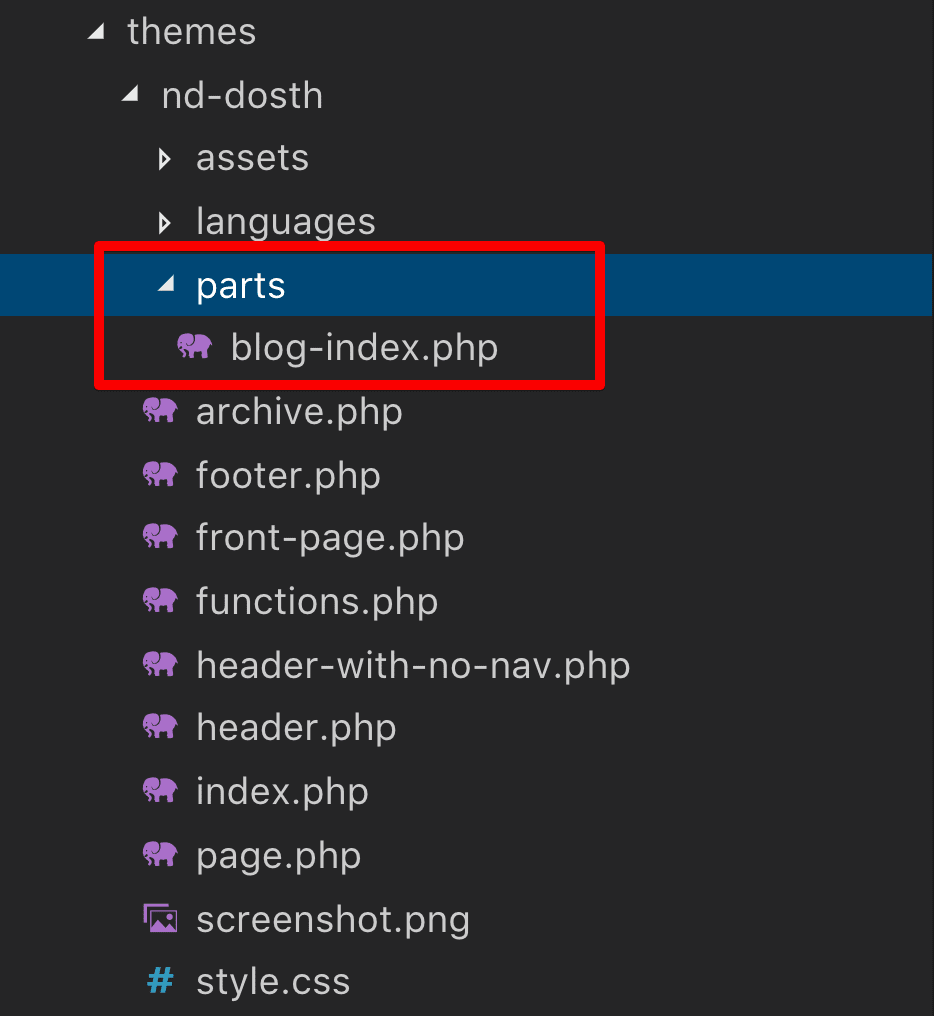
So, we are prepending the directory name before the slug:
<?php get_template_part( 'parts/blog', 'index' ); ?>
Easy, right?
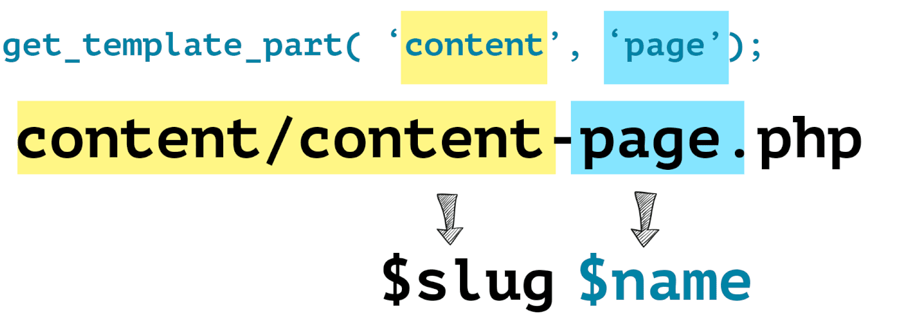
Also, if the directory name and the slug portion of the file name are same, for example, if you are trying to load the following file:
content/content-page.php
You can simply combine the directory name and slug like this:
<?php get_template_part( 'content', 'page' ); ?>
Similarly, if you are trying to load the file whose directory name and the file name is the same, for example:
content/content.php
You can include it in the following way:
<?php get_template_part( 'content' ); ?>get it?
In fact, if you open up the latest default theme that comes with WordPress, this is what You’ll see.
Important Note: You can load the same template part any times in the same file. The get_template_part() function uses PHP’s require instead of require_once.
That’s all. That’s pretty much how you can modularize template parts in WordPress.
Next, we will see how to modularize Dynamic Sidebars.
Introducing get_sidebar() for modular sidebars
If you notice, the dynamic sidebar code inside both index.php and archive.php is exactly the same too!
So, let’s make it modular as well!
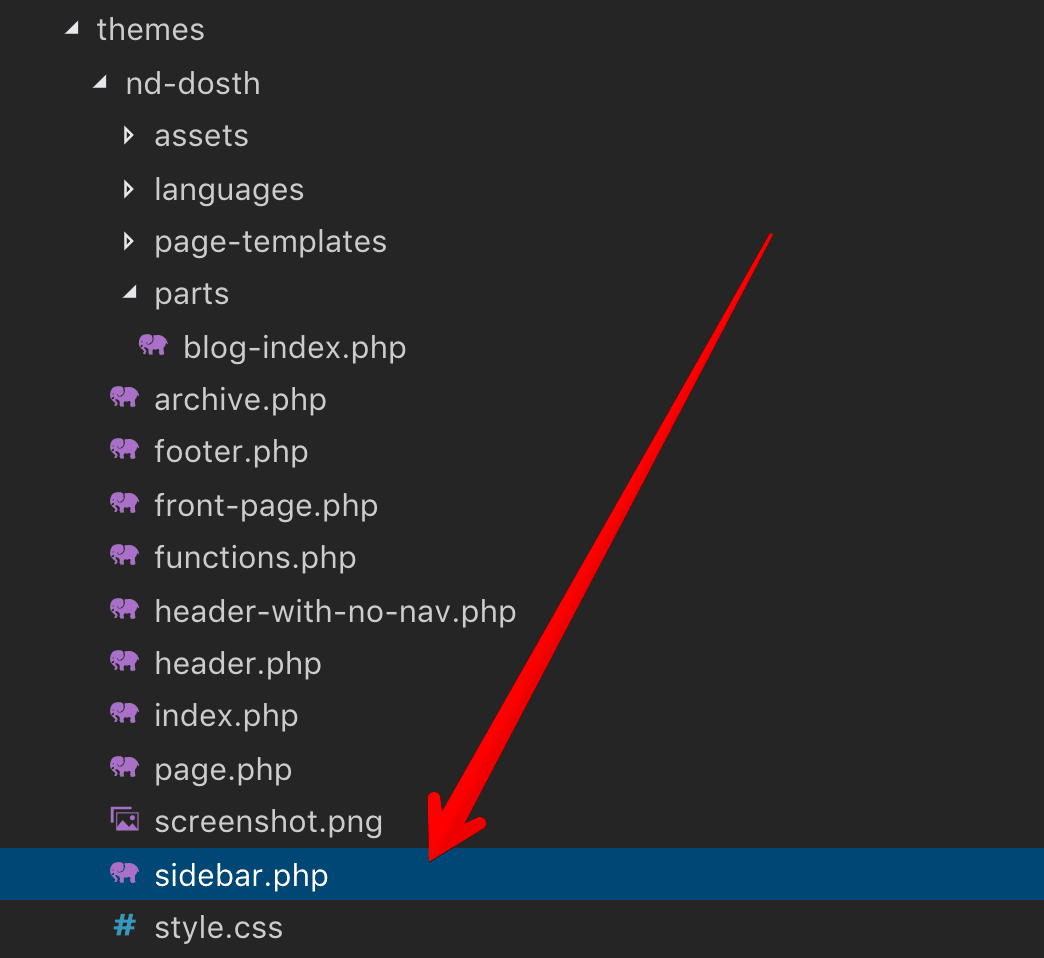
First of all, let’s create a new file called sidebar.php inside our theme directory.
Here is the updated theme directory structure!
Next, from the index.php file, copy all the code inside the HTML container with ID “blog-sidebar” and paste it inside the sidebar.php file.
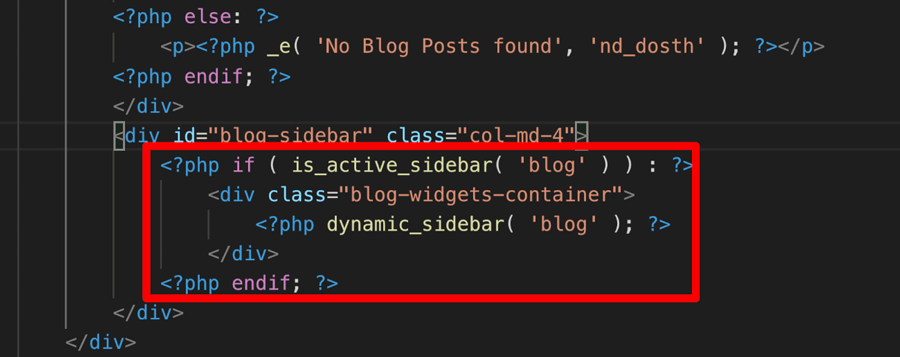
Here is the final code for sidebar.php file:
<?php if ( is_active_sidebar( 'blog' ) ) : ?>
    <div class="blog-widgets-container">
        <?php dynamic_sidebar( 'blog' ); ?>
    </div>
<?php endif; ?>
Next, remove the above sidebar code from both index.php and archive.php files and put the following line on code in the place.
<?php get_sidebar(); ?>
And if you now check out the “Blog” page and archive pages in the browser, everything works as usual. The sidebar is still getting displayed as like it used to,
Just like get_header() function looks for the header.php file, The get_sidebar() function looks for the sidebar.php file inside the root level of the theme directory.
We can also instruct the get_sidebar() function to look for a different sidebar file by passing the file name as a parameter, for example:
get_sidebar( 'footer-section-one' );
The above line of code will look for sidebar-footer-section-one.php file inside the root level of the theme directory.
And, here is an exercise. We are currently outputting two dynamic sidebars in the footer.php file:
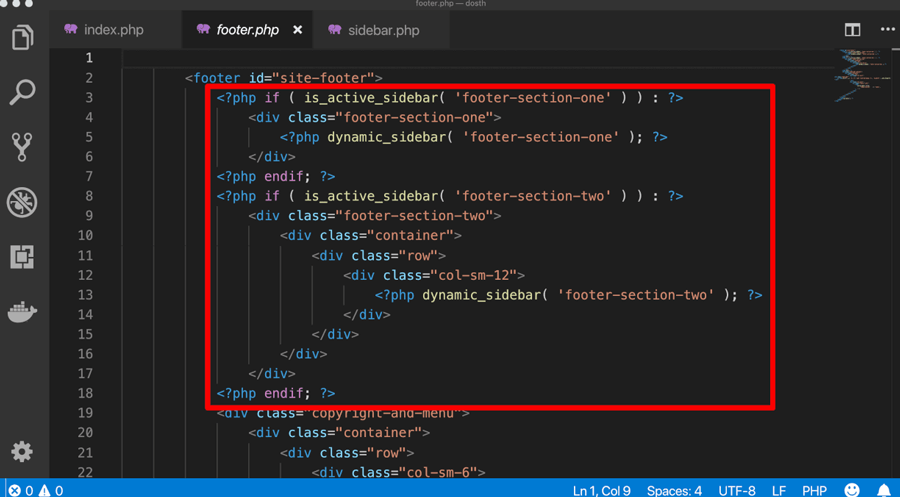
Make these two dynamic sidebars modular by using the above-mentioned technique.
“Hey! We are not going to use these sidebars in other places, right?”
Yep!
“Then why do we have to move them to a separate file?”
Simple! It makes the footer.php file leaner and improves the readability of the file. Also, you never know, you would probably end up using these sidebars else.
Anyway, Here is the final index.php file for this module:
<?php
/**
 * The main template file
 *
 * This is the most generic template file in a WordPress theme
 * and one of the two required files for a theme (the other being style.css).
 * It is used to display a page when nothing more specific matches a query.
 * E.g., it puts together the home page when no home.php file exists.
 *
 * @link https://developer.wordpress.org/themes/basics/template-hierarchy/
 *
 * @package Dosth
 */
get_header();
?>
<div class="content-container">
<?php if ( is_home() ) : ?>
    <h1 class="page-title"><?php single_post_title(); ?></h1>
<?php endif; ?>
    <div class="container">
        <div class="row">
            <div class="blog-posts col-md-8">
            <?php if ( have_posts() ): ?>
                <?php while( have_posts() ): ?>
                    <?php the_post(); ?>
                    <?php get_template_part( 'parts/blog', 'index' ); ?>
                <?php endwhile; ?>
                <?php the_posts_pagination(); ?>
            <?php else: ?>
                <p><?php _e( 'No Blog Posts found', 'nd_dosth' ); ?></p>
            <?php endif; ?>
            </div>
            <div id="blog-sidebar" class="col-md-4">
                <?php get_sidebar(); ?>
            </div>
        </div>
    </div>
</div>
<?php get_footer(); ?>
And here is the final archive.php file for this module:
<?php
/**
 * The template for displaying archive pages
 *
 * @link https://developer.wordpress.org/themes/basics/template-hierarchy/
 *
 * @package Dosth
 */
get_header();
?>
<div class="content-container">
    <h1 class="page-title"><?php the_archive_title(); ?></h1>
    <div class="container">
        <div class="row">
            <div class="blog-posts col-md-8">
            <?php if ( have_posts() ): ?>
                <?php while( have_posts() ): ?>
                    <?php the_post(); ?>
                    <?php get_template_part( 'parts/blog', 'index' ); ?>
                <?php endwhile; ?>
                <?php the_posts_pagination(); ?>
            <?php else: ?>
                <p><?php _e( 'No Blog Posts found', 'nd_dosth' ); ?></p>
            <?php endif; ?>
            </div>
            <div id="blog-sidebar" class="col-md-4">
                <?php get_sidebar(); ?>
            </div>
        </div>
    </div>
</div>
<?php get_footer(); ?>
Easy to skim through these files now, right?
Next, we will learn how to build a single blog post page.
WordPress Theme Development: Building a single post page
If you click on any blog post from the blog posts index page or archive pages, WordPress will take you a page where you can read the entire blog post.
There are two types of Single post page in WordPress.
- A single post page which renders a single blog post.
- A single post page which renders a custom post type like an e-commerce product, a book, an event, etc.
For now, let’s just talk about a blog post based single post page. We will discuss custom post type based single post page in a future module.
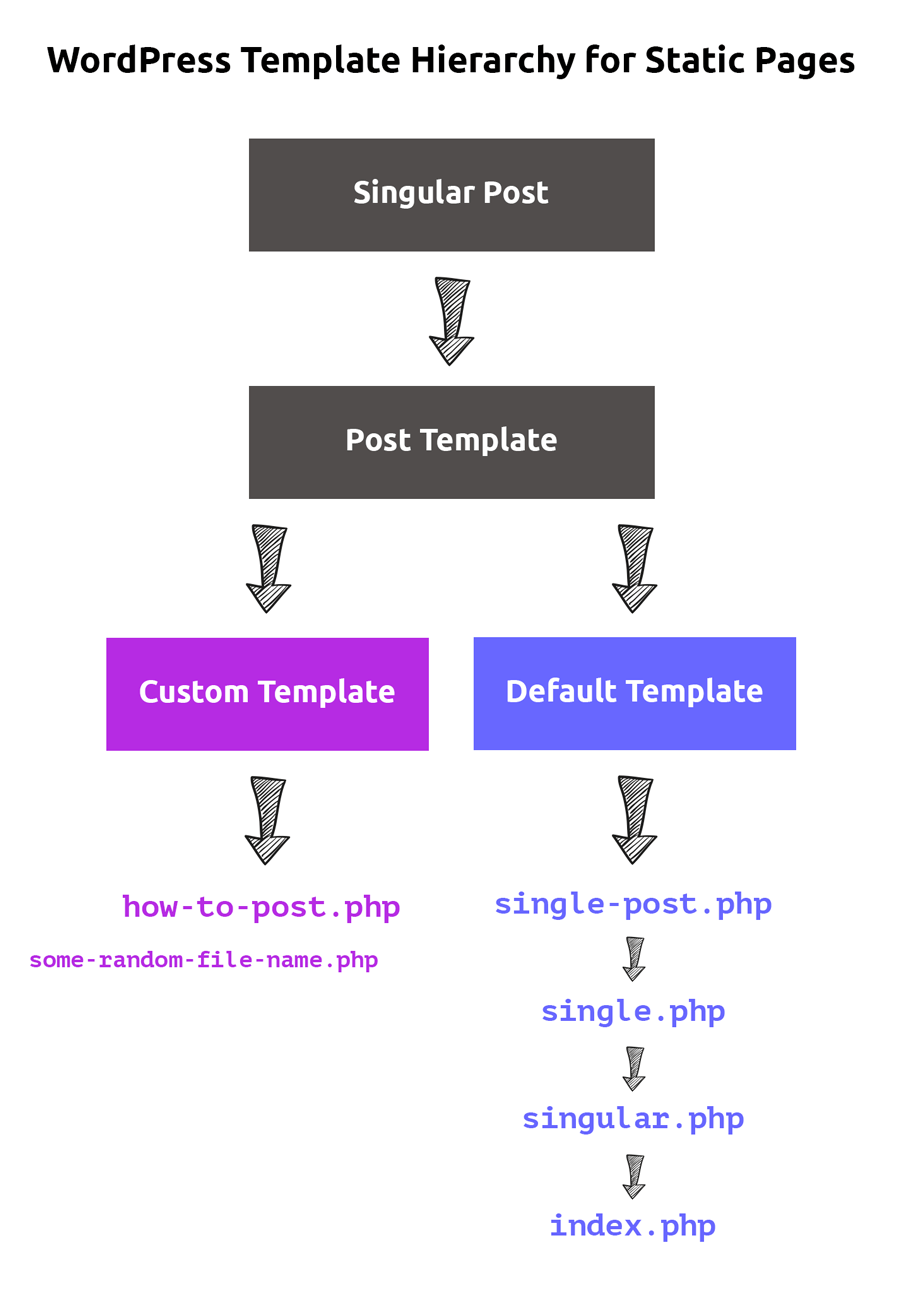
While trying to render a single blog post page:
- WordPress will first see if there is a custom template set for the blog post.
- If there is no custom template is set, WordPress will then look for
single-post.phpfile. - If there is no
single-post.phpfile, WordPress will then look forsingle.phpfile. - If there is no
single.phpfile, WordPress will then look forsingular.phpfile. - If there is no
singular.phpfile, WordPress will finally render the single post page usingindex.phpfile.
Currently, Since there is no specific template file for rendering a single blog post, WordPress is using index.php file.
The advantage of single-post.php file
The word “post” in the single-post.php filename is the post type.
If we create the single-post.php file, WordPress will use this file to render a “single blog post” only. That is post type of “post” only.
Although, It is not written anywhere that a “post” means a blog post. Because most of the fact that most WordPress sites on the web use the post type of “post” to create blog posts only, this became a standard.
So, single-post.php file will give us some fine grain control over the markup of the blog post.
But wait until you here the advantage of single.php file.
The advantage of single.php file
As you already know, WordPress supports three types of Posts in WordPress:
- A Page – For example, About us, Static Front page, Contact us
- A Blog Post or Just a post – For example, “10 best places you must visit before you get married :P”
- A Custom Post – For example, an e-commerce product, a book, a movie, a team member etc.
The advantage of single.php file is, you can use it to render:
- A page with a single blog post.
- As well as, a page with a single post belonging to a custom post type. For example, if there is a custom post type called the book, WordPress will use
single.phpfile to render an individual book.
But, because of design differences between a blog post and a custom post type like “book”, we usually end up using the single.php file for rendering a page with single blog post only.
And for a custom post type like “book”, we create a template like single-book.php.
Having said that, clients install plugins which creates custom post types all the time and some plugins do not come up with single post template file specific to the custom post type that they were creating.
So, it is a common practice to use the single.php file as the fallback file for rendering custom single posts as well.
Simply put, the single.php file is universal file for rendering single detail pages of all types of posts except “static pages”.
So, instead of creating single-post.php file, most developers end up creating single.php file to render the single blog post.
Let’s create single.php file and put the Loop in it
Go ahead and create the single.php file inside our theme directory.
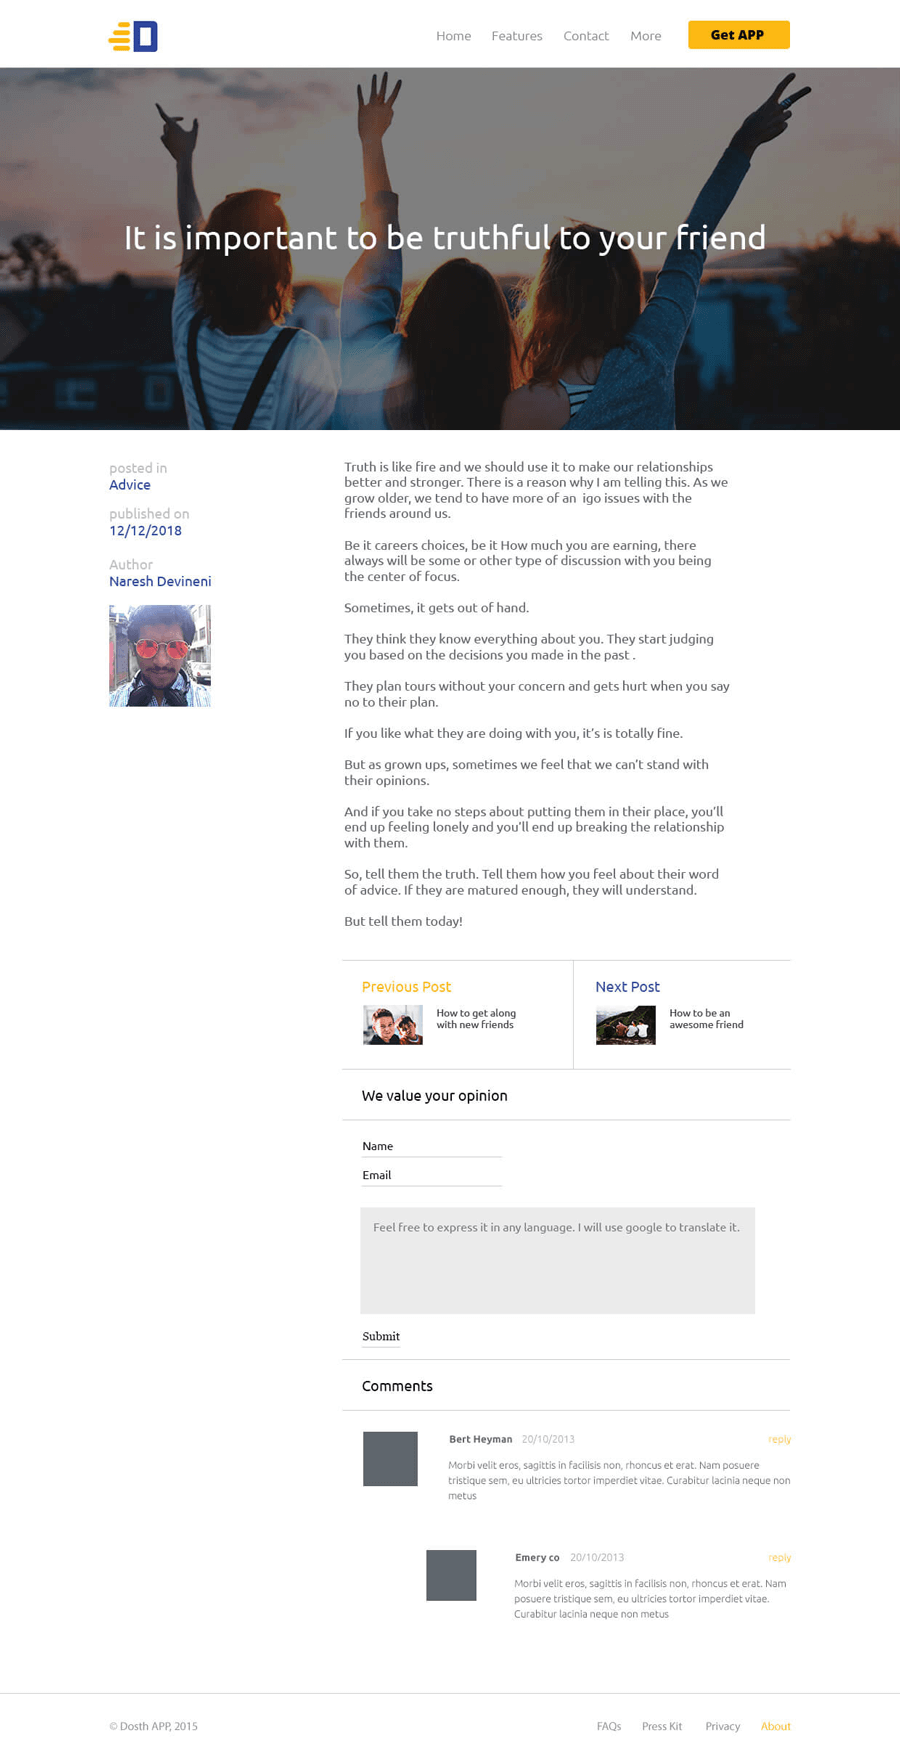
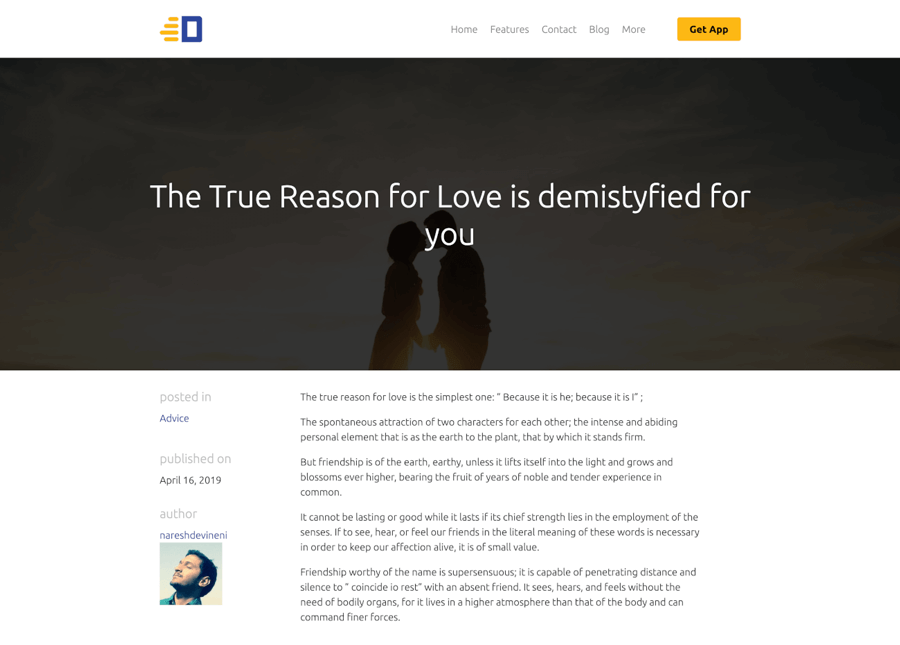
And here is the design we are trying to create:
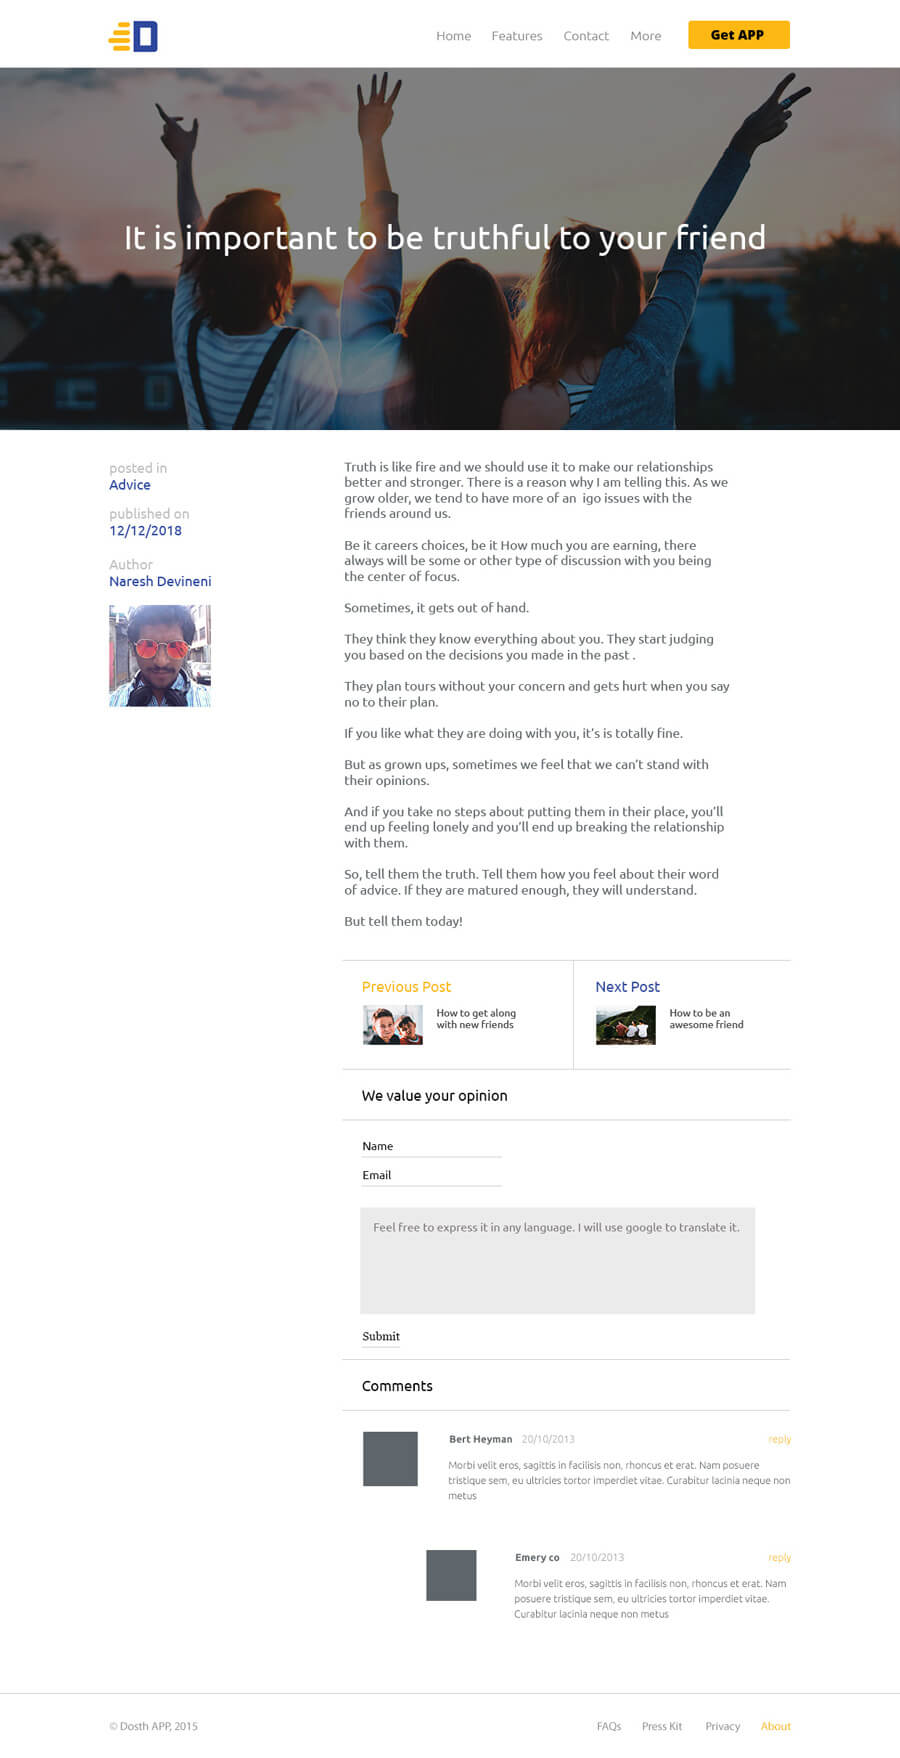
Next, put the following code inside the single.php file:
<?php
/**
* The template for displaying all single posts
*
* @link https://developer.wordpress.org/themes/basics/template-hierarchy/#single-post
*
* @package Dosth
*/
get_header();
?>
<div class="content-container">
<?php while( have_posts() ): ?>
<?php the_post(); ?>
<?php if ( has_post_thumbnail() ) :
$featured_image = wp_get_attachment_image_src( get_post_thumbnail_id( get_the_ID() ), 'full' ); ?>
<div class="full-width-featured-image" style="background-image:url(<?php echo $featured_image[0]; ?>);">
<h2><?php the_title(); ?></h2>
</div>
<?php endif; ?>
<div class="container">
<div class="row">
<div class="article-info col-md-3">
<?php $categories = get_the_category(); ?>
<?php if ( ! empty( $categories ) ) : ?>
<div class="posted-in">
<h4><?php _e( 'Posted In', 'nd_dosth' ); ?></h4>
<?php the_category(); ?>
</div>
<?php endif; ?>
<div class="published-on">
<h4><?php _e( 'Publish On', 'nd_dosth' ); ?></h4>
<?php the_date(); ?>
</div>
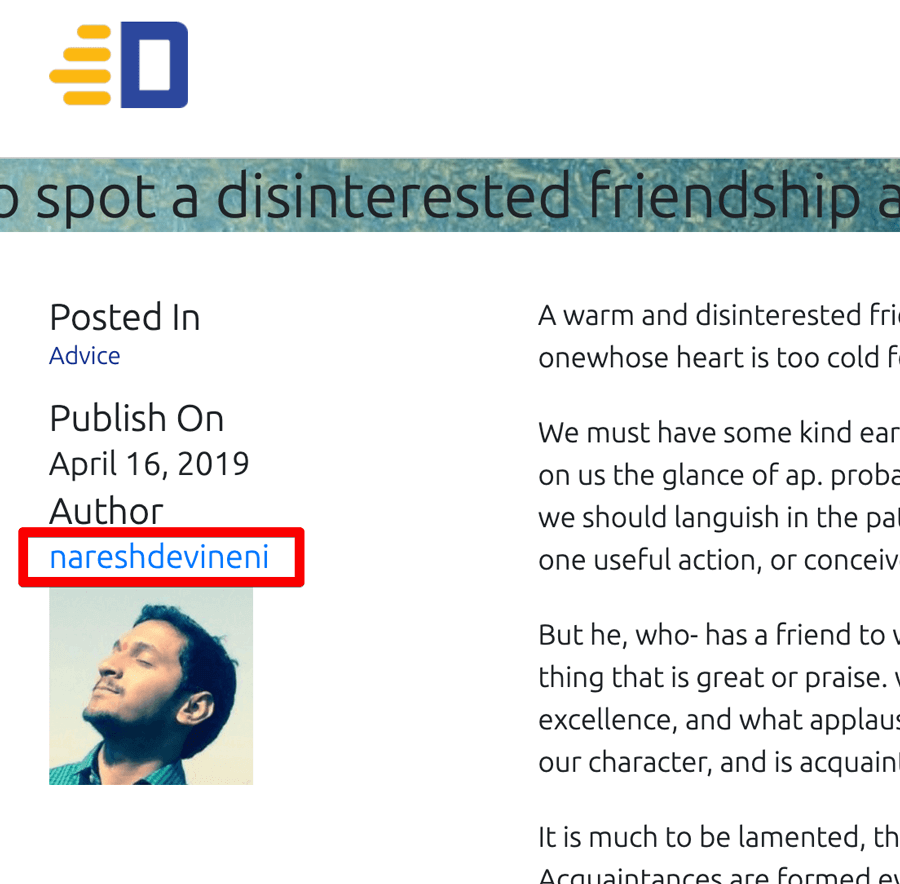
<div class="post-author">
<h4><?php _e( 'Author', 'nd_dosth' ); ?></h4>
<a class="author-archive" href="<?php echo esc_url( get_author_posts_url( get_the_author_meta( 'ID' ) ) ); ?>">
<?php the_author(); ?>
</a>
<?php echo get_avatar( get_the_author_meta('ID') , 100 ); ?>
</div>
</div>
<div id="actual-article" class="col-md-8">
<?php the_content(); ?>
</div>
</div>
</div>
<?php endwhile; ?>
</div>
<?php get_footer(); ?>
Here is what the above code renders to:
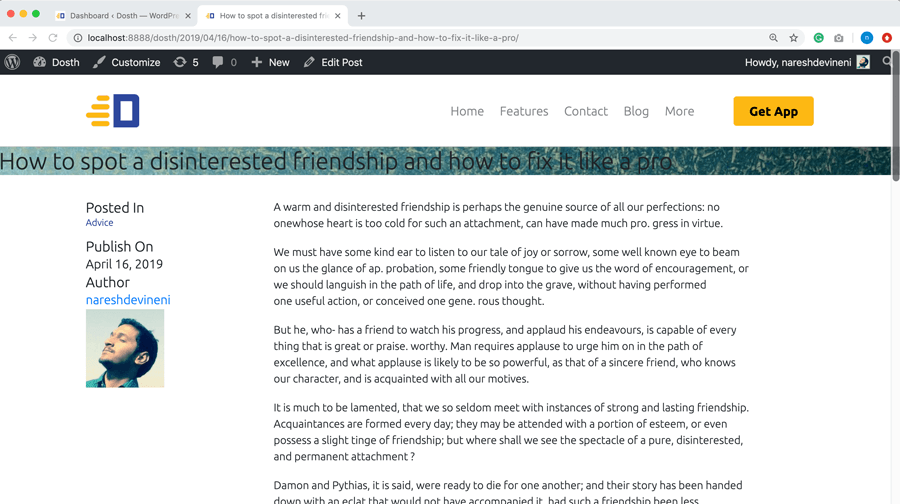
Again! Nothing much is going on the above code.
Just the regular Loop with some standard template tags in it. That’s all.
Inside the Loop, first, we are outputting the featured image. Instead of outputting it using the <img> tag, we are using the featured image as background to achieve the design in the mockup.
<?php if ( has_post_thumbnail() ) :
    $featured_image = wp_get_attachment_image_src( get_post_thumbnail_id( get_the_ID() ), 'full' ); ?>
    <div class="full-width-featured-image" style="background-image:url(<?php echo $featured_image[0]; ?>);">
        <h2><?php the_title(); ?></h2>
    </div>
<?php endif; ?>
“Can’t we just do this in the CSS file?”
There is no easy way to access the image URL of the blog post’s featured image inside a CSS file. So, sometimes it is totally ok to output inline styles.
Next, we created a two column layout using the Bootstrap Framework.
Inside the right-hand column, we are outputting the actual blog post content.
Inside the left-hand column, we are outputting blog post information such as categories and date published.
<div class="article-info col-md-3">
    <?php $categories = get_the_category(); ?>
    <?php if ( ! empty( $categories ) ) : ?>
        <div class="posted-in">
            <h4><?php _e( 'Posted In', 'nd_dosth' ); ?></h4>
            <?php the_category(); ?>
        </div>
    <?php endif; ?>
    <div class="published-on">
        <h4><?php _e( 'Publish On', 'nd_dosth' ); ?></h4>
        <?php the_date(); ?>
    </div>
    <div class="post-author">
        <h4><?php _e( 'Author', 'nd_dosth' ); ?></h4>
        <div class="author-name"><?php the_author(); ?></div>
        <?php get_avatar( get_the_author_meta('ID')  , 100 ); ?>
    </div>
</div>
There only new thing in the above code is:
<div class="post-author">
    <h4><?php _e( 'Author', 'nd_dosth' ); ?></h4>
    <a class="author-archive" href="<?php echo esc_url( get_author_posts_url( get_the_author_meta( 'ID' ) ) ); ?>">
        <?php the_author(); ?>
    </a>
    <?php echo get_avatar( get_the_author_meta('ID')  , 100 ); ?>
</div>
Introducing the_author() template tag
<a class="author-archive" href="<?php echo esc_url( get_author_posts_url( get_the_author_meta( 'ID' ) ) ); ?>">
     <?php the_author(); ?>
</a>
the_author() function outputs the name of the author who is assigned to the blog post.
Currently, our site only has one user. The administrator. We created the administrator while installing WordPress, remember?
And whenever we create a blog post or any other custom post, because we did not create any other user, The administrator becomes the author of every post by default.
So, in my case, it is outputting my name.
But simply outputting the name is not of big use.
When a reader of the blog likes a blog post written by a particular author, he/she wants to see the other articles written by the same author.
So, we have to link the author’s name to the author’s archive so that when a reader clicks on the author’s name, they should be navigated to the author’s archive page. An author’s archive page contains all the blog posts written by a particular author.
So, instead of just outputting the name of the author, we are wrapping the author’s name inside a hyperlink that points to the author archive.
<a class="author-archive" href="<?php echo esc_url( get_author_posts_url( get_the_author_meta( 'ID' ) ) ); ?>"><?php the_author(); ?></a>
We are getting the author’s archive page link by using the get_author_posts_url() function. This function accepts the author ID as the parameter.
WordPress creates a unique ID for every user( author ) we create. And we are getting the post author ID by using The get_the_author_meta('ID') function. This function accepts a single parameter to pull a specific kind of information about the user who authored the post. In our case, we want the ID of the author of the Post, so, we have provided ‘ID’ as the parameter for the get_the_author_meta() function.
Simply put, the following line of code returns the author’s archive permalink:
get_author_posts_url( get_the_author_meta( 'ID' );
For example:
http://localhost:8888/dosth/author/nareshdevineni
Introducing get_avatar() for output
Next, we are getting the profile picture of the author by using get_avatar() function.
<?php echo get_avatar( get_the_author_meta('ID') , 100 ); ?>
The get_avatar() function returns the markup of the <img> tag with the image URL of the post’s author.
And because it just returns the markup, we are manually echoing the markup returned by the get_avatar() function.
<?php echo get_avatar( get_the_author_meta('ID') , 100 ); ?>
The get_avatar() function accepts two parameters.
Post Author ID
As usual, We are getting the ID of the post author using the get_the_author_meta('ID')
Avatar Size
Next, we are providing the image size of the post author in pixels.
In our case, we need to output the 100x100px image of the post author So, I have provided 100 as the second parameter.
<?php echo get_avatar( get_the_author_meta('ID') , 100 ); ?>
“Hey! Where did the image come from?”
Good Question!
How to create avatars for the authors of your WordPress site
WordPress doesn’t allow us to upload a profile picture for the administrator or any other user we create via the admin dashboard.
“So, how do we upload a profile picture?”
Simple, first, we have to create an account on http://gravatar.com and upload the profile picture there.
Then, on our WordPress site, when creating an account for the user, we have to use the same e-mail ID that we have used to create an account on Gravatar. Be it site administrator or any other user.
For example, while installing WordPress for the Dosth site, I have used the same e-mail ID that I used for Gravatar service and WordPress displays my profile picture automatically in my User Profile.
The get_avatar() function depends on Gravatar Service to generate the Final URL of the profile picture.
So, if you are not seeing the profile picture, The e-mail ID that you have used while installing WordPress doesn’t have an account on Gravatar.
Simply put, If we want the authors of our blog to have profile pictures, the only way is to create an account on:
That’s all!
Next, we will style the Single Blog Post page.
Styling the Single Post Page
Go ahead and put the following CSS at the end of the style.css file:
/*-------------------------------------------------------------------------------
  16.Single Blog Post page styling
-------------------------------------------------------------------------------*/
.single .full-width-featured-image{
    min-height:500px;
    display:flex;
    justify-content: center;
    align-items: center;
    background-repeat: no-repeat;
    background-size:cover;
    background-position:center center;
    position:relative;
}
.single .full-width-featured-image h1{
    color:white;
    position:relative;
    z-index:2;
    font-size:50px;
    text-align:center;
    max-width:1000px;
    margin:0 auto;
}
.single .full-width-featured-image:after{
    width:100%;
    height:100%;
    content:"";
    background-color:rgba(0,0,0,0.8);
    position:absolute;
    top:0;
    left:0;
}
.single .article-info h4{
    color:#bfbfbf;
    font-size:20px;
    text-transform:lowercase;
    margin-bottom:10px;
    margin-top:30px;
}
.single .article-info a{
    font-size:16px;
    color:#1a3794;
}
.single #actual-article{
    padding:30px 0;
}
.single #actual-article p{
    font-size:16px;
}
If you now visit a single blog post in the frontend, this is how it looks like:
Next, we will learn how to add the comment form to a single blog post.
How to add comment form functionality to a blog post
A blog post is not complete without a Comment Form and comments.
People read articles all the time and they would love to express their thoughts if they love or hate a particular article.
And it is extremely easy to create a Comment Form in WordPress.
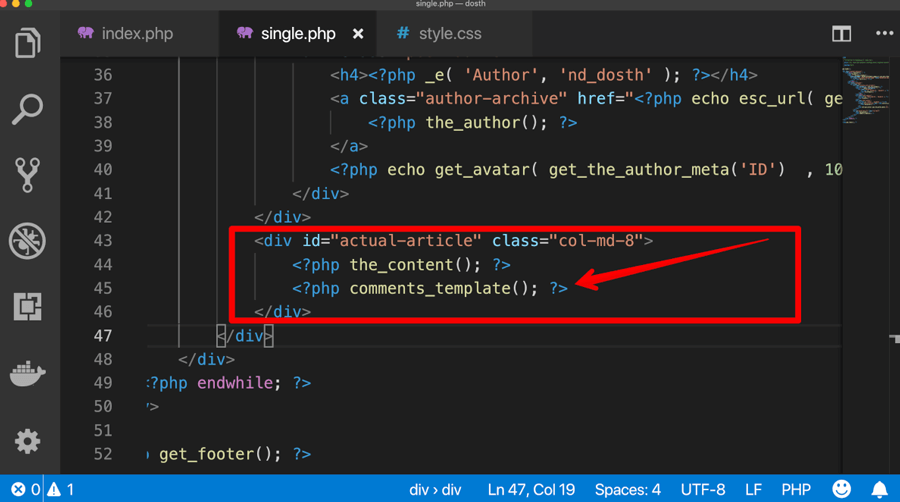
All you have to do is call comments_template() function inside the Loop of single.php file.
<?php comments_template(); ?>
Go ahead and put the above line of code inside single.php file and to be precise, put it right underneath the_content() function call.
Common, let’s take a look at the Comment Form section in the frontend by visiting any single blog post.
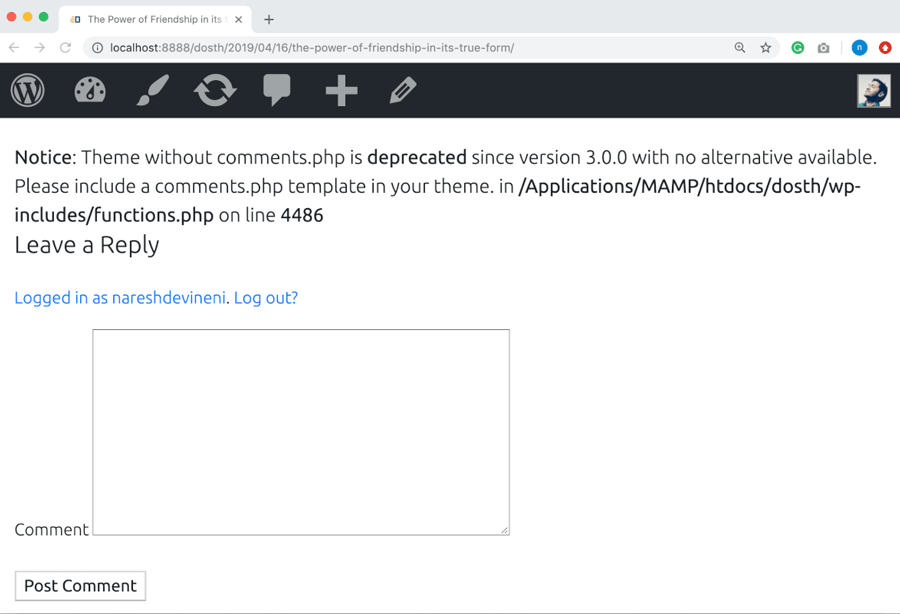
And Bang! There is a Notice!
Although WordPress is printing out the Comment Form functionality, it says that we have to create a comments.php file and take control of the comments functionality.
Well, let’s do just that then.
And I am still sticking to my previous statement.
It is still extremely easy to create a Comment Form in WordPress.
Common, go ahead and create a new file called comments.php inside our theme directory.
Here is the update directory structure of our theme:
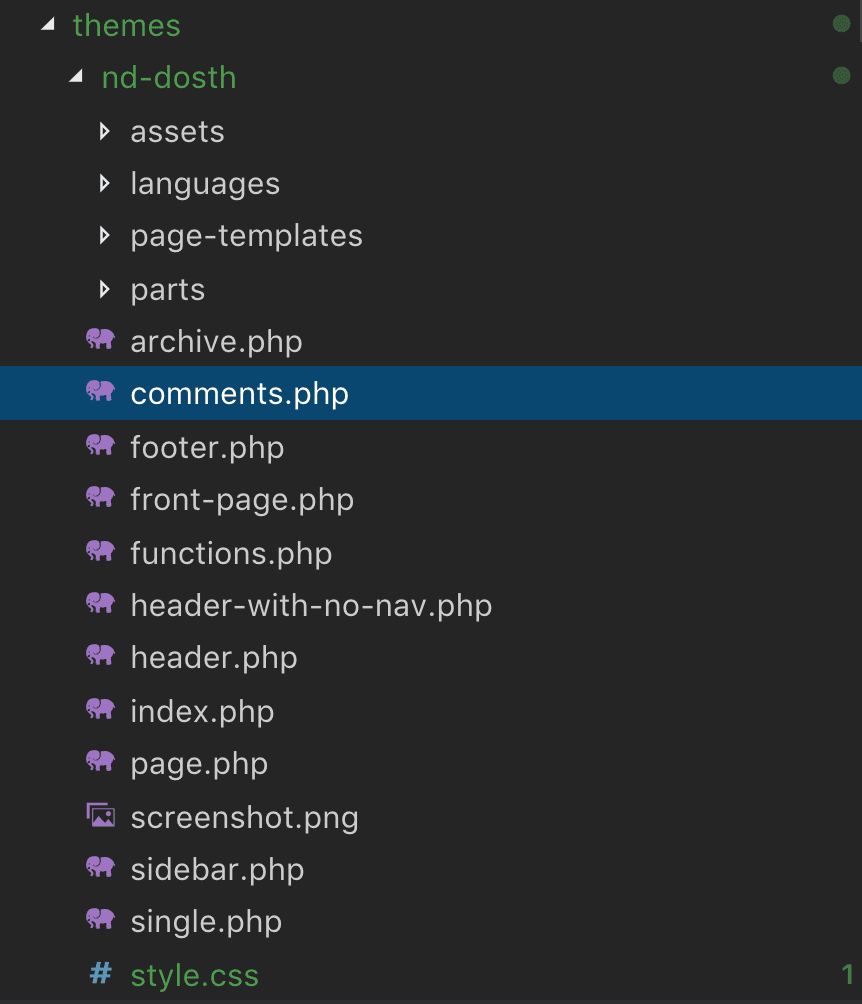
if now you go back to the single blog post page in the browser:
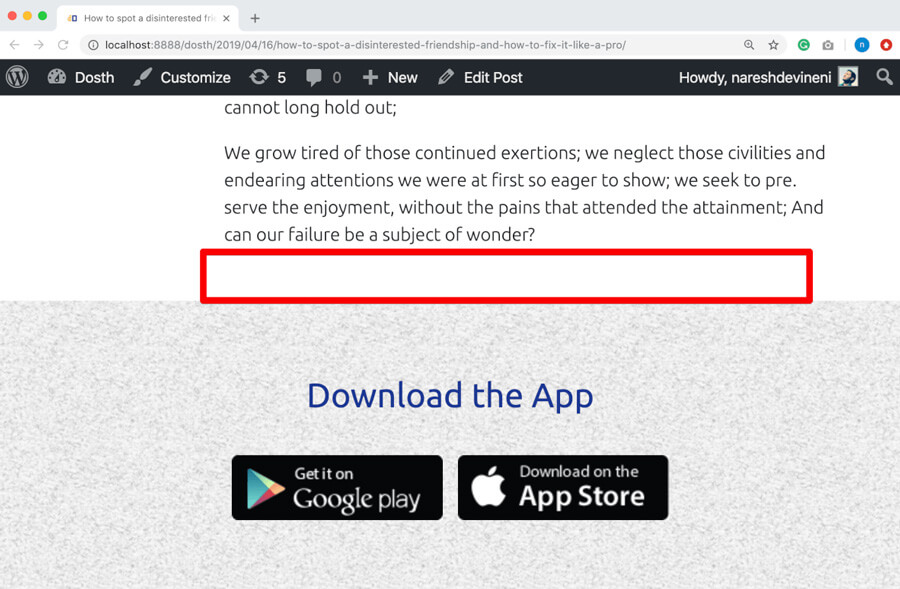
Uff…The comment form that wordpress previously outputted is now gone.
This is happening because WordPress is trying to render the comment form using the code inside the comments.php file and the file is empty.
“So, do we have to code the Comment Form our selves?”
Na! We don’t have to!
WordPress provides us with several PHP functions that output all the functionality that is required for the comment form and in fact the entire comment section.
All we have to do use them properly to create a decent comments.php file.
“So, how do we get started?”
Simple! Ever tried looking into the code of the default WordPress themes like “twentyseventeen”, “twentynineteen”, etc?
“Nope!”
Well, you better start learning from those default themes. The default WordPress themes are GEMS that are not hidden.
You can learn quite a bit of code organization techniques and coding tricks from them.
It is a good practice to steal the code from the default themes
And, sometimes you have to steal quite a bit of code from them for your custom theme. Trust me, it makes our life as a theme developer much easier.
So, go ahead and open up the comments.php file of “twentyseventeen” theme. If for some reason you do not have “twentyseventeen” theme installed, you can easily download it by going to:
Admin Dashboard -> Appearance -> Themes -> Add New -> Search “twentyseventeen”
Next, copy all the code from the comments.php file of “twentyseventeen” theme and paste it inside our “nd-dosth” theme’s comments.php file.
If you are lazy, Here is the code for our theme’s comments.php file.
<?php
/**
* The template for displaying comments
*
* This is the template that displays the area of the page that contains both the current comments
* and the comment form.
*
* @link https://codex.wordpress.org/Template_Hierarchy
*
* @package WordPress
* @subpackage Twenty_Seventeen
* @since 1.0
* @version 1.0
*/
/*
* If the current post is protected by a password and
* the visitor has not yet entered the password we will
* return early without loading the comments.
*/
if ( post_password_required() ) {
    return;
}
?>
<div id="comments" class="comments-area">
<?php
// You can start editing here -- including this comment!
if ( have_comments() ) : ?>
<h2 class="comments-title">
<?php
$comments_number = get_comments_number();
if ( '1' === $comments_number ) {
/* translators: %s: post title */
printf( _x( 'One Reply to “%s”', 'comments title', 'twentyseventeen' ), get_the_title() );
} else {
printf(
/* translators: 1: number of comments, 2: post title */
_nx(
'%1$s Reply to “%2$s”',
'%1$s Replies to “%2$s”',
$comments_number,
'comments title',
'twentyseventeen'
),
number_format_i18n( $comments_number ),
get_the_title()
);
}
?>
</h2>
<ol class="comment-list">
<?php
wp_list_comments( array(
'avatar_size' => 100,
'style' => 'ol',
'short_ping' => true,
'reply_text' => twentyseventeen_get_svg( array( 'icon' => 'mail-reply' ) ) . __( 'Reply', 'twentyseventeen' ),
) );
?>
</ol>
<?php the_comments_pagination( array(
'prev_text' => twentyseventeen_get_svg( array( 'icon' => 'arrow-left' ) ) . '<span class="screen-reader-text">' . __( 'Previous', 'twentyseventeen' ) . '</span>',
'next_text' => '<span class="screen-reader-text">' . __( 'Next', 'twentyseventeen' ) . '</span>' . twentyseventeen_get_svg( array( 'icon' => 'arrow-right' ) ),
) );
endif; // Check for have_comments().
// If comments are closed and there are comments, let's leave a little note, shall we?
if ( ! comments_open() && get_comments_number() && post_type_supports( get_post_type(), 'comments' ) ) : ?>
<p class="no-comments"><?php _e( 'Comments are closed.', 'twentyseventeen' ); ?></p>
<?php
endif;
comment_form();
?>
</div><!-- #comments -->
If you now go back to the single blog post page in the browser and refresh it:
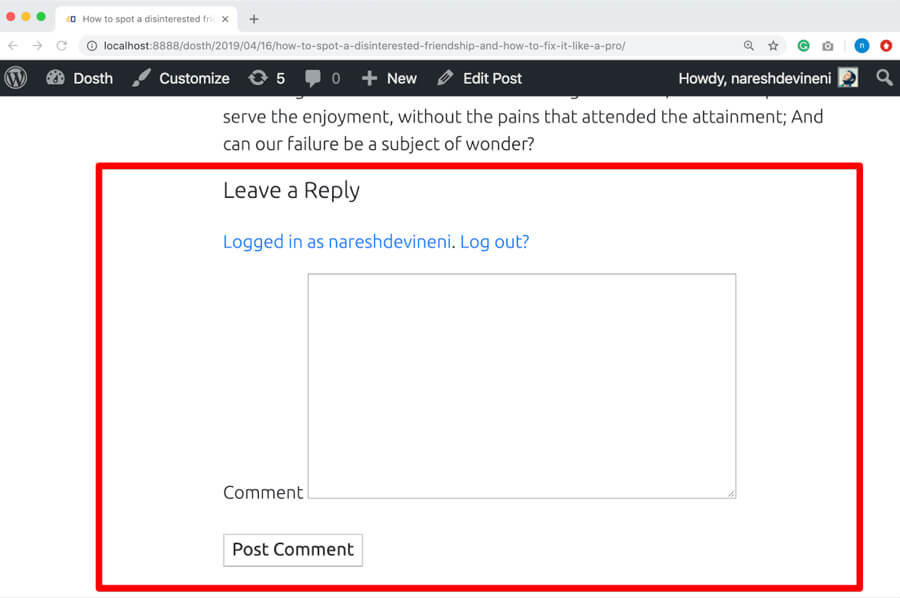
Ah! Now the comment form is getting outputted without any notice or errors!
Also, if you inspect the HTML markup of the field, you’ll find HTML5 e-mail and URL field types. This is happening because we have enabled support for HTML5.
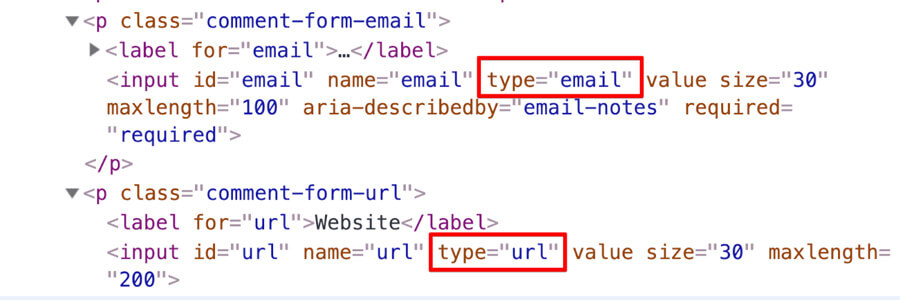
Great! But don’t let this output fool you. There is a problem.
When we are copying the code from default WordPress themes, in that code, we have to look for PHP function calls whose function definition is not in our theme.
If you notice our theme’s comments.php file carefully, you will find such a PHP function.
Can you guess which function it is?
“Yessssss!! Its twentyseventeen_get_svg() function, right?”
Great! on what line numbers of the comments.php file is this function getting called?
“This function is getting called on the line numbers 60, 66 and 67”
Oh great! You have sharp eyes.
Our theme doesn’t have the function definition for twentyseventeen_get_svg() function.
“But why PHP is not throwing any error? We did not define this function in our theme, right?”
I honestly have no Idea. I am no PHP expert, but from what I see, although we did not define this function in our theme, PHP could be failing to throw the error because this function is getting called inside an array and is failing silently.
I tried calling this function outside the array and PHP threw a fatal error.
Anyway, the bottom line is, when we copy the code from a particular default theme, for example, “twentyseventeen”, we have to look for any function calls that belong to the “twentyseventeen” inside the copied code.
We can easily recognize them because their function starts with their theme name. For example, if you notice the twentyseventeen_get_svg() function name, it is starting with “twentyseventeen”.
And, once we find such a function, we have two options:
- Search for the function definition inside the default theme and copy it in our theme as well.
- If removing the function call from our theme file is harmless and doesn’t break the functionality, just remove it.
Most of the time, we have to go with the first option. But, twentyseventeen_get_svg() function is harmless as it is just outputting a SVG icon. So, in our case, we will go with the second option. We will just remove all the traces of twentyseventeen_get_svg() function from our theme’s comments.php file.
This will solve our problem.
Here is the updated code from comments.php file:
<?php
/**
* The template for displaying comments
*
* This is the template that displays the area of the page that contains both the current comments
* and the comment form.
*
* @link https://codex.wordpress.org/Template_Hierarchy
*
* @package WordPress
* @subpackage Twenty_Seventeen
* @since 1.0
* @version 1.0
*/
/*
* If the current post is protected by a password and
* the visitor has not yet entered the password we will
* return early without loading the comments.
*/
if ( post_password_required() ) {
return;
}
?>
<div id="comments" class="comments-area">
<?php
// You can start editing here -- including this comment!
if ( have_comments() ) : ?>
<h2 class="comments-title">
<?php
$comments_number = get_comments_number();
if ( '1' === $comments_number ) {
/* translators: %s: post title */
printf( _x( 'One Reply to “%s”', 'comments title', 'nd_dosth' ), get_the_title() );
} else {
printf(
/* translators: 1: number of comments, 2: post title */
_nx(
'%1$s Reply to “%2$s”',
'%1$s Replies to “%2$s”',
$comments_number,
'comments title',
'nd_dosth'
),
number_format_i18n( $comments_number ),
get_the_title()
);
}
?>
</h2>
<ol class="comment-list">
    <?php
        wp_list_comments( array(
            'avatar_size' => 100,
            'style'       => 'ol',
            'short_ping'  => true,
            'reply_text'  => __( 'Reply', 'nd_dosth' ),
        ) );
    ?>
</ol>
<?php the_comments_pagination( array(
'prev_text' => '<span class="screen-reader-text">' . __( 'Previous', 'nd_dosth' ) . '</span>',
'next_text' => '<span class="screen-reader-text">' . __( 'Next', 'nd_dosth' ) . '</span>',
) );
endif; // Check for have_comments().
// If comments are closed and there are comments, let's leave a little note, shall we?
if ( ! comments_open() && get_comments_number() && post_type_supports( get_post_type(), 'comments' ) ) : ?>
<p class="no-comments"><?php _e( 'Comments are closed.', 'nd_dosth' ); ?></p>
<?php
endif;
comment_form();
?>
</div><!-- #comments -->
Also, if you notice, comments.php file is filled with a ton of WordPress translation functions. So, in the above-updated-code, I just replaced “twentyseveteen” text domain with our theme’s text domain, that is, “nd_dosth”.
Now, before we break down the comments.php file into bits and pieces, let’s test it out by going back to the comment form in the browser.
Let’s test the Comment Form
If you are already logged in, you’ll see just the “Comment” textarea box. Since you are logged in, WordPress is taking all the details like Name, Email and Website from your profile.
If you viewing the same comment form after logging out, you have to fill out the other fields too.
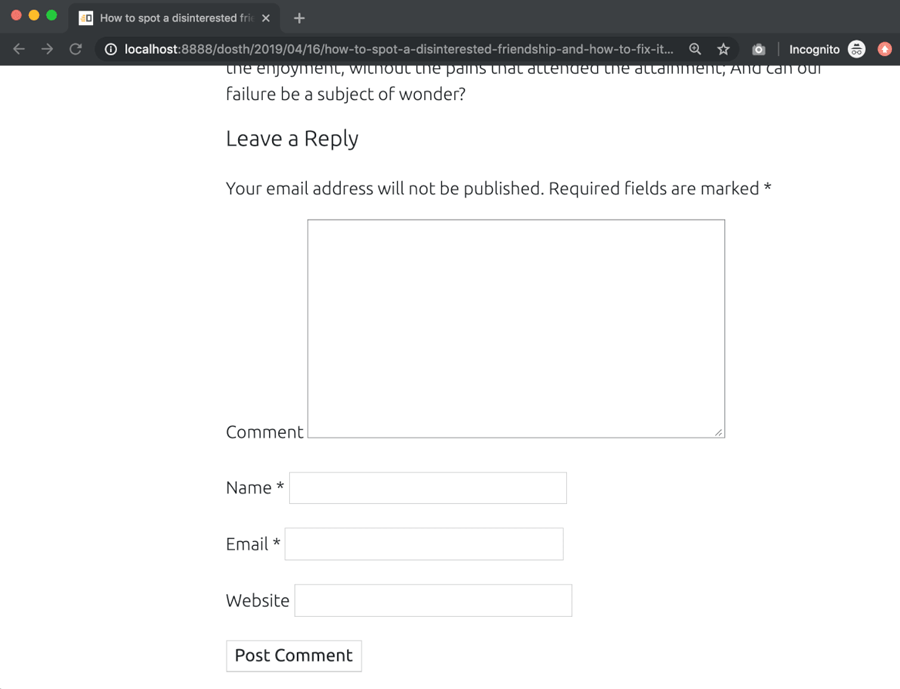
Now post at least four comments and give reply to a couple of them by using a different name.
I went ahead and created and some comments and everything is working fine in my testing!
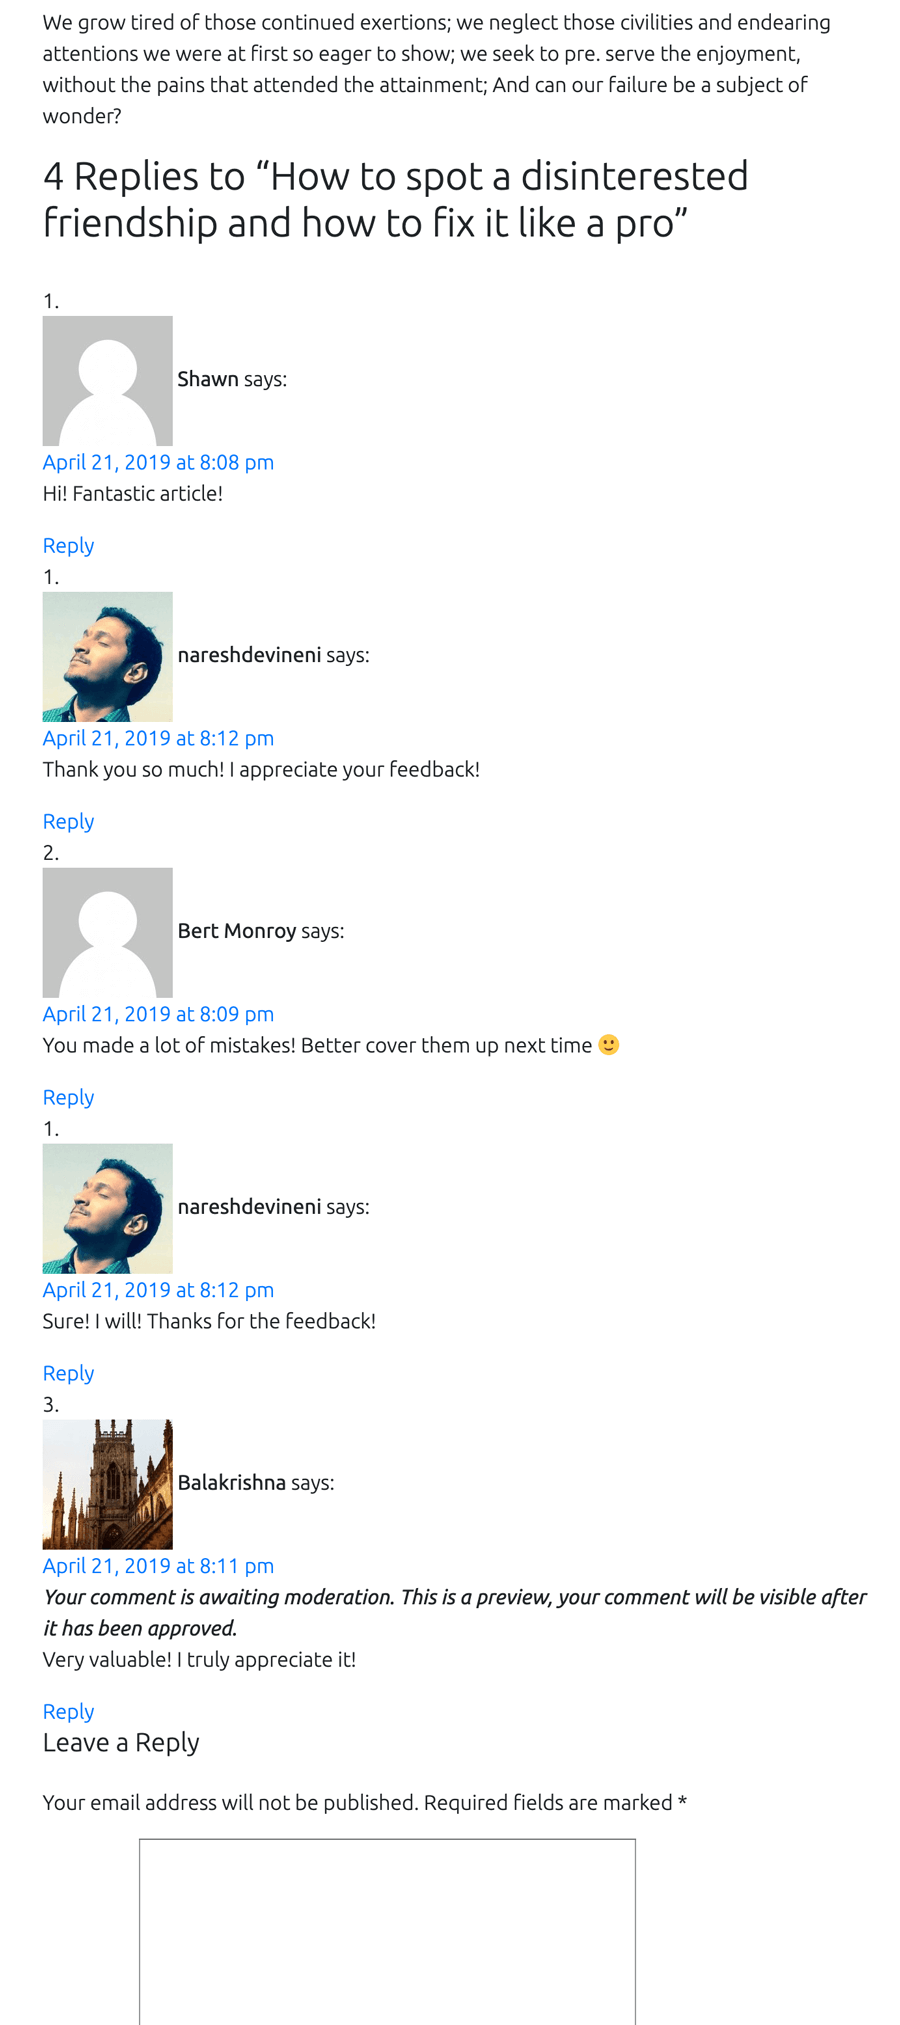
If you notice, there are four approved comments and one comment is waiting for moderation. The comment waiting for moderation can only be seen by the person who created it and the administrator of the site.
Now that you know what output that the code inside comments.php file is generating, you can easily skim through the file without any injuries :P
Now let’s break down the comments template a.k.a comments.php file
if ( post_password_required() ) {
return;
}
For the rest of the lesson, I will be referring to the blog post as the “post” because, comments.php file can be used for the custom posts too! Just like, single.php file, This file is universal too!
Outputting the title of the comment section
Anyway, First of all, we are checking whether the post is password protected by using the post_password_required()
If the post is password protected, we are just exiting out the of the file so that the rest of the file code will not be processed.
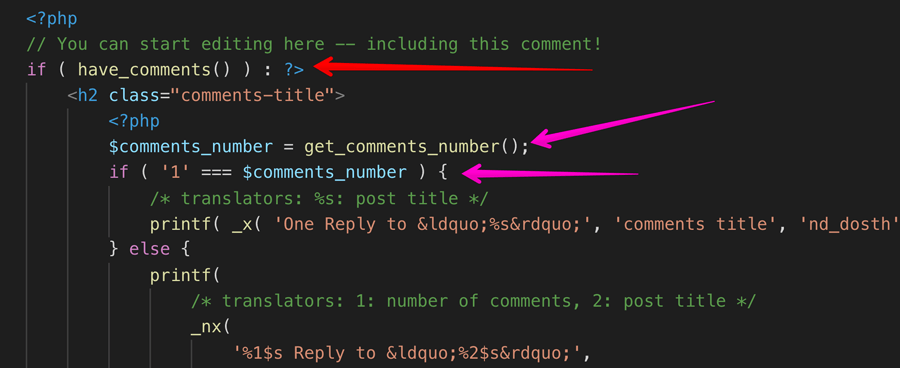
Next, we are checking if there are any comments for the post using the have_comments() WordPress function. This function will return true if there is at least comment made for the post.
If there are comments, first we are getting the comment count using the get_comments_number() WordPress function and if the comment count is one, we are outputting the title of the comment section in the following way:
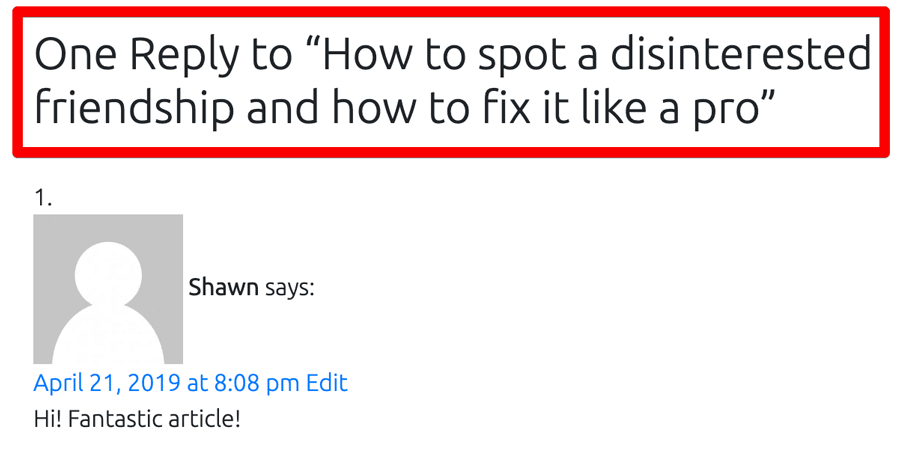
But if the comment count is more that one, we are outputting the comment count dynamically while providing some context to the translators via _nx() WordPress translation function.
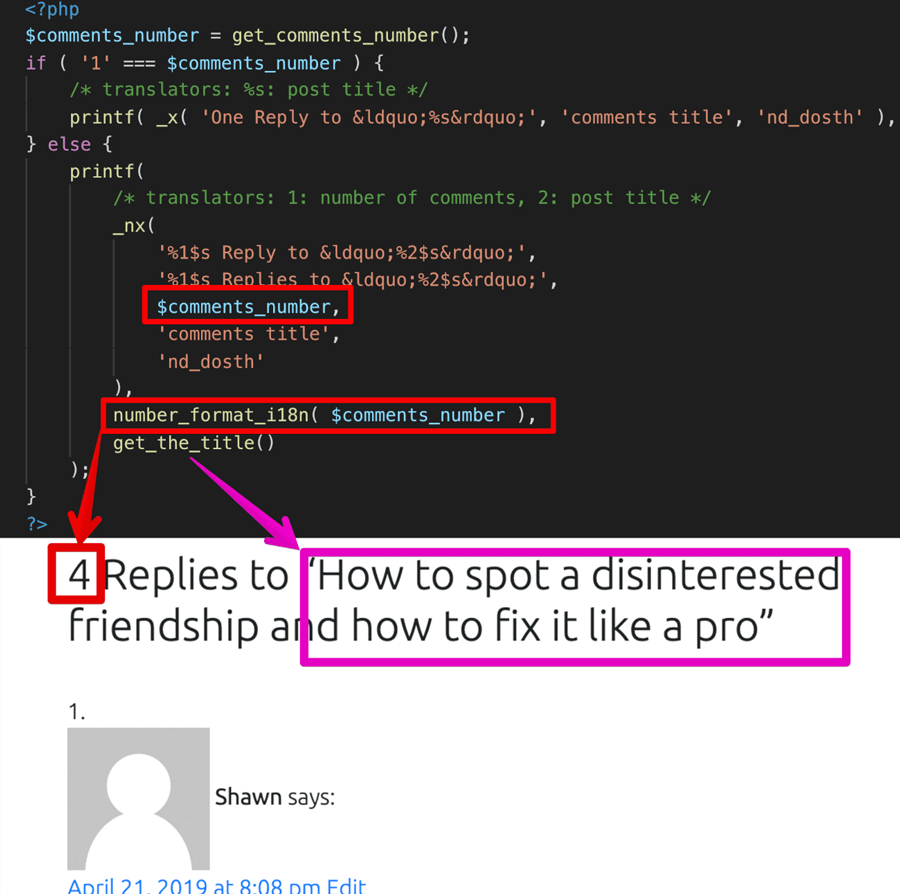
We are now done with the title of the comment.
Outputting the comments
Next, using the wp_list_comments() WordPress function, we are outputting the comments of the post.
<ol class="comment-list">
<?php
wp_list_comments( array(
'avatar_size' => 100,
'style' => 'ol',
'short_ping' => true,
'reply_text' => __( 'Reply', 'nd_dosth' ),
) );
?>
</ol>
The wp_list_comments() takes an array of options which allow us to control the markup of the comment list.
You can learn more about this function by visiting the following URL.
https://codex.wordpress.org/Function_Reference/wp_list_comments
Feel free play around with various options.
The most interesting option of all is the “callback”.
With “callback” option we can write our own custom markup for individual comment. It might look complex. But in reality, it is not!
And it is really useful to take control of the markup for individual comment. It helps you style the comment in the way you want!
There are a ton of articles explaining how to do this, do some research and just try it out! You’ll learn a lot.
Comment list depends on Gravatar service too
Also, if you notice the above screenshot, a dummy image is being used for the avatar.
This thing is that WordPress depends on Gravatar service for comment author avatars as well.
You can’t just skip the Gravatar service.
Outputting the comments pagination
Next, we are outputting the comments pagination by using the_comments_pagination() WordPress function.
the_comments_pagination( array(
    'prev_text' => '<span class="screen-reader-text">' . __( 'Previous', 'nd_dosth' ) . '</span>',
    'next_text' => '<span class="screen-reader-text">' . __( 'Next', 'nd_dosth' ) . '</span>',
) );
We are modifying the markup of the pagination’s “next” and “previous” link text by providing an array with arguments as a parameter.
Checking if comments are open
Then, we are checking whether comments are open for a particular post using the comments_open() WordPress function. If the comments are closed, we are informing the commenter that he/she can no longer comment on this post.
// If comments are closed and there are comments, let's leave a little note, shall we?
if ( ! comments_open() && get_comments_number() && post_type_supports( get_post_type(), 'comments' ) ) : ?>
    <p class="no-comments"><?php _e( 'Comments are closed.', 'nd_dosth' ); ?></p>
<?php
endif;
In WordPress, you control whether to close or open comments for a particular post by going to:
Post edit screen -> Document options -> Discussion
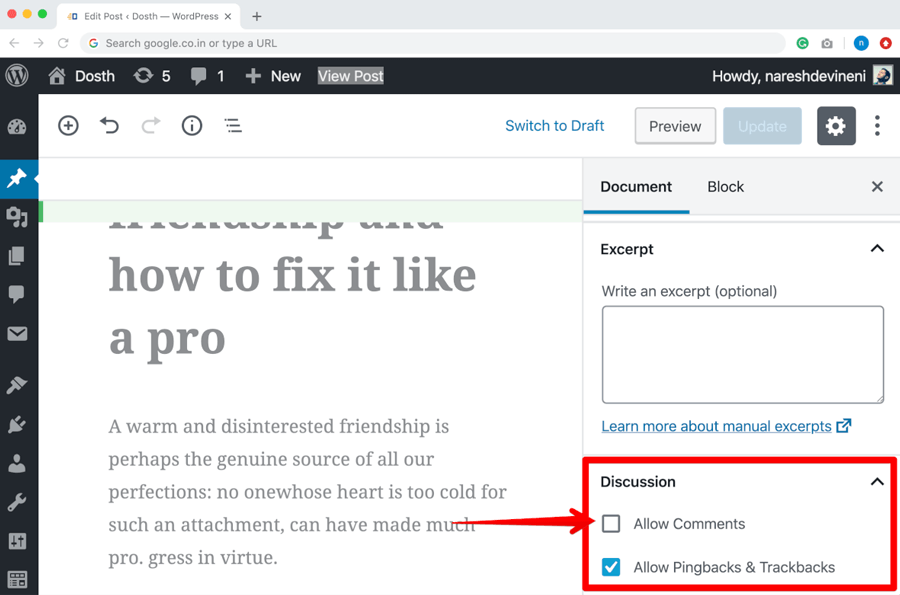
Outputting the comment form
Lastly, we are outputting the Comment Form using the comment_form() WordPress function.
The comment_form() function is smart too! If the comments are not open for a particular blog post, the comment form will not be displayed. Cool, right?
And, Just like wp_list_comments() function, the comment_form() function also accepts an array of options which allows us to add/modify the markup of the comment form, For example:
<?php $comment_args = array(
        'comment_notes_before'  => '<p class="required-message">'. __( 'Fields with ( * ) are required', 'usablewp' ) .'</p>',
        'title_reply' => __( 'We would love your opinion', 'usablewp'  ),
        'comment_field' => '<p>' .
            '<label for="comment">' . __( 'Let us know what you have to say:', 'usablewp' ) . '</label>' .
            '<textarea id="comment" name="comment" cols="45" rows="6" aria-required="true"></textarea>' .
            '</p>',
        'comment_notes_after'       => '',
        );
?>
<?php comment_form( $comment_args ); ?>
I implemented this technique on UsableWP comment form and here is the output:
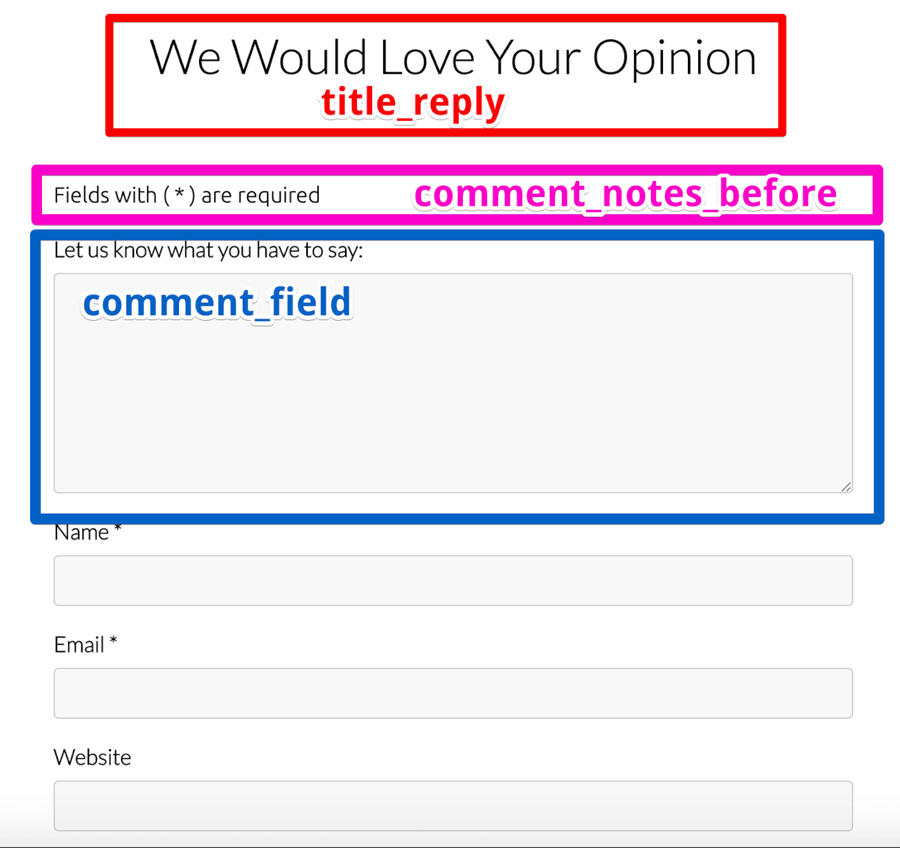
Feel free to edit the comments.php file
As long as you know what you are doing, It is totally ok to edit the code inside the comments.php file.
Just because you copied the code from the default theme, it doesn’t mean you can’t edit it. Just feel free to play around with it.
In the next lesson, we will style the comment section of a blog post!
Let’s style it!
Go ahead and put the following CSS at the end of the style.css file:
/*-------------------------------------------------------------------------------
  17.Comment Section Styling
-------------------------------------------------------------------------------*/
#respond h3, .comments-title{
    color:black;
    padding:20px;
    font-size:20px;
    border-top:1px solid #000;
    border-bottom:1px solid #000;
    margin:30px 0;
}
#commentform .comment-notes{
    margin-bottom:20px;
}
#commentform label{
    display:block;
}
#commentform input[type="text"],
#commentform input[type="url"],
#commentform input[type="email"],
#commentform textarea{
    border: 1px solid #ccc;
    border-radius: 4px;
    margin-bottom: 20px;
    width: 100%;
    background-color: #f8f8f8;
    padding: 7px 10px;
    font-size: 18px;
}
#commentform input[type="submit"]{
    line-height: 38px;
    border-radius: 4px;
    padding: 0 20px;
    background-color: #fdb813;
    color: black;
    font-weight: bold;
    font-size: 16px;
    border:0;
    position: relative;
    transition:all 0.4s;
    cursor:pointer;
}
#commentform input[type="submit"]:hover{
    background-color: #6e551a;
    color: white;
}
.comment-body .comment-author{
    float:left;
    width:30%;
}
.comment-body .comment-author .fn{
    display:block;
    margin-top:10px;
}
.comment-body{
    overflow:hidden;
    margin-bottom:30px;
}
.comment{
    margin-bottom:30px;
}
.comment-list, .children{
    margin:0;
    padding:0;
    list-style-type: none;
}
.comment-list > li:first-child{
    border-top:0;
    padding-top:0;
}
.comment{
    border-top:1px solid #ccc;
    padding-top:30px;
    position:relative;
}
.children .comment{
    border-top:0;
}
.comment .children{
    border-top:1px dotted #5e666b;
    border-left:1px dotted #5e666b;
    padding-top:10px;
    padding-left:10px;
}
.children{
    margin-left:100px;
}
.children img{
    max-width:75px;
    height:auto;
}
.children .fn{
    font-size:12px;
}
.says{
    display:none;
}
.comment-metadata{
    margin-left:30%;
}
.comment-metadata a{
    color:#5e666b;
    font-size:14px;
    margin-bottom:10px;
    display:block;
}
.comment-reply-link{
    position:absolute;
    top:15px;
    right:0;
    font-size:12px;
    color:#1a3794;
}
And here is the final output of the comments section:
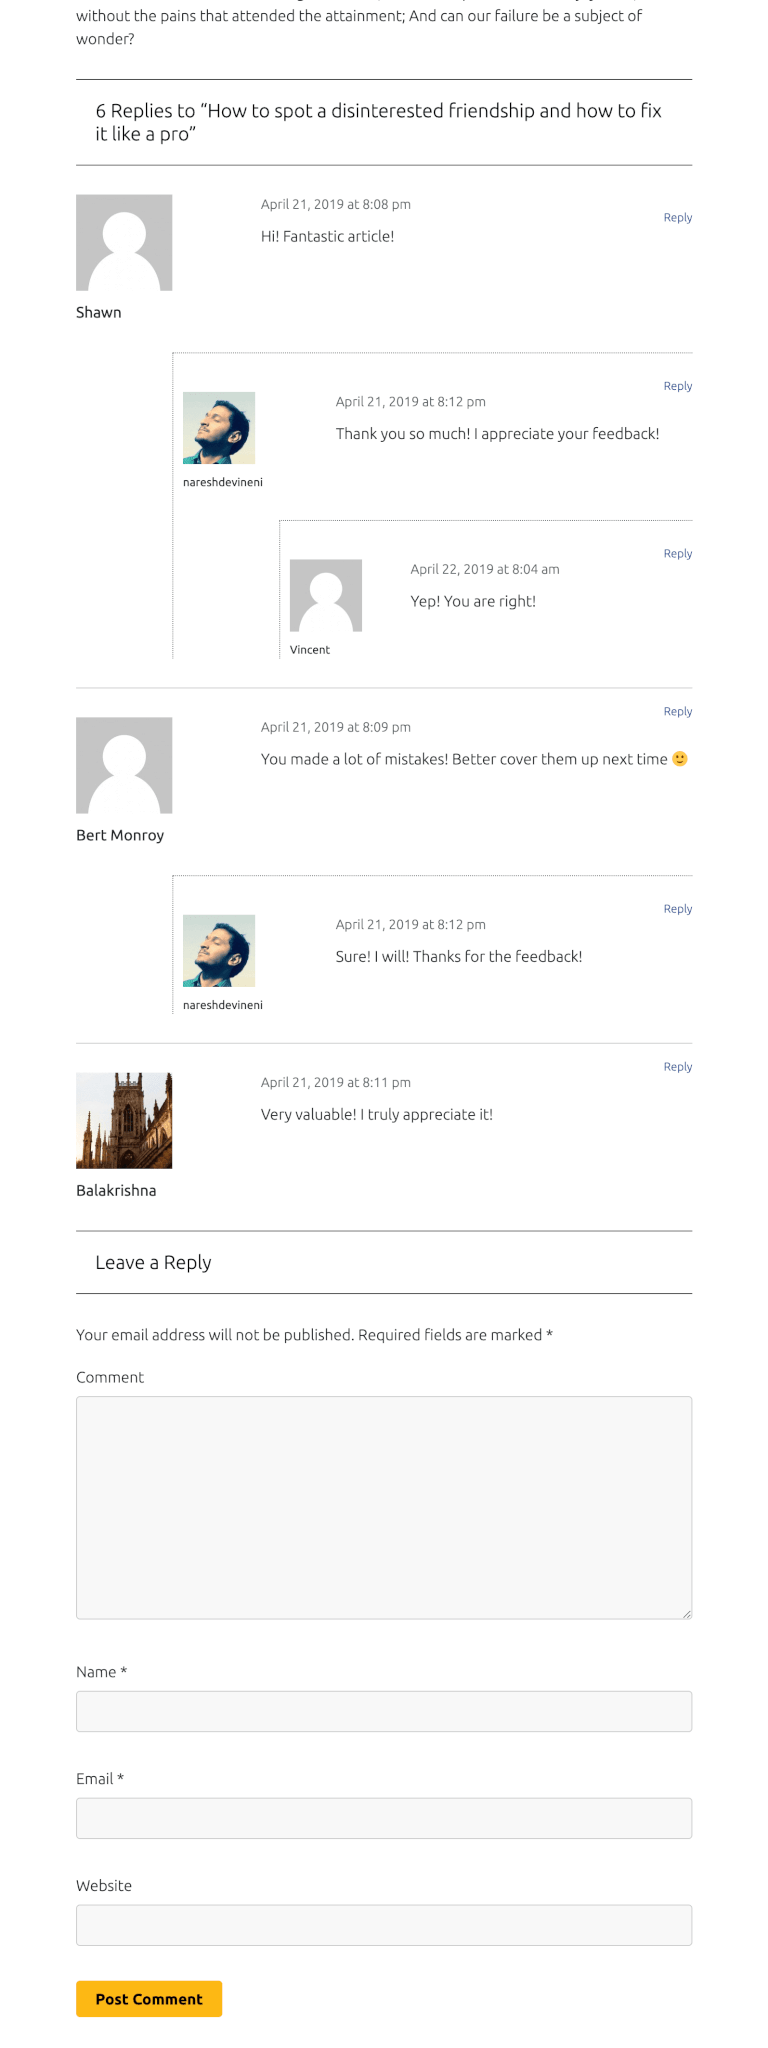
Not bad, right?
I know it looks nothing like the mockup! But you know, time constraints!
Anyway, we are almost done with our blog, but we miss one something and we will fix that in the next!
How to add post navigation for a blog post – the easy way
The post navigation contains the title, permalink, etc. of the previous and next posts of the current post.
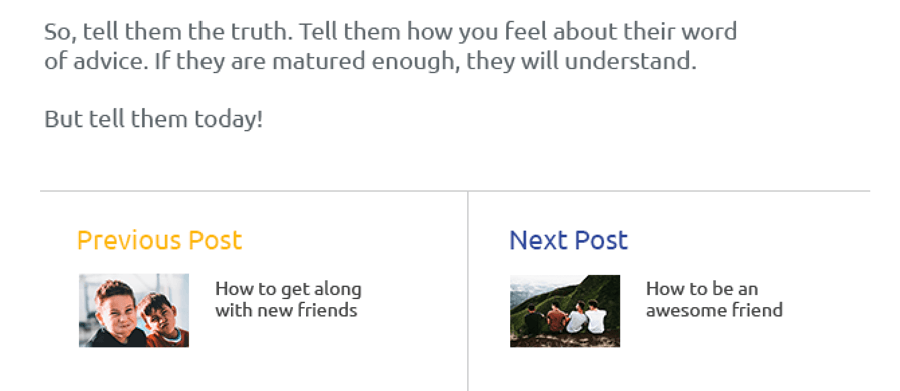
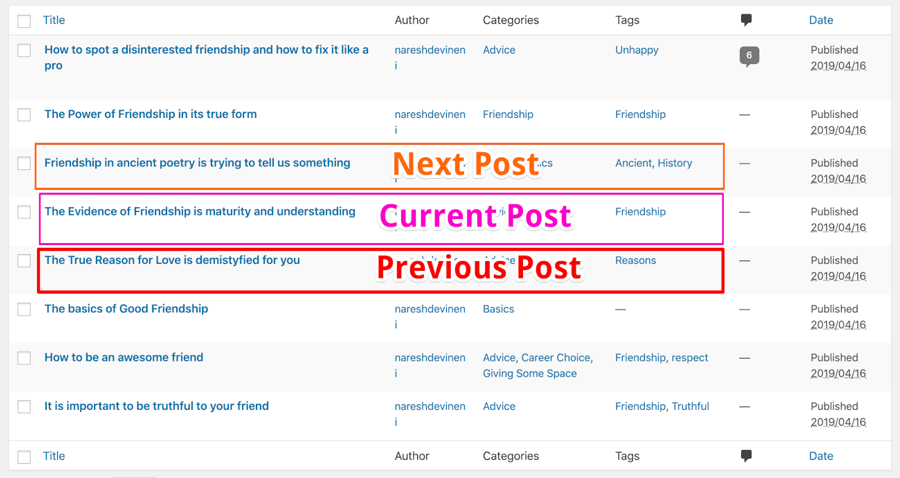
The Previous post of a current post is nothing but a post which is published just before the current post. Similarly, The Next post of a current post is published right after the current post.
The first article of the blog is not gonna have a previous post.
The last article of the blog is not gonna have the next post.
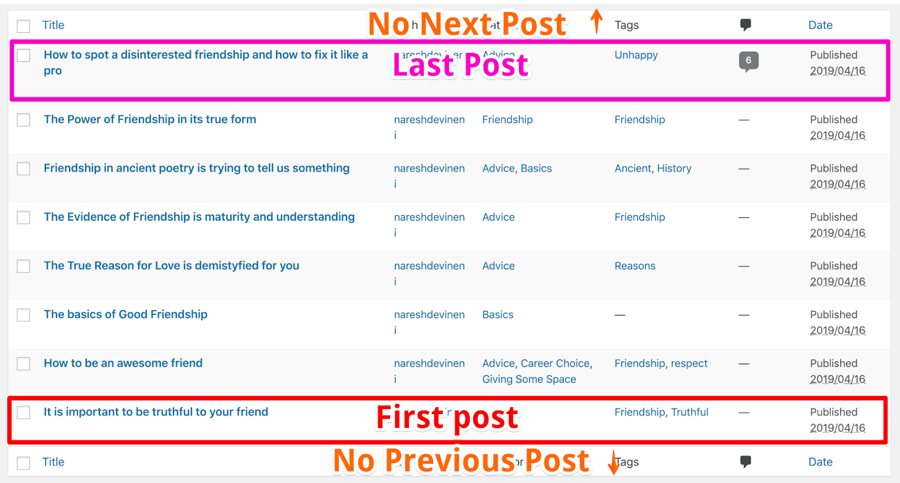
There are two ways you can add previous and next posts navigation for a blog post.
The Easy Way
Open up the single.php file and put the following line of code right in between the_content() and comments_template() function calls.
<?php the_post_navigation(); ?>
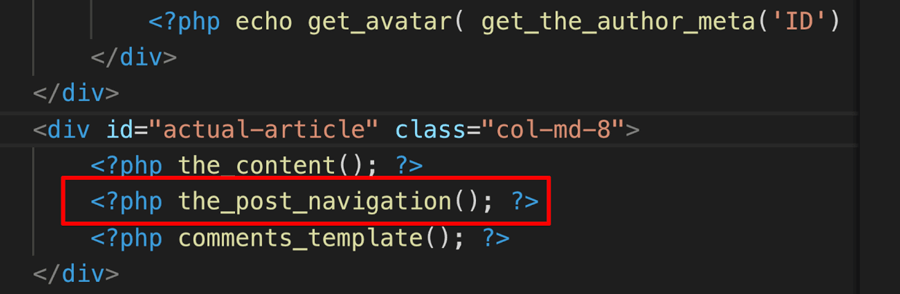
And this is the output the_post_navigation() function is outputting to the browser:
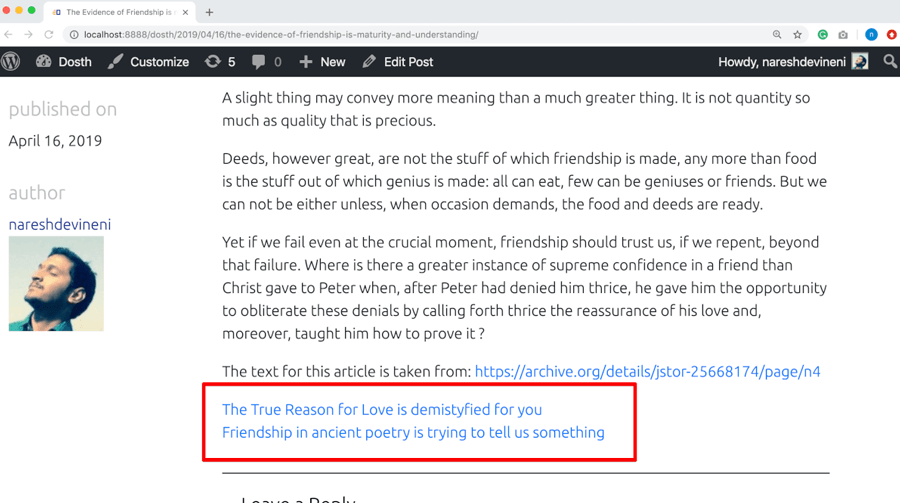
What would a reader think about those links?
There is no text indicating that those two links are next and previous posts of the current blog post, right?
The thing with WordPress functions is, most of them accept an array of arguments which modifies the way the function behaves and outputs the markup.
the_post_navigation() function is no exception. It accepts an array of arguments and you can learn about these arguments by visiting the article in the codex:
https://developer.wordpress.org/reference/functions/get_the_post_navigation/
But currently, we are interested in only two of them, $prev_text and $next_text.
Go back to the single.php file and replace the following code:
<?php the_post_navigation(); ?>
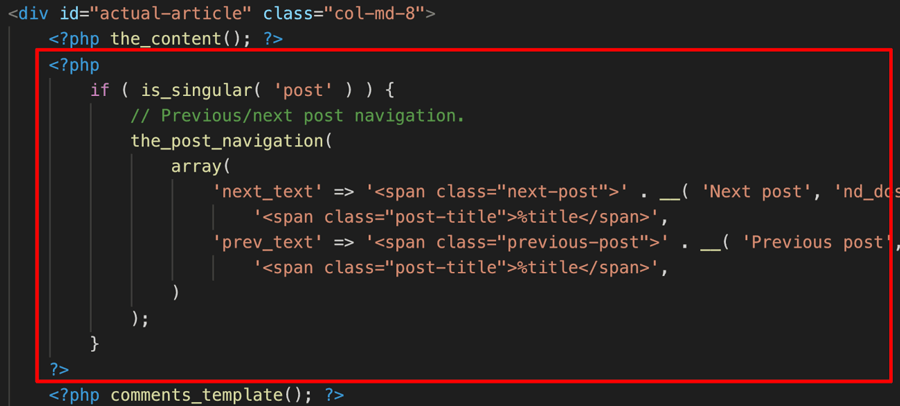
With:
<?php
    if ( is_singular( 'post' ) ) {
        // Previous/next post navigation.
        the_post_navigation(
            array(
                'next_text' => '<span class="next-post">' . __( 'Next post', 'nd_dosth' ) . '</span> ' .
                    '<span class="post-title">%title</span>',
                'prev_text' => '<span class="previous-post">' . __( 'Previous post', 'nd_dosth' ) . '</span> ' .
                    '<span class="post-title">%title</span>',
            )
        );
    }
?>
I shop-lifted this code from the default WordPress “twentysixteen” theme and modified it according to my needs.
WordPress could end up using the single.php file for rendering single posts of custom post types as well. But we want to output the post navigation only for blog posts.
So, first, we are checking whether the post type is “post” using the is_singular('post') conditional tag. If the single post belongs to the “post” type, then and then only we are outputting the post navigation.
And inside, we are outputting the post navigation by customizing the output of previous and next posts.
If you observe the above code, we are just concatenating some markup around the Title of the previous and next posts.
Except for the title, everything else is purely HTML markup.

For outputting title, we are using a dynamic placeholder called %title. WordPress will replace this dynamic placeholder with the actual titles of the next and previous posts.
The above code will be transformed to the following markup in the browser:
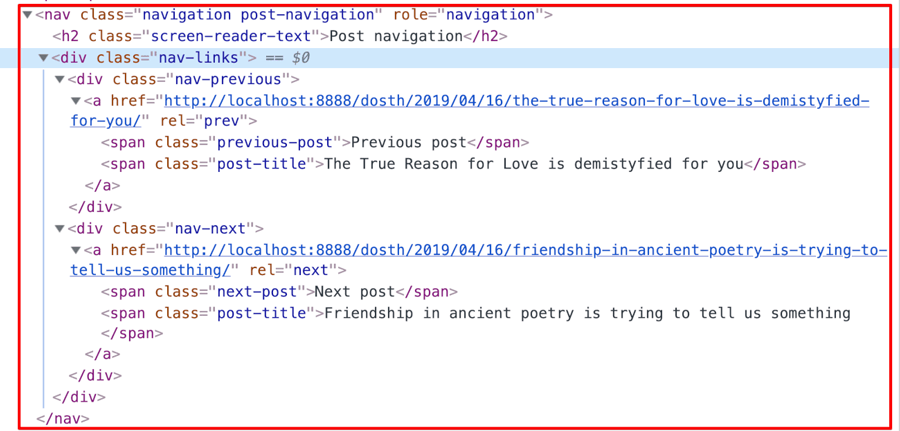
Pretty cool, Right?
WordPress does all the heavy lifting for us all the time.
You can style the above markup and make it look pretty like this:
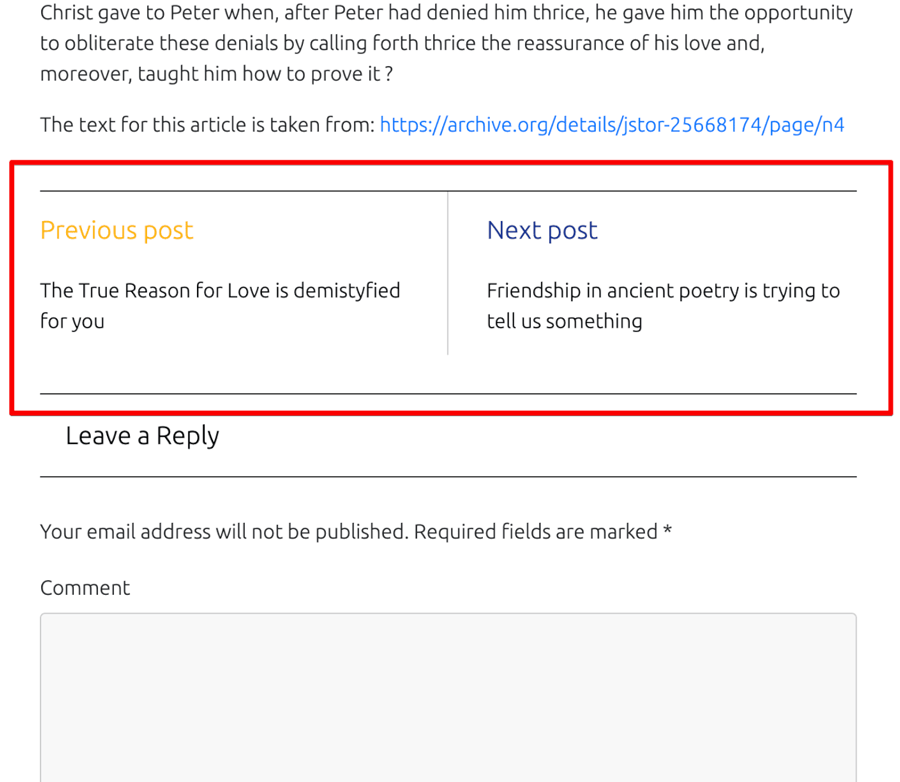
But, if you notice the mockup for the single blog post page, we are also outputting the thumbnails for previous and next articles:
And because of the way the_post_navigation() function works, there is no way we can output the thumbnails.
So, we can not use the_post_navigation() function anymore.
“So, how to achieve this?”
How to add post navigation for a blog post – the better way
The advantage of WordPress is, there are multiple ways to build a particular piece of data.
We don’t have to code anything by ourselves. All we have to do is use existing WordPress functions to achieve the desired outcome.
Introducing get_adjacent_post()
The get_adjacent_post() function is used to retrieve the adjacent post of the current single blog post. You can either retrieve a previous post or next post. But only one post at a time.
This function accepts four parameters.
get_adjacent_post( $in_same_term, $excluded_terms, $previous, $taxonomy );
All the above four parameters are optional. By default, this function returns the previous post of the current post even if you call this function without any parameters.
1) $in_same_term : ( boolean ): ( Default False ): As the parameter name suggests, if we provide True for this parameter, the function will pull the adjacent post which belongs to the same term as the current blog post.
In WordPress, a term would belong to one of the following taxonomies:
- Category
- Tag
- Or Custom Taxonomy like Book Genre
Also, If you specify true for this parameter, we should also specify the taxonomy as the last parameter. For example,
get_adjacent_post( true, '', false, 'tag' );
For example, If the current post is assigned to “Friendship” tag, in the above line of code, we are instructing get_adjacent_post() function to pull the next adjacent post which is assigned to “friendship” tag only.
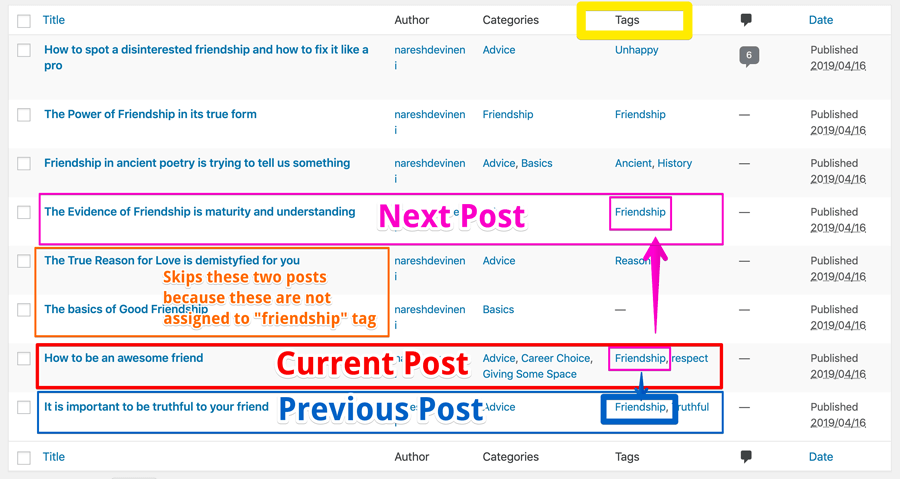
2) $exclude_terms : ( array or string ): As the parameter name suggests, using this parameter, you can skip the adjacent post which belongs to a particular term.
get_adjacent_post( 'true', 'respect', false, 'tag' );
For example, If the current post is assigned to “Friendship” tag, in the above line of code, we are instructing get_adjacent_post() function to pull the next adjacent post which is assigned to “friendship” tag. But, if the next adjacent post is assigned with ‘respect’ tag also, the post will be skipped even if it is assigned to the “friendship” tag.
3) $previous_post : ( boolean ): ( Default True ) If we set this parameter to False, this function will retrieve the next post of the current post. Otherwise, the previous post is retrieved.
You already know about the fourth parameter!
The get_adjacent_post() function returns a WP_Post object.
A WP_Post object contains all the information about a particular post. For example, Post title, Post ID and even the Post content.
object(WP_Post)#1217 (24) {
    ["ID"]=> int(633)
    ["post_author"]=> string(1) "1"
    ["post_date"]=> string(19) "2019-04-16 06:17:01"
    ["post_date_gmt"]=> string(19) "2019-04-16 06:17:01"
    ["post_content"]=> string(5250) "..."
}
Note: This is a standard PHP object. If you are not familiar with object-oriented concepts of PHP, you better learn it. Although it is not mandatory, it helps you master WordPress.
Anyway, always remember, If some WordPress function returns a WP_Post object, using this object, you can literally pull out and output any piece of information about a particular post.
“How?”
If you notice the above WP_Post object data, the first property in the object is the ID of the post. And, The most vital information we ever need about a particular post is its ID. There are a ton of WordPress functions which outputs specific pieces of information about a particular post when you provide them the ID of the post. So, it is powerful and we are about to experience the technique.
The Setup
First, open up the functions.php file and put the following definition at the end of the file:
/*
 * Outputs the post's thumbnail and title when ID of the post is provided
 */
function nd_dosth_output_post_thumb_and_title( $post_id ){ ?>
    <div class="post-info">
        <?php // Output Post's Thumbnail ?>
        <?php $page_thumb = wp_get_attachment_image_src( get_post_thumbnail_id( $post_id ), 'thumbnail' ); ?>
        <?php if( ! empty( $page_thumb[0] ) ) : ?>
            <a href="<?php echo get_the_permalink( $post_id ); ?>" class="post-thumb">
                <img src="<?php echo $page_thumb[0]; ?>" />
            </a>
        <?php endif; ?>
        <?php // Output Previous page Title ?>
        <a class="post-title" href="<?php echo get_the_permalink( $post_id ); ?>">
            <?php echo get_the_title( $post_id ); ?>
        </a>
    </div>
<?php }
Note: If you define a function inside the functions.php file, you can call it anywhere inside your theme’s template files.
Next, create a new file called post-navigation.php inside the parts directory of our theme.
nd-dosth/parts/post-navigation.php
Next, put the following code inside the post-navigation.php file.
<?php
    //Getting Next Adjacent Post
    $next_post      = get_adjacent_post( false, '', false, 'category' );

    //Getting Previous Adjacent Post
    $previous_post  = get_adjacent_post();
?>
<div class="next-previous-articles">
    <?php if ( ! empty( $previous_post ) ) : ?>
        <div class="previous-article">
            <h4><?php _e( 'Previous Article','nd_dosth' ); ?></h4>
            <?php nd_dosth_output_post_thumb_and_title( $previous_post->ID ) ?>
        </div>
    <?php endif; ?>
    <?php if ( ! empty( $next_post ) ) : ?>
        <div class="next-article">
            <h4><?php _e( 'Next Article','nd_dosth' ); ?></h4>
            <?php nd_dosth_output_post_thumb_and_title( $next_post->ID ) ?>
        </div>
    <?php endif; ?>
</div>
Next, replace the_post_navigation() code from the single.php file that we have added previously with the following line of code:
<?php get_template_part( 'parts/post', 'navigation' ); ?>
Here is the update code for single.php file:
<?php
/**
 * The template for displaying all single posts
 *
 * @link https://developer.wordpress.org/themes/basics/template-hierarchy/#single-post
 *
 * @package Dosth
 */
get_header();
?>
<div class="content-container">
    <?php while( have_posts() ): ?>
        <?php the_post(); ?>
        <?php if ( has_post_thumbnail() ) :
            $featured_image = wp_get_attachment_image_src( get_post_thumbnail_id( get_the_ID() ), 'full' ); ?>
            <div class="full-width-featured-image" style="background-image:url(<?php echo $featured_image[0]; ?>);">
                <h1><?php the_title(); ?></h1>
            </div>
        <?php endif; ?>
        <div class="container">
            <div class="row">
                <div class="article-info col-md-3">
                    <?php $categories = get_the_category(); ?>
                    <?php if ( ! empty( $categories ) ) : ?>
                        <div class="posted-in">
                            <h4><?php _e( 'Posted In', 'nd_dosth' ); ?></h4>
                            <?php the_category(); ?>
                        </div>
                    <?php endif; ?>
                    <div class="published-on">
                        <h4><?php _e( 'Published On', 'nd_dosth' ); ?></h4>
                        <?php the_date(); ?>
                    </div>
                    <div class="post-author">
                        <h4><?php _e( 'Author', 'nd_dosth' ); ?></h4>
                        <a class="author-archive" href="<?php echo esc_url( get_author_posts_url( get_the_author_meta( 'ID' ) ) ); ?>">
                            <?php the_author(); ?>
                        </a>
                        <?php echo get_avatar( get_the_author_meta('ID')  , 100 ); ?>
                    </div>
                </div>
                <div id="actual-article" class="col-md-8">
                    <?php the_content(); ?>
                    <?php get_template_part( 'parts/post', 'navigation' ); ?>
                    <?php comments_template(); ?>
                </div>
            </div>
        </div>
    <?php endwhile; ?>
</div>
<?php get_footer(); ?>
Here is the output of in the browser:
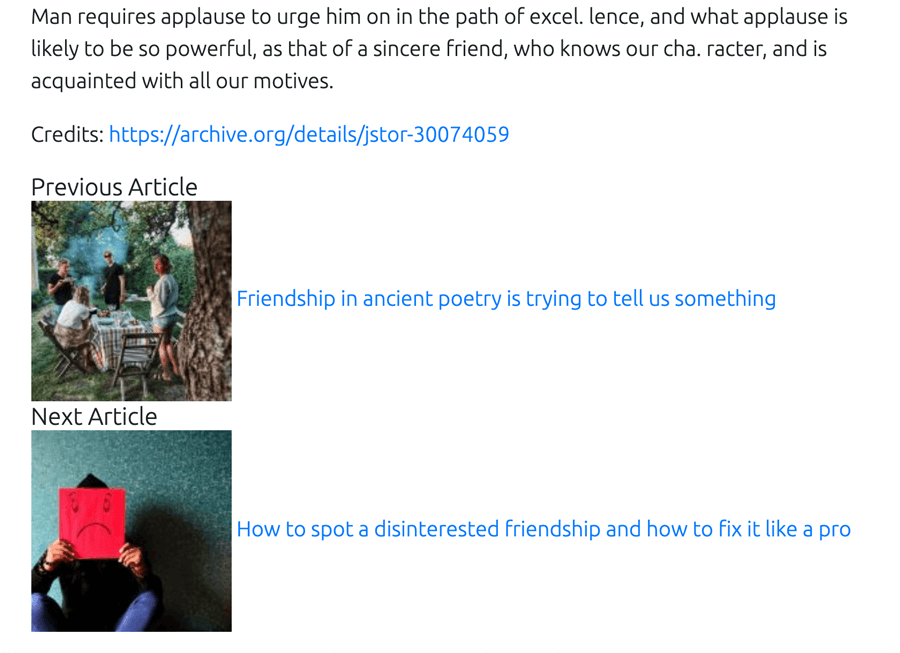
Let’s break it down
Don’t worry, nothing complex going on in the above code.
When WordPress starts processing the single.php file, after executing the_content() function, it comes across:
<?php get_template_part( 'parts/post', 'navigation' ); ?>
And starts processing the post-navigation.php template file located inside the nd-dosth/parts directory.
The post-navigation.php template file is responsible for outputting the next and previous posts section.
<?php
    //Getting Next Adjacent Post
    $next_post      = get_adjacent_post( false, '', false, 'category' );

    //Getting Previous Adjacent Post
    $previous_post  = get_adjacent_post();
?<
Inside this file, the first thing we are doing is getting the next adjacent post of the current post with the help of:
$next_post = get_adjacent_post( false, '', false, 'category' );
We are retrieving the next post irrespective of taxonomy based filter by setting the first parameter to false.
And, by setting the third parameter to false, we are instructing get_adjacent_post() function to return the next post instead of the previous post.
Then, we are getting the previous post with the help of:
$previous_post = get_adjacent_post();
We did not provide any parameters because this function returns the previous post by default.
<div class="next-previous-articles">
    <?php if ( ! empty( $previous_post ) ) : ?>
        <div class="previous-article">
            <h4><?php _e( 'Previous Article','nd_dosth' ); ?></h4>
            <?php nd_dosth_output_post_thumb_and_title( $previous_post->ID ); ?>
        </div>
    <?php endif; ?>
    <?php if ( ! empty( $next_post ) ) : ?>
        <div class="next-article">
            <h4><?php _e( 'Next Article','nd_dosth' ); ?></h4>
            <?php nd_dosth_output_post_thumb_and_title( $next_post->ID ); ?>
        </div>
    <?php endif; ?>
</div>
Next, If it is the first blog post of our site, the get_adjacent_post() function will not return any previous post, so, $previous_post variable will be empty.
So, We are checking for this situation and outputting the previous post based markup only if there is a previous post.
Finally, inside the IF condition, we are outputting the previous post’s thumbnail and title with the help of:
nd_dosth_output_post_thumb_and_title( $previous_post->ID );
This is a custom function we have created inside the functions.php file.
This function accepts a $post_id as the parameter and the only responsibility of this function is to output a particular blog post’s title and thumbnail based on the $post_id provided. And the code inside this function is nothing new to you all.
/*
 * Outputs the post's thumbnail and title when ID of the post is provided
 */
function nd_dosth_output_post_thumb_and_title( $post_id ){ ?>
    <div class="post-info">
        <?php // Output Post's Thumbnail ?>
        <?php $page_thumb = wp_get_attachment_image_src( get_post_thumbnail_id( $post_id ), 'thumbnail' ); ?>
        <?php if( ! empty( $page_thumb[0] ) ) : ?>
            <a href="<?php echo get_the_permalink( $post_id ); ?>" class="post-thumb">
                <img src="<?php echo $page_thumb[0]; ?>" />
            </a>
        <?php endif; ?>
        <?php // Output Previous page Title ?>
        <a class="post-title" href="<?php echo get_the_permalink( $post_id ); ?>">
            <?php echo get_the_title( $post_id ); ?>
        </a>
    </div>
<?php }
If we observe the code of this function, this function is using the ID of a blog post to output its title and thumb.
Since we are interested in outputting the previous post’s thumbnail and title, we have provided the ID of the previous post for this function, like this:
nd_dosth_output_post_thumb_and_title( $previous_post->ID );
Remember? in this lesson, I have said that get_adjacent_post() function returns a WP_Post object.
Because $previous_post variable now holds the WP_Post object of the previous post, we are accessing the ID like this:
$previous_post->ID
If you want to access the previous post’s title, all you have to do is access the
$previous_post->post_title
Anyway, that’s pretty much how we are outputting the Previous Post’s thumbnail and title.
Next, we are doing the same for the Next post as well. Only this time, we are providing the ID of the next post, like this:
nd_dosth_output_post_thumb_and_title( $next_post->ID );
Easy enough?
The key takeaway here is if you define a function inside the functions.php file, you can call it anywhere inside your theme’s template files.
Let’s style it
Go ahead and put the following CSS at the end of the style.css file:
#respond #reply-title{
    margin-top:0;
}
.single #actual-article{
    /* Issue fix */
    padding-left:15px;
    padding-right:15px;
}
/*-------------------------------------------------------------------------------
  18.Post Navigation Styling
-------------------------------------------------------------------------------*/
.next-previous-articles{
    overflow: hidden;
    border-top:1px solid #000;
    margin-top:40px;
}
.next-previous-articles > div{
    width:50%;
    float:left;
    padding-top:15px;
    padding-bottom:25px;
}
.previous-article, .next-article{
    display:block;
    font-size:20px;
}
.previous-article{
    color: #fdb813;
}
.next-article{
    color: #1a3794;
}
.previous-article{
    padding-right:15px;
    border-right:1px solid #ccc;
}
.next-article{
    padding-left:15px;
}
.next-previous-articles a{
    display:block;
}
.next-previous-articles .post-thumb{
    width:75px;
    float:left;
}
.next-previous-articles .post-title{
    font-size:16px;
    margin-left:95px;
    margin-top:15px;
    color:black;
}
@media only screen and (max-width:767px){
    .next-previous-articles > div{
        width:100%;
    }
    .previous-article{
        padding-left:15px;
        border-right:0;
    }
}
And here is the style output of the post navigation in the browser:
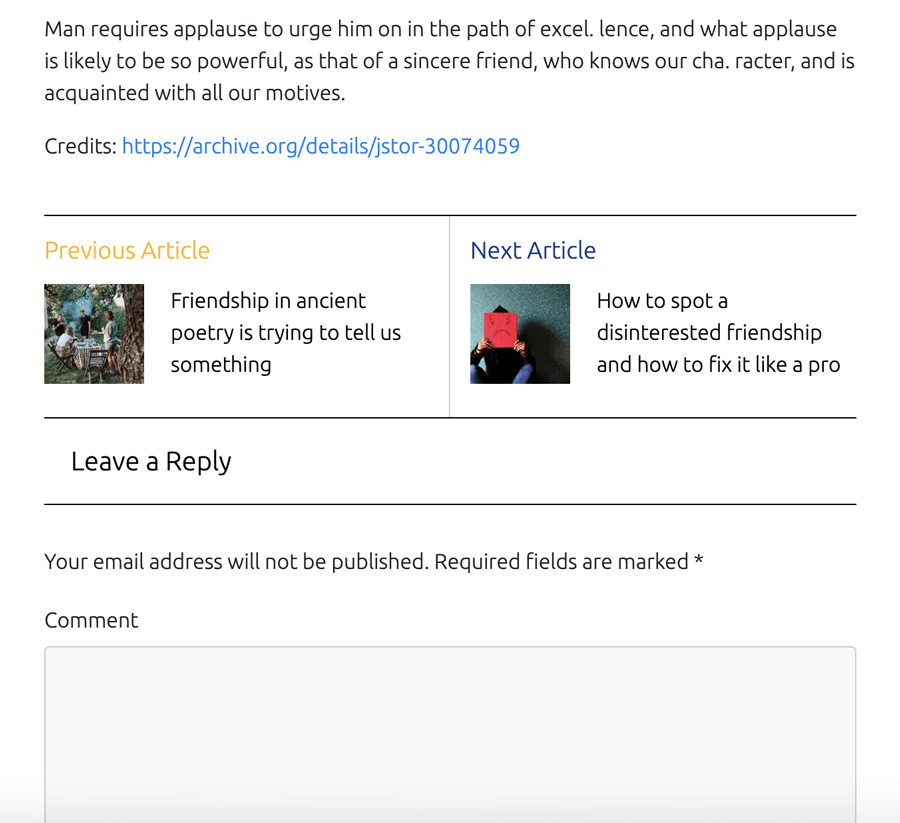
And that’s it. Although I have missed a few things here and there, this is pretty much how you build template files for the WordPress blog.
In other words, we are done with the blog!
Exercises for the blog
Now that we are done with the blog (well almost!), here a few exercises I want you to do!
Build the author bio section for the single blog post page
I did not take care of Author Bio for the Single Blog Post page and you already know how to achieve this. So build the Author Bio section by doing some research.
Create and use a custom template for a blog post
Just like pages, we can also assign a custom template for a particular blog post.
Also, our current single post page doesn’t have a sidebar. So design a custom template that contains a sidebar and assign it to a blog post.
Here is the tip:
<?php
/*
* Template Name: Article with Sidebar
* Template Post Type: post
*/
?>
Peek into the twenty**** default themes of WordPress
So, as I have said before, you can learn a lot of stuff from the default themes. Especially the code organization and the proper usage of the get_template_part() function
Try supporting post formats
Post formats are a feature of WordPress which allows us to choose the format of the post.
Research about the post formats by visiting this link in the codex:
https://codex.wordpress.org/Post_Formats
And, try implementing them inside your theme.
Take control over the comments list markup
At some point, for some project, you will definitely have to customize the markup of the comments list inside the single blog post page.
But to do so, we have to provide a callback function to the wp_list_comments() function.
wp_list_comments( array( 'callback' => 'nd_dosth_comment') );
And inside this callback function, you have to write markup for the individual comment.
You have to define this callback function inside functions.php file, like this:
<?php //careful with this opening PHP tag
/**
 * Template for comments and pingbacks.
 *
 * To override this walker in a child theme without modifying the comments template
 * simply create your own nd_dosth_comment(), and that function will be used instead.
 *
 * Used as a callback by wp_list_comments() for displaying the comments.
 * @author: Twenty Twelve, default wordpress theme
 * @access public
 * @since 1.0.0
 */
function nd_dosth_comment( $comment, $args, $depth ) {
    $GLOBALS['comment'] = $comment;
    switch ( $comment->comment_type ) :
        case 'pingback' :
        case 'trackback' :
        // Display trackbacks differently than normal comments.
    ?>
    <li <?php comment_class(); ?> id="comment-<?php comment_ID(); ?>">
        <p><?php _e( 'Pingback:', 'nd_dosth' ); ?> <?php comment_author_link(); ?> <?php edit_comment_link( __( '(Edit)', 'nd_dosth' ), '<span class="edit-link">', '</span>' ); ?></p>
    <?php
            break;
        default :
        // Proceed with normal comments.
        global $post;
    ?>
    <li <?php comment_class(); ?> id="li-comment-<?php comment_ID(); ?>">
        <div class="comment-wrap">
            <div class="comment-avatar">
                <?php echo get_avatar( $comment, 75 ); ?>
            </div>
            <div class="comment-body">
                <div class="comment-author-wrap vcard">
                    <div class="comment-author" itemprop="creator">
                        <?php
                            $author = get_comment_author_link();
                            echo $author;
                        ?>
                    </div>
                    <time class="comment-time">
                        <?php
                            printf( '<a href="%1$s"><time datetime="%2$s">%3$s</time></a>',
                                esc_url( get_comment_link( $comment->comment_ID ) ),
                                get_comment_time( 'c' ),
                                /* translators: 1: date, 2: time */
                                sprintf( __( '%1$s at %2$s', 'nd_dosth' ), get_comment_date(), get_comment_time() )
                            );
                        ?>
                    </time>
                </div>
                <!-- end of comment author wrap -->
                <div class="comment-content" itemprop="commentText" itemprop="commentText">
                        <?php if ( '0' == $comment->comment_approved ) : ?>
                            <p class="comment-awaiting-moderation"><?php _e( 'Your comment is awaiting moderation.', 'nd_dosth' ); ?></p>
                        <?php endif; ?>
                        <p><?php comment_text(); ?></p>
                        <div class="reply">
                            <?php comment_reply_link( array_merge( $args, array( 'reply_text' => __( 'Reply', 'nd_dosth' ), 'after' => '', 'depth' => $depth, 'max_depth' => $args['max_depth'] ) ) ); ?>
                        </div>
                        <!-- .reply -->
                </div>
                 <!-- end of comment comment content -->
            </div>
            <!-- end of comment body -->
        </div>
    <?php
        break;
    endswitch; // end comment_type check
}
I copied this code from the twentytwelve default theme and adjusted it according to my needs and the best thing is, although this is an age-old code, it still works great.
If you are feeling more adventurous, peek into the twentynineteen default theme and try make it work for your needs!
That’s it for this part.
In the next part, we will start playing around with custom queries and other not-yet-discussed template files related to search and 404 pages.


 © 2026 UsableWP. A project by Naresh Devineni.