If you’re in a hurry, start reading from here.
If you’re taking care of your WordPress website seriously, you’ll end up doing the following activities regularly:
And if you notice, all these activities update your site’s database because:
There is so much happening inside your database. It is the heart of your website.
In most cases, the above-mentioned activities are safe to perform.
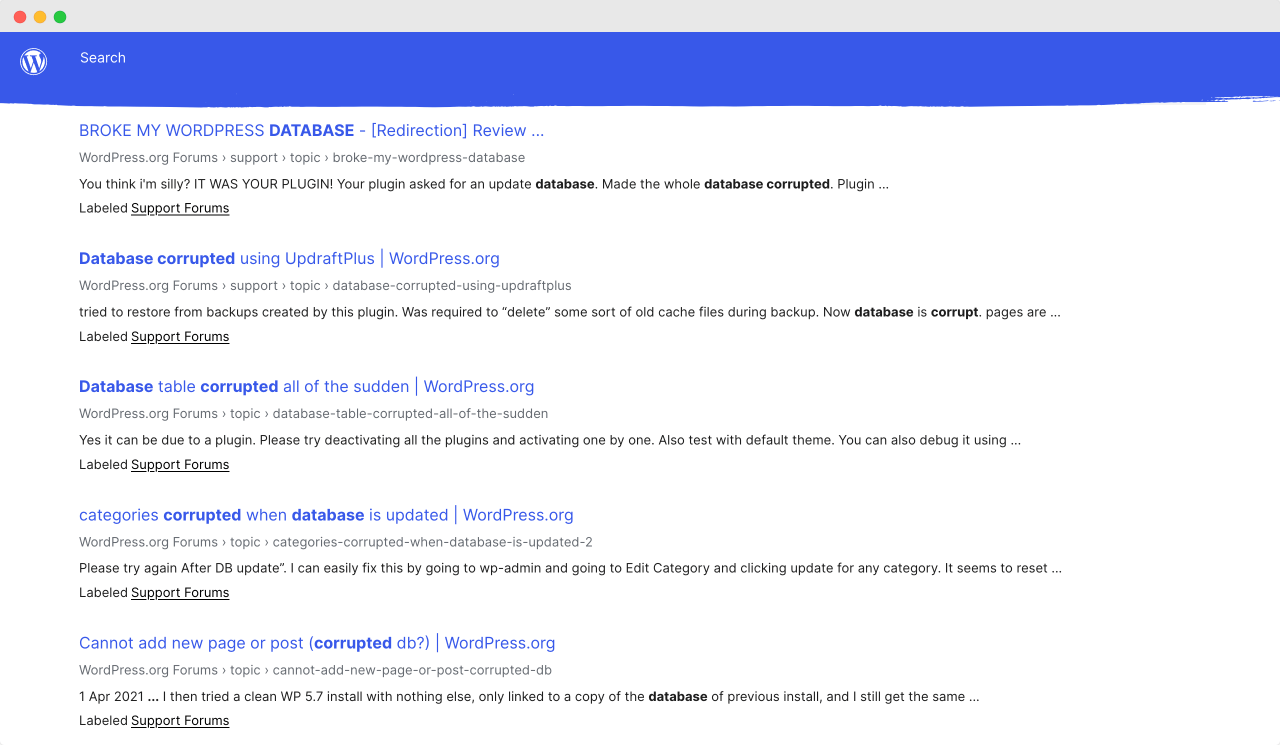
But sometimes, things could go terribly wrong.
For example:
Actually, there are a thousand ways to ruin your WordPress website:
And god forbid when things do go wrong, praying that someone will fix the mess up is not the solution. It could easily get expensive.
A client ended up paying me $800 to fix his site’s database, which had been accidentally replaced with outdated staging site content.
There is no point in touching leaves after burning your hands.

You must take precautions not to burn your hands in the first place.
You must back up your WordPress Database before things go wrong.
But don’t worry. It is only a two-step activity:
This will help you easily restore your site’s settings and content when something goes wrong.
High-quality Hosting services like WPEngine, Rocket.Net, Kinsta, etc. will automatically back up your entire website daily, including the Database.
You don’t have to configure anything here.
If something goes wrong, contact your web host’s support team, and they will help you fix the database problem.
Please remember that these automatic backups are taken at a certain point in time daily, such as 7 a.m.
So, if you perform the database operation before the daily backup time, you could lose the data.
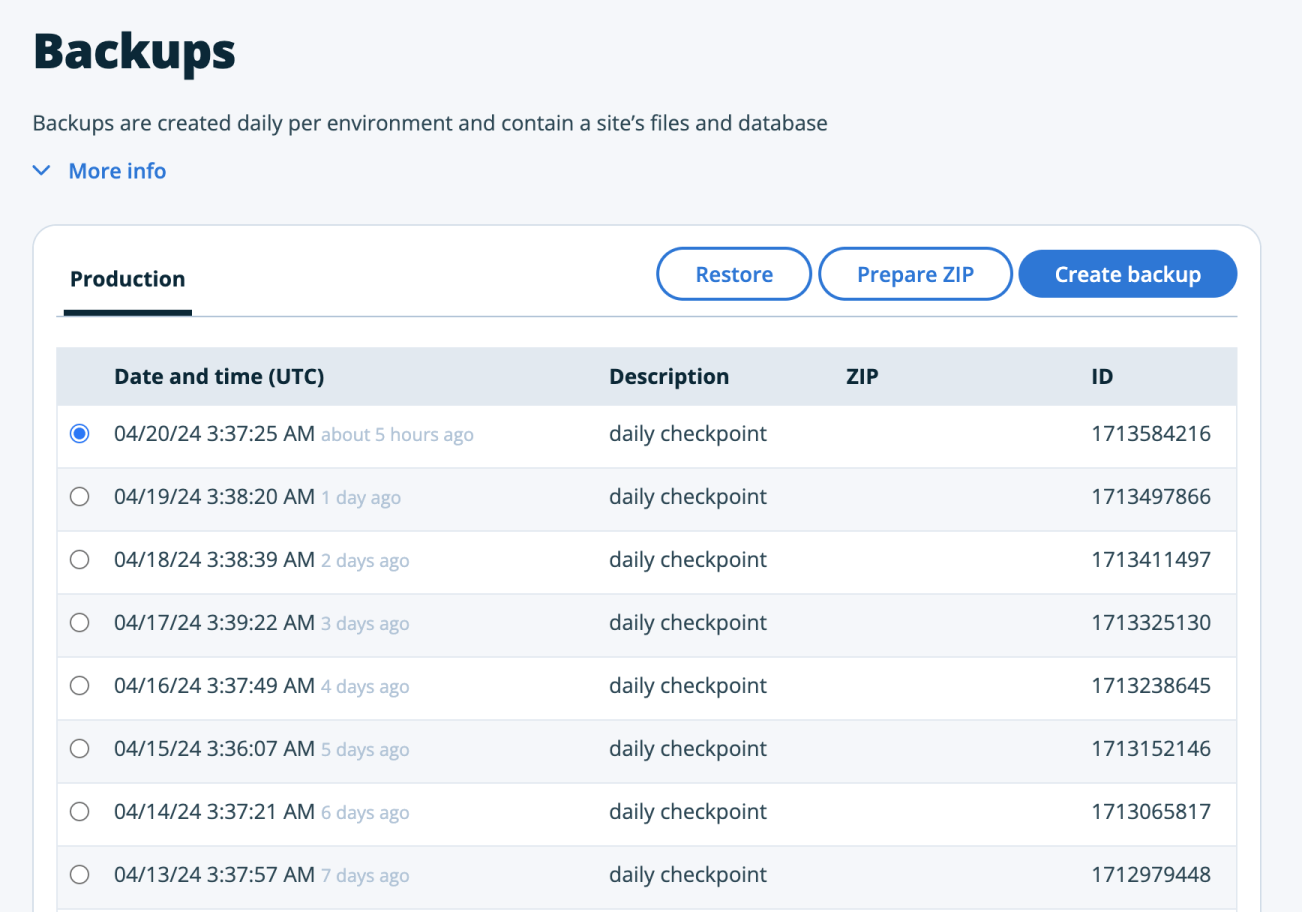
But don’t worry, these hosting services will also allow you to take an on-demand backup anytime you want:

This is why I recommend using your high-quality hosting service for your website and database backups.
However, for some reason, if your hosting service doesn’t provide reliable backups and you can’t afford to move to a different hosting service, then this next approach is just for you…
There are two popular database backup plugins: Duplicator and Updraftplus.
You can go with either of them.
According to my experience, the Duplicator plugin is the most reliable.
First, install the Updraft Plus plugin if it has not already been installed.
If you don’t know how to install a plugin, read the following article: How to add a plugin in WordPress: 3 reliable ways.
Anyway, to install the plugin, go to:
WordPress Admin Dashboard -> Plugins -> Add NewNext, search for “updraft plus” inside the plugin search box:
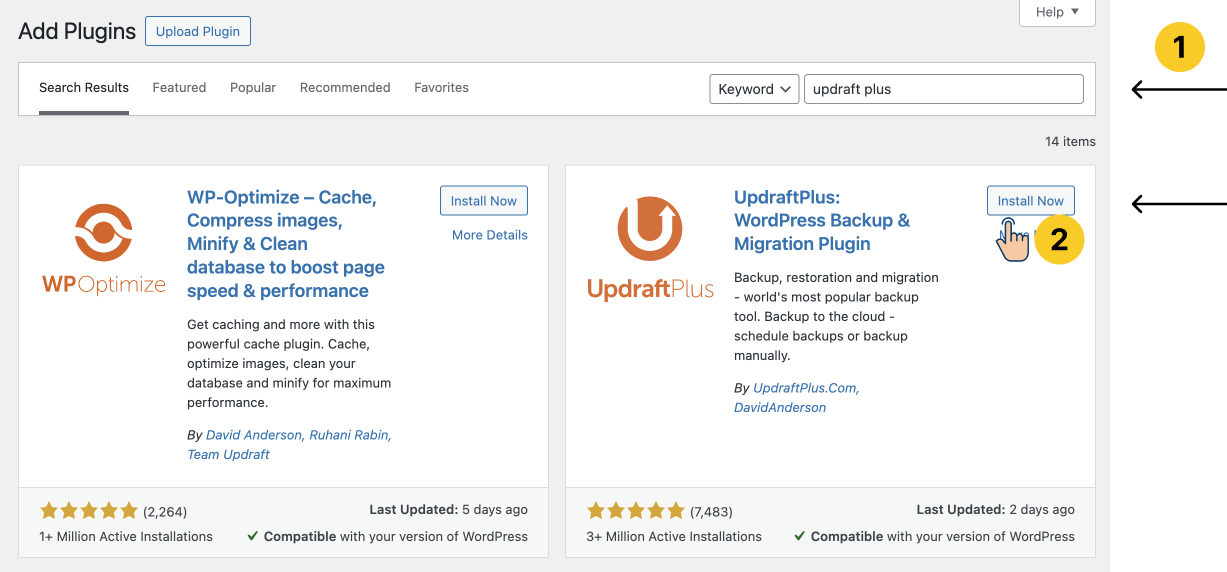
Once you find the plugin, install and activate it.
Once the activation is done, from the admin menu on the left, go to:
Settings -> Updraftplus Backups 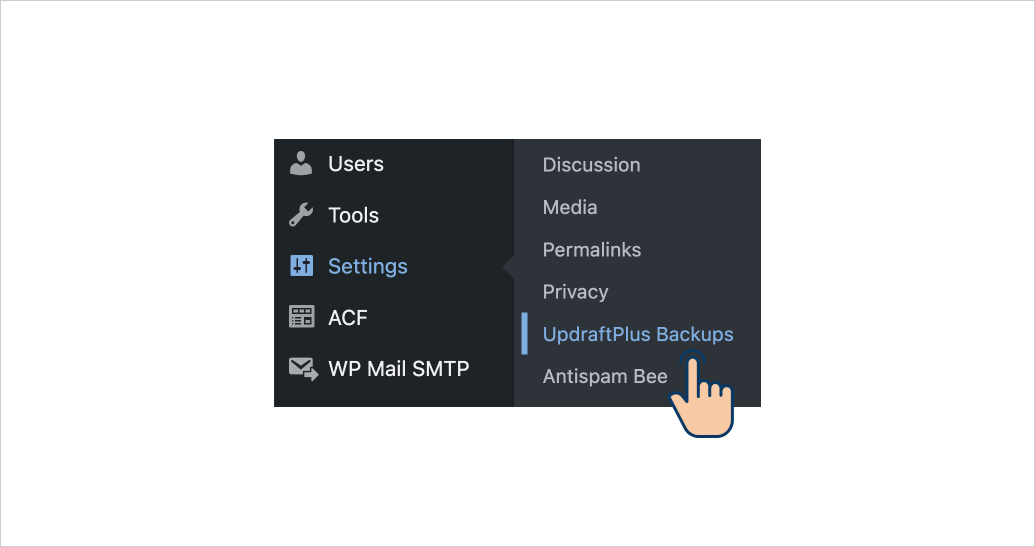
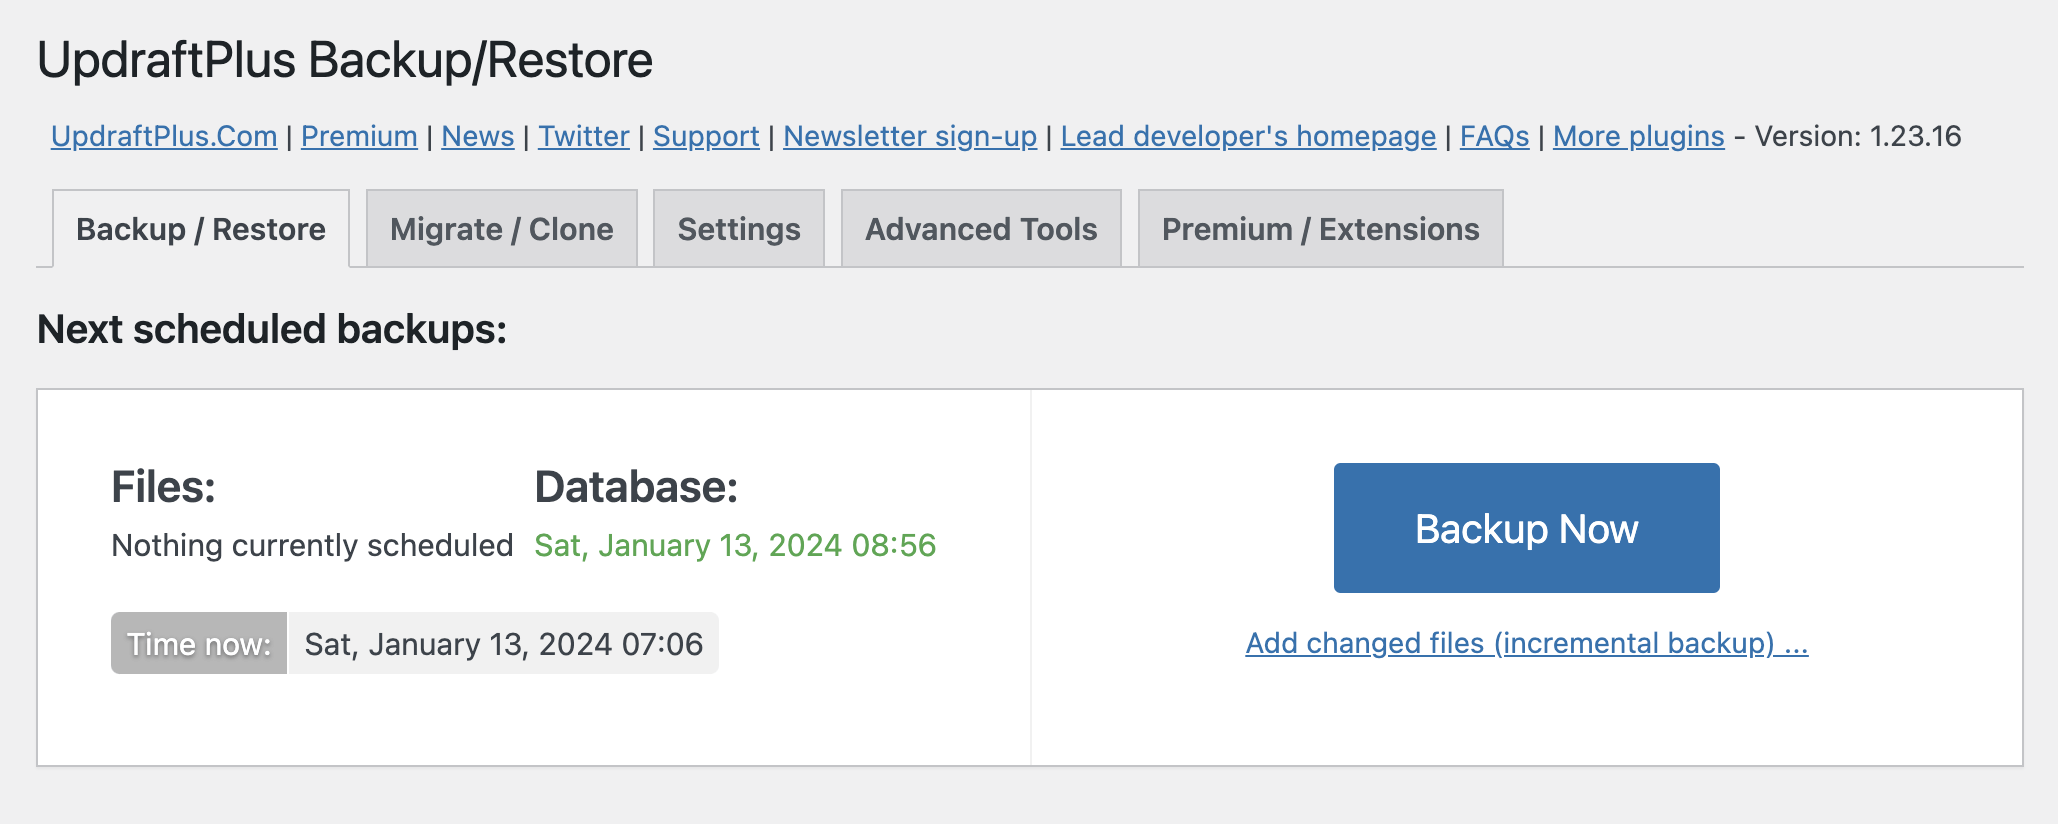
Next, make sure you are on the “Backup / Restore” tab and click on the “Backup Now” button:

This will bring up a popup with backup options:
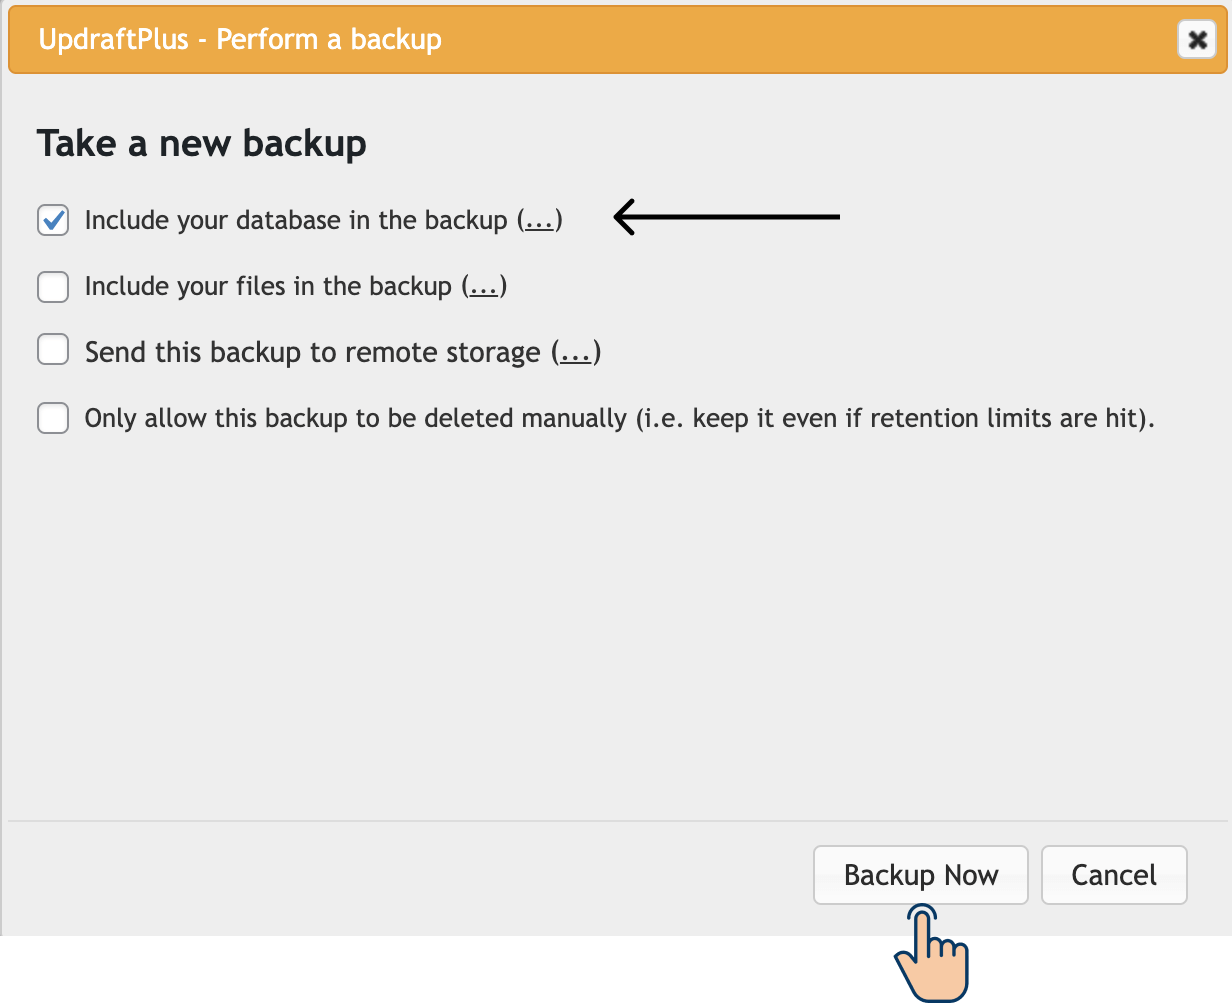
As you can see, you can back up the entire website and its database using the Updraft Plus plugin. Not just the database.
But for the purposes of this lesson, make sure to check the “Include your database in the backup” option and then click on the “Backup Now” button.
That’s all.
You will now have your database backed up in no time.
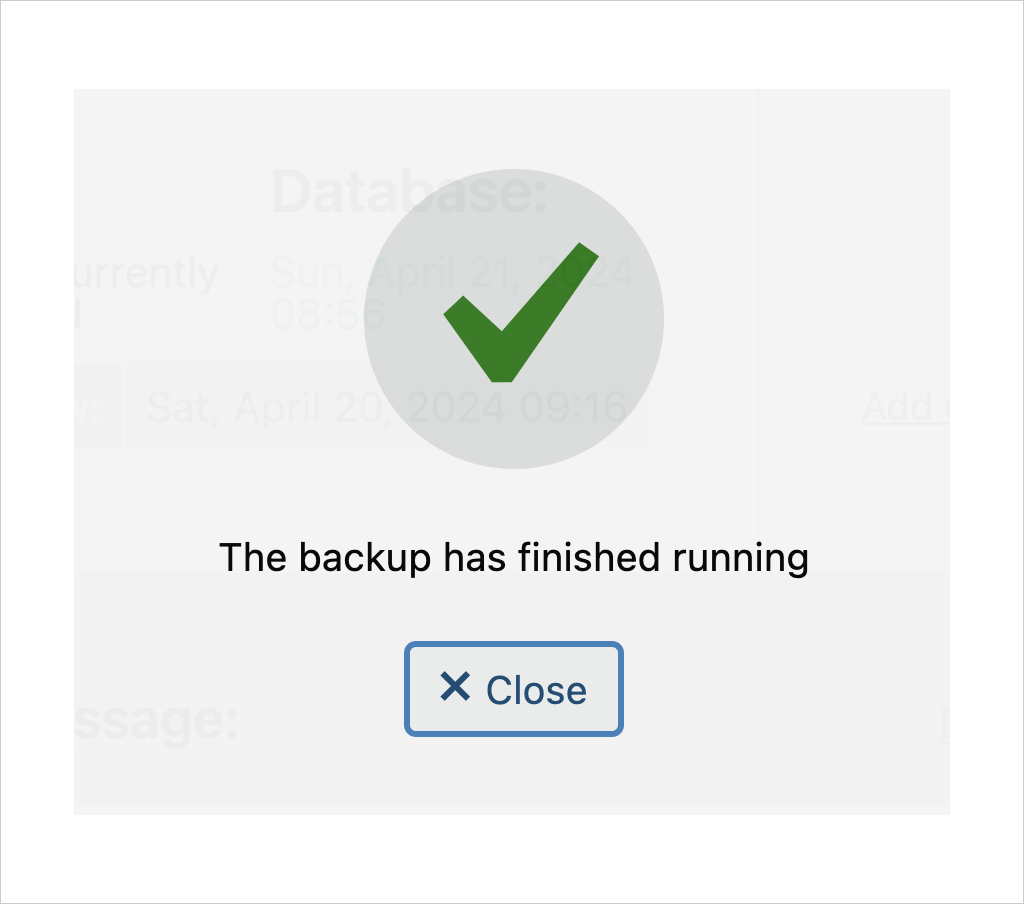
Once the backup is ready, the Updraft Plus plugin will display a success pop-up:
You can find this backup by scrolling a bit down on the same page once the popup is closed:
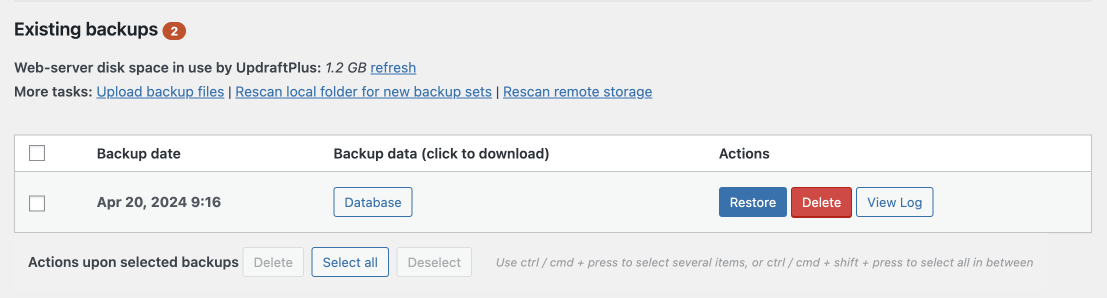
As you can see, if something goes wrong when you try to update your site, you can easily click on the “Restore” button to restore things to normal.
Note: If you’re running a WooCommerce site, please avoid restoring things on the live site. Doing so could cause you to lose valuable sales and order data.
Having said all this, if you can’t get things to work with Updraft Plus, try the Duplicator plugin to back up your database or the entire site.
First, install the Duplicator plugin if it has not already been installed.
If you don’t know how to install a plugin, read the following article: How to add a plugin in WordPress: 3 reliable ways.
Anyway, to install the plugin, go to:
WordPress Admin Dashboard -> Plugins -> Add NewNext, search for “Duplicator” inside the plugin search box:
Once you find the plugin, install and activate it.
Once the activation is done, click on the “Duplicator” menu item that is located at the end of the admin menu on the left:
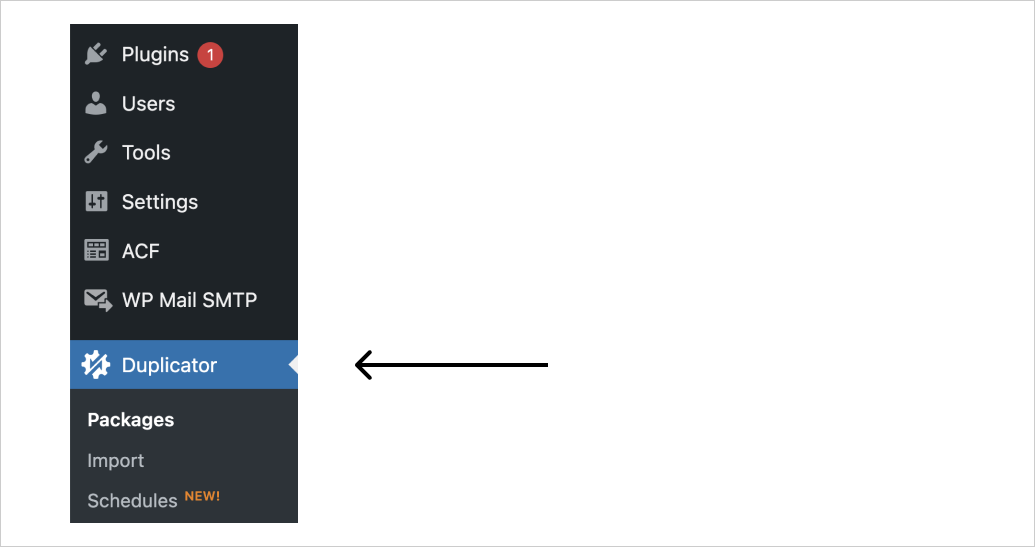
You’ll now be taken to the “Packages” screen.
To create a database backup, we must create a new package.
So, click on the “Create New” button located on the top-right corner of the screen:
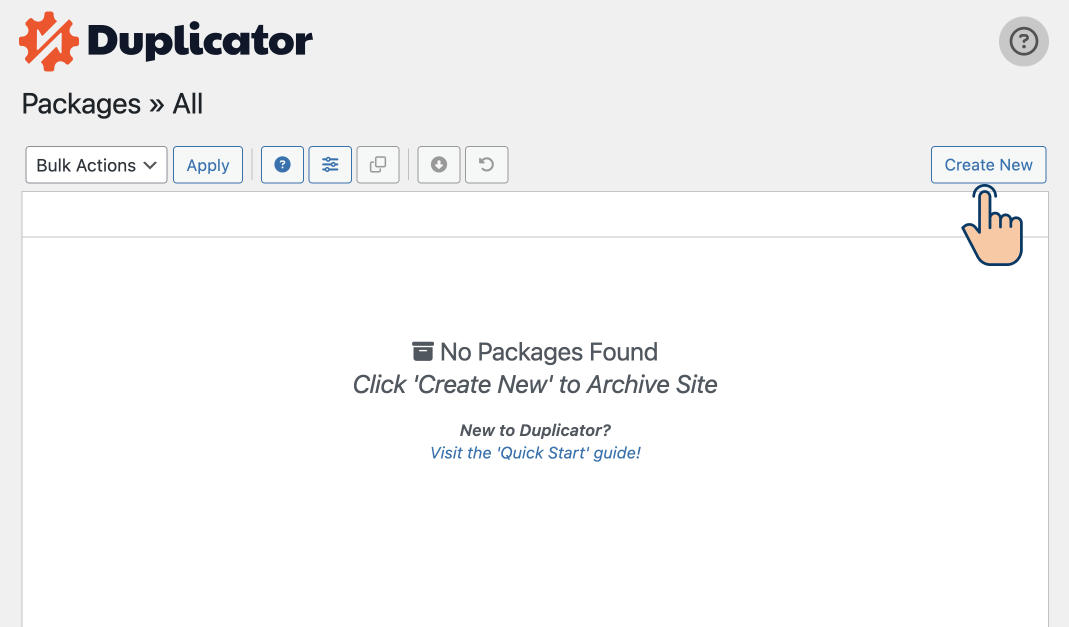
Next, we will be taken to the “New Package” screen:
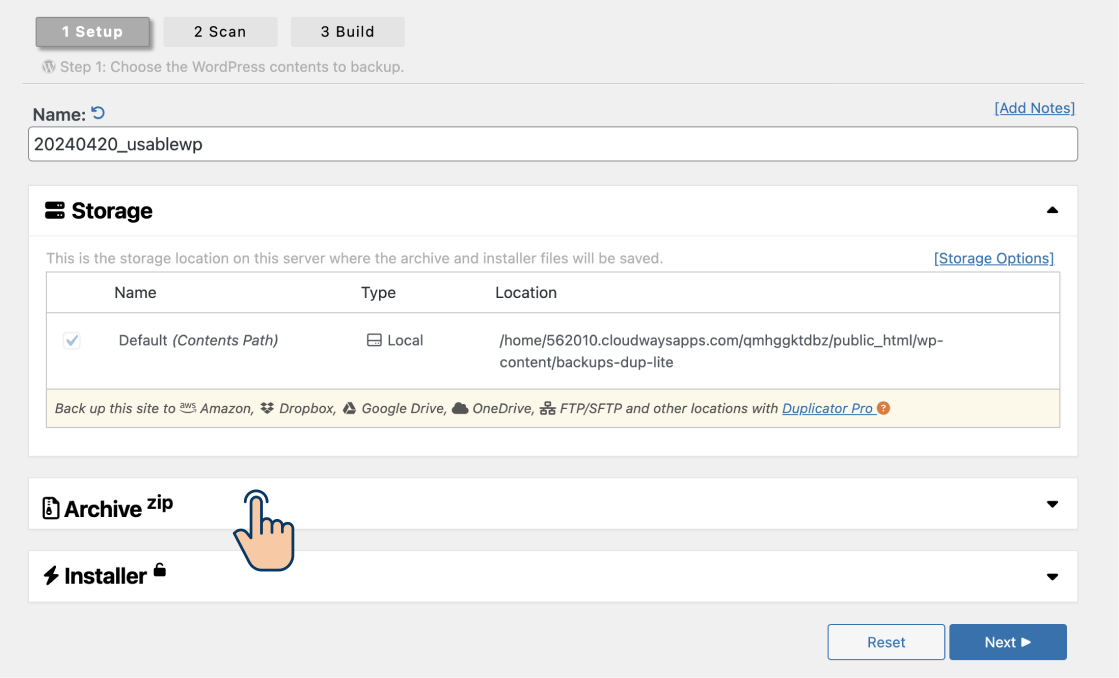
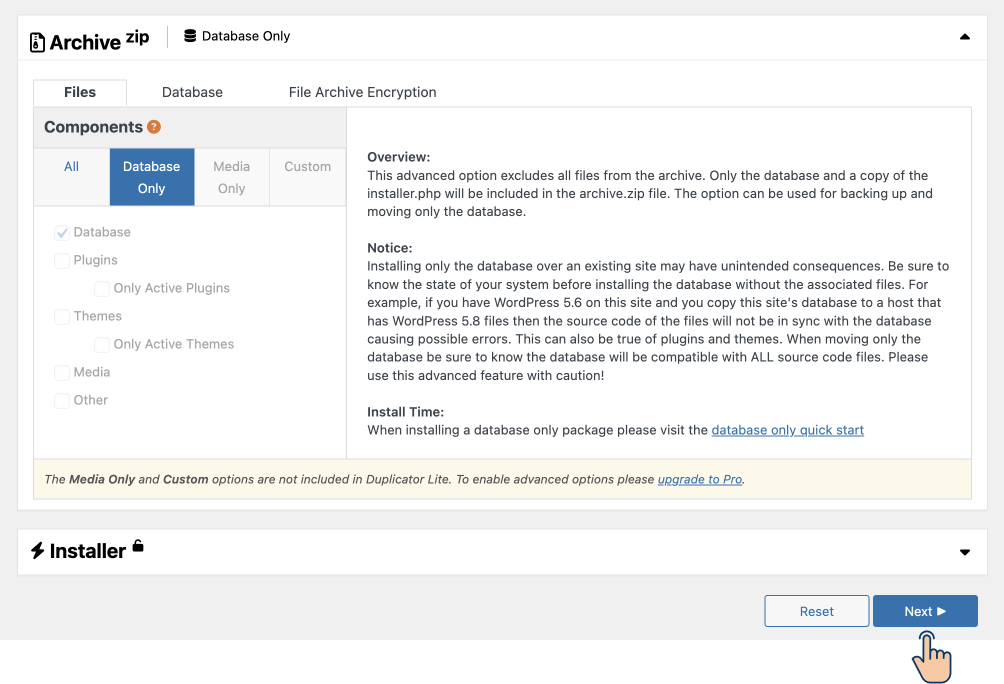
And if you notice, there is an “Archive Zip” accordion panel.
Click on it to open up its options.

The “All” option is selected by default. This means the Duplicator plugin will back up the entire website, not just the database.
If you want to back up the entire website, by all means, keep the “All” option selected as is and click on the “Next” button.
For the purposes of this lesson, I am only interested in backing up the database, So I will select the “Database only” option and click on the “Next” button:
The Duplicator plugin will now scan the website so that it can get the size of the database:

Currently, the size of my site’s database is 144 MB. Your database size could be different.
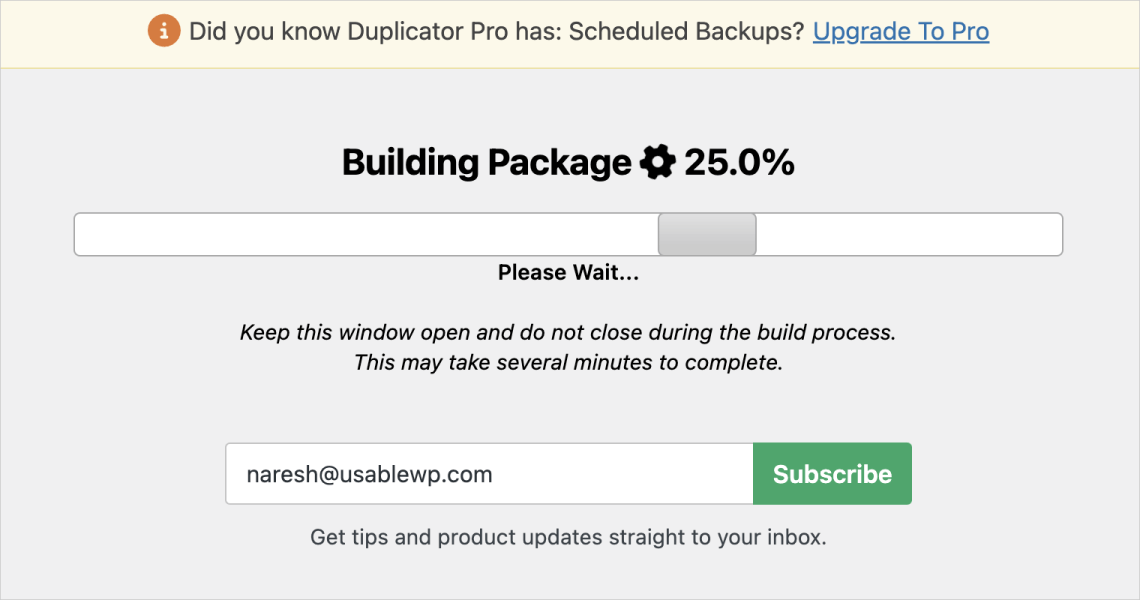
Finally, click on the “Build” button to create the backup of the database.
The plugin will now take some time to build the database backup:
Once the package creation is complete, Duplicator will show a “Package Build Completed” message along with buttons to download the backup.
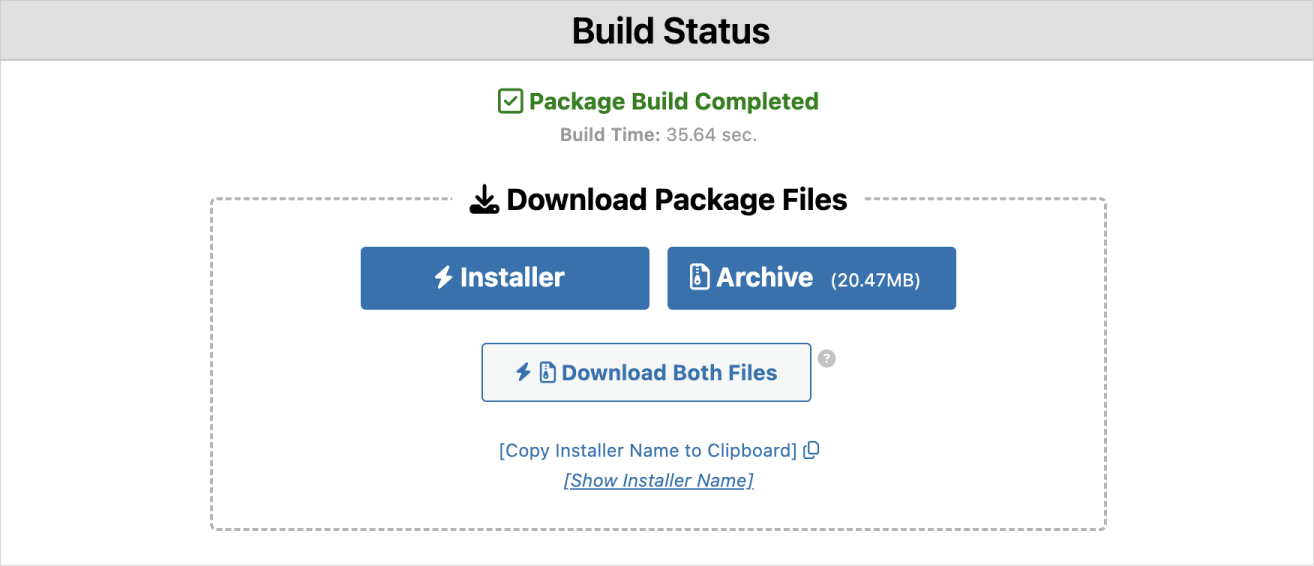
Make sure to download both the “Installer.php” file and the database archive by clicking on the “Download both files” button.
Put them somewhere safe just in case you have to use them to restore the database when needed.
That’s all.
That’s exactly how you can back up the WordPress database using a plugin.
“Hey! Duplicator is saying that my database is too large to take a backup. What’s happening?”
I am sorry to hear. Duplicator’s free version is generous but comes with few restrictions in terms of the size of the backup.
In most cases, whether it’s a full site backup or a database-only backup if the backup size exceeds 500 MB, Duplicator will ask you to purchase its premium plugin.
“Got it. Do you think the premium version is worth it?”
Yep, absolutely.
Most of my client sites are large, and I own Duplicator Pro. Very helpful premium plugin.
Having said all this, if you can’t get things to work with Updraft Plus or the Duplicator plugin, the next best way to back up the database is to use cPanel and phpMyAdmin.
That is what we will explore next.
Most hosting services will allow you to manage your site’s database using phpMyAdmin software.
phpMyAdmin comes pre-installed on most hosting cPanels, and you can use it to:
Anyway, in the world of phpMyAdmin, exporting the database means downloading it for backup or migration purposes.
Come on, let’s see how to export the database in three easy steps.
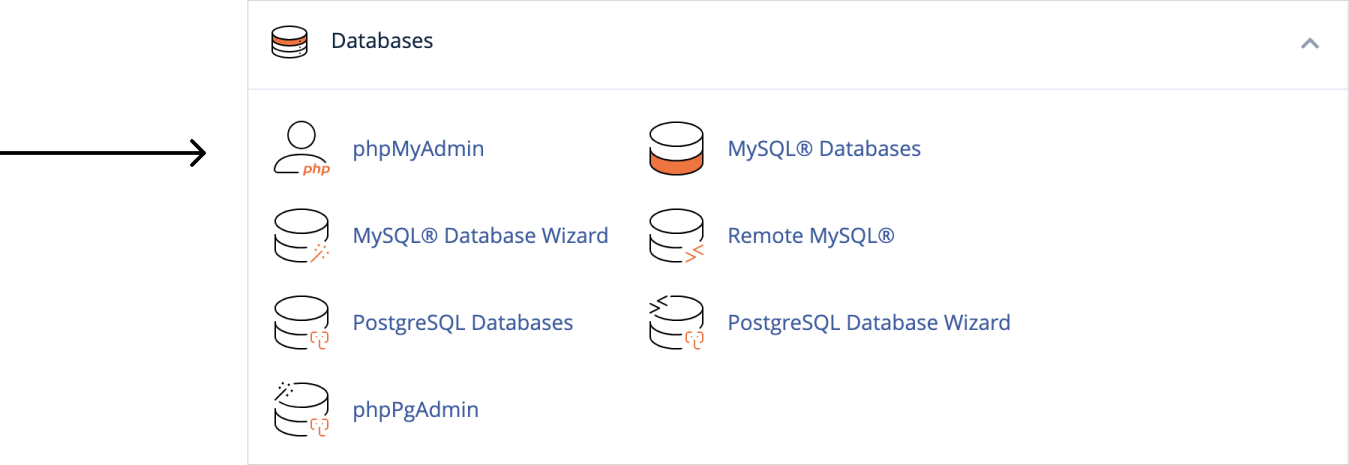
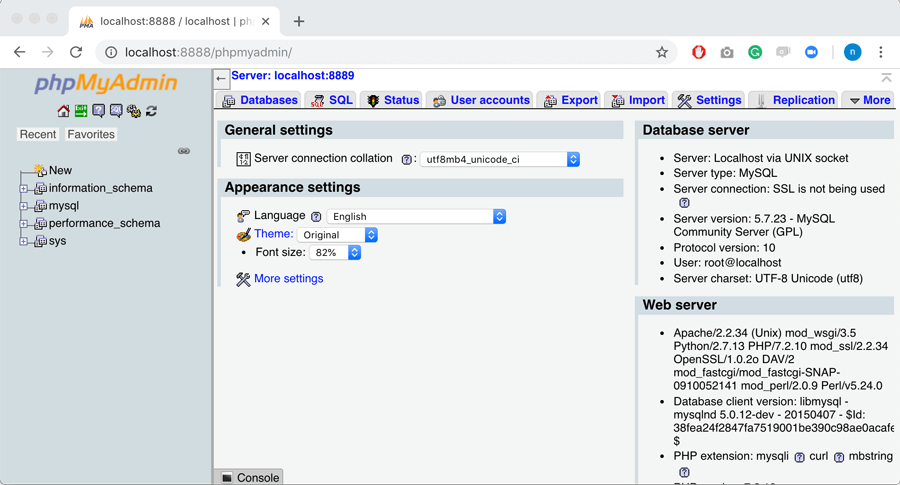
I have found it for my hosting service, clicked it and as a result, I got redirected to the phpMyAdmin’s web interface:

To achieve this, first, click on the “Databases” menu item from the phpMyAdmin’s primary menu.
Next, inside the “Databases” screen, you generally see two databases if you have only one website installed on your web server.
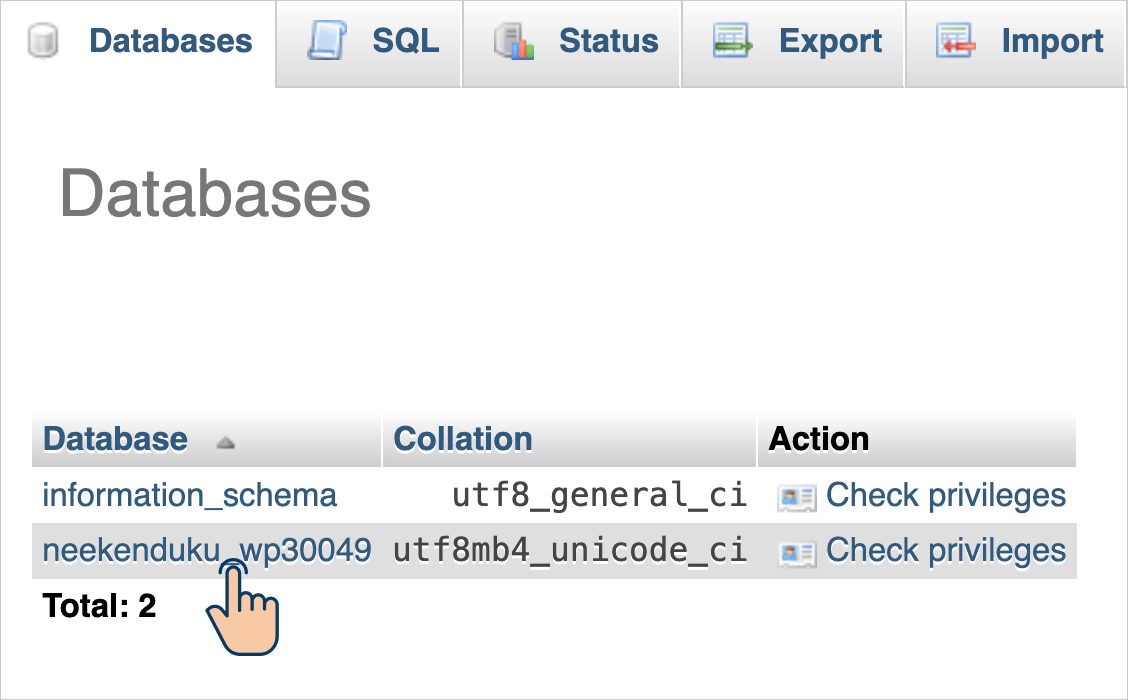
The first database you’ll see is “information_schema”, and it can be safely ignored as it represents the default database for any phpMyAdmin installation.
The second database listed is specific to your website.
For example, in the screenshot provided, apart from the “information_schema” database, you’ll notice another database labelled “neekenduku_wp30049,” representing the database dedicated to my website.
Don’t worry if you have multiple sites installed on your hosting service and multiple databases to select from on the “Databases” screen of phpMyAdmin.
You can confirm the required site’s database name by either contacting your web host or by accessing the site’s wp-config.php file.
The wp-config.php is one of the core files of your WordPress installation.
It contains information about the database, such as the name, username, and password.
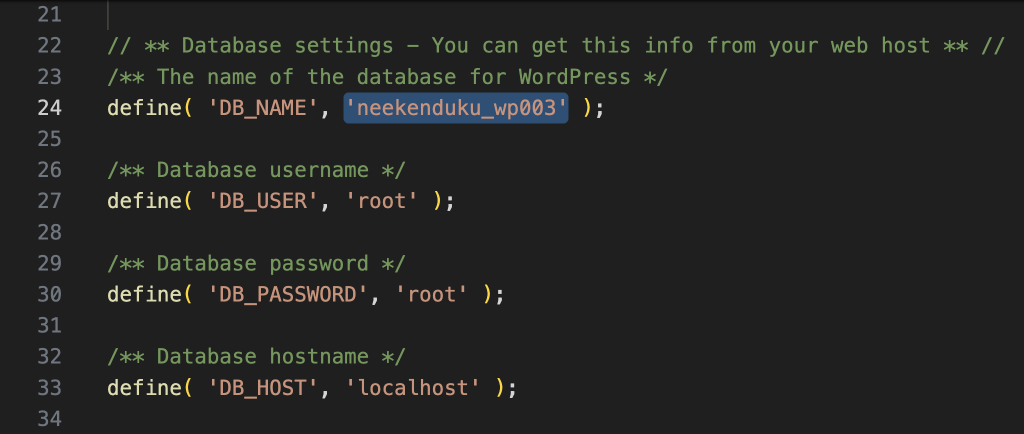
In our case, we are only interested in the site’s database name, right?
So, look for the “DB_NAME” variable inside the wp-config.php file, and you’ll find your database name.
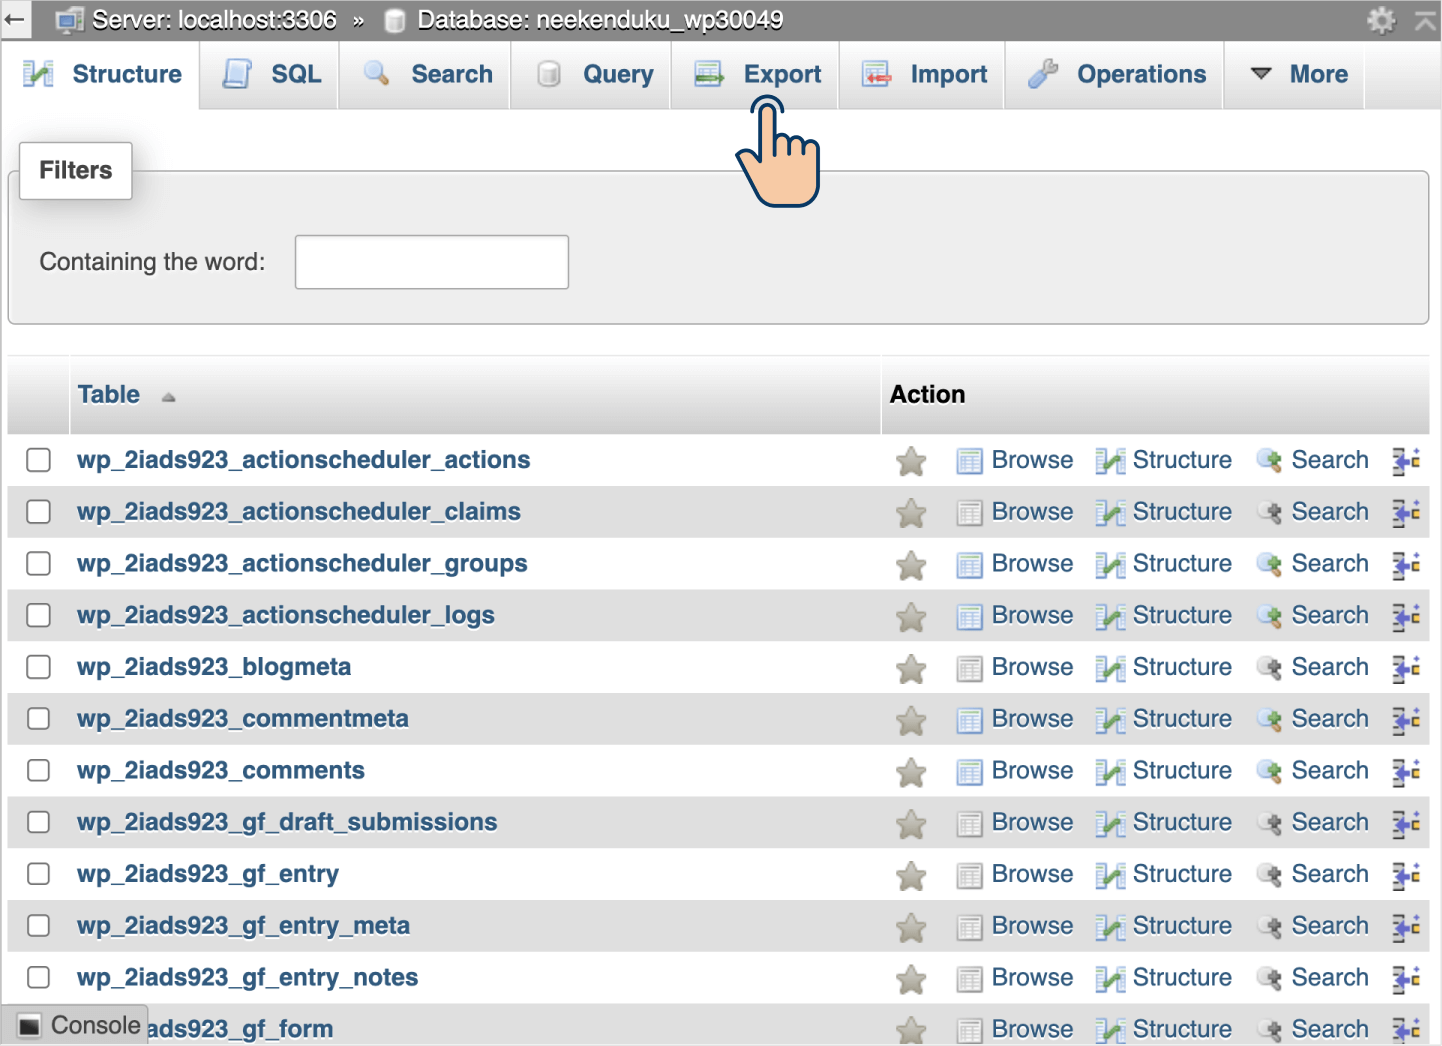
After finding your site’s database name, return to phpMyAdmin’s “Databases” screen and click on your database name to see its content tables and other important options, such as Export, Import, Search, etc.
Once you open your site’s database on phpMyAdmin, you’ll find the “Export” button:
Click on it to see the database export options:
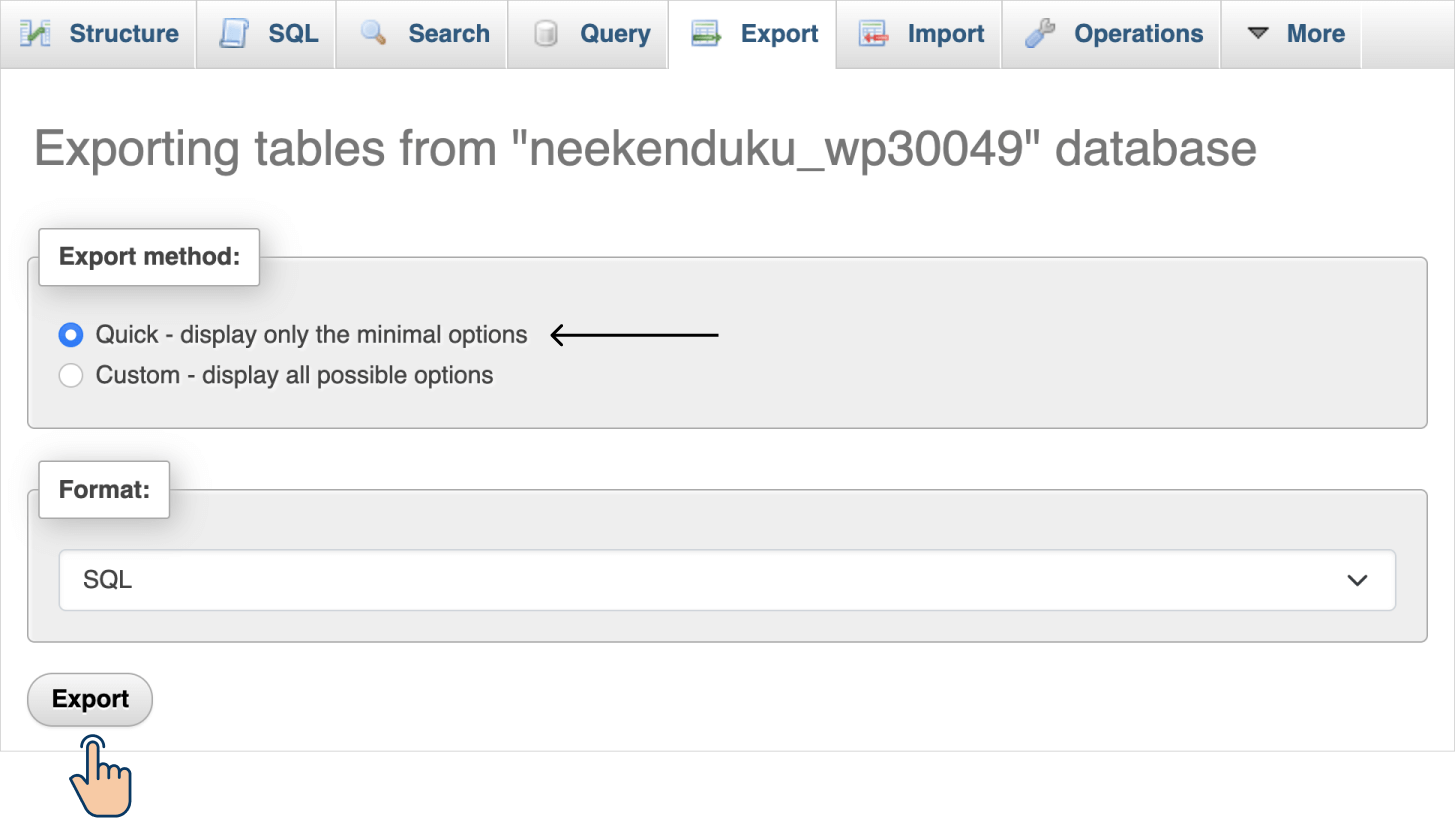
Finally, make sure that the “Quick – display only the minimal options” is selected and click on the “Export” button to download your site’s database.
That’s exactly how you backup your database using the phpMyAdmin software.
Having said all this, if you are dealing with a large database, just like plugin-based approach, you might not be able to export your database without experiencing timeouts.
I have experienced phpMyAdmin timeouts when dealing with a site’s database size of 3 GB and I couldn’t download the database at all.
And this is where the last approach comes in.
I saved the best for the last.
It will help you export a database of any size without any problems.
It is that…It is this…
“Alright, enough hype, bro! Just show us the approach.”
Hahaha, here is comes…
This approach requires knowledge of the Command Line Interface (CLI), Ability to Log into the web server using SSH, and the ability to use WP-CLI.
If you have no clue about them, read the following articles and then come back to this article:
“Done! I have read them!”
Great! Here is how to export the WordPress database using WP-CLI:
We can export a WordPress site’s database using the wp db export command.
Here is its syntax:
wp db export <location_for_saving_exported_db_file_and_its_file_name>And here is its real-world usage:
wp db export ./db-backup/site.sql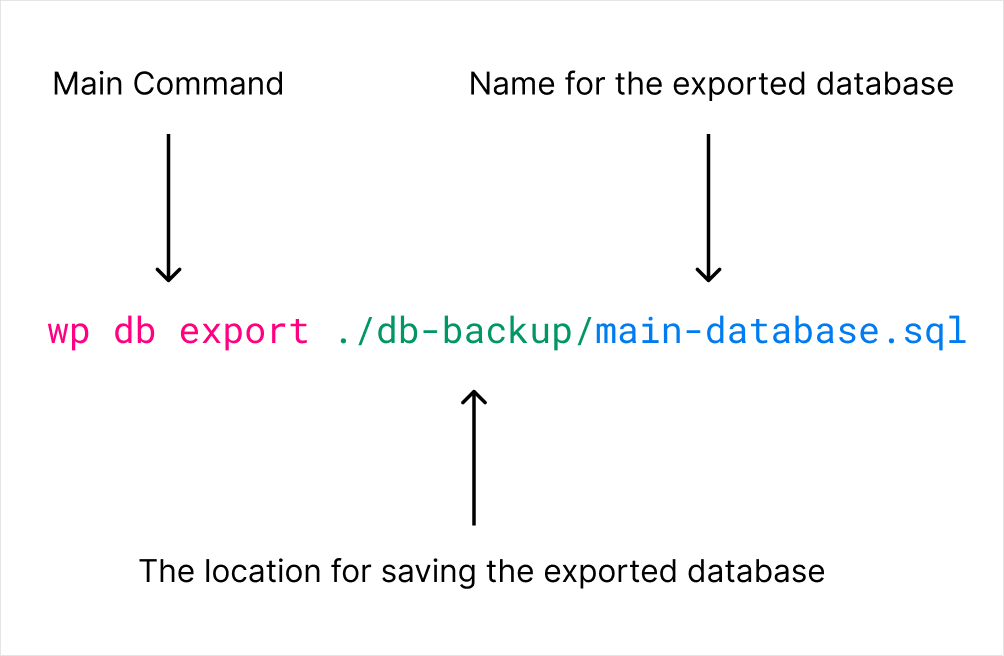
Running the above command results in downloading the site’s database no matter how big the database is:

The save location can be anywhere inside your web server’s file system, and the name of the exported database file can be anything you want.
If you’re facing any errors related to permissions, try running the same command by using the --allow-root argument:
wp db export ./db-backup/site.sql --allow-rootThere are many security concerns if you’re using the --allow-root argument. So, use it only if you don’t have any other option.
There are so many options that change the way the wp db export operation behaves. You can see all the options of the wp db export command here: wp db export options
These options are helpful for achieving many of your unique scenarios.
That’s all.
You now know all the best approaches to back up your site’s database.
Be careful while using these techniques.
I will see you in the next article.