How to connect to your WordPress website using SSH (Secure Shell) and why you should do that
Secure Shell (SSH) is one of many ways to help you connect to your web server so that you can manage it.
Just to be on the same page…
No matter where you host your website, it will be hosted on a web server provided by the web hosting company.
And a web server is nothing but a computer with no Graphic User Interface (GUI) and some special software installed on it:

Like any computer, a web server has a file system, user accounts, and settings to configure.
This is why you can manage your web server using web hosting tools like File Manager and CPanel or using File Transfer Protocol (FTP) tools such as FileZilla.
However, the problem with FTP and Hosting’s CPanel is that, depending on the task, they can become dead slow and throw timeouts for certain operations.
For example, let’s just say that you want to backup or migrate your WordPress website, and with a lot of data, it is currently sizing at 3.8 GB.
If you try to back up and migrate your 3.8 GB site via File Manager in CPanel or FTP, it will take you forever because there are many files.
Depending on the restrictions of the CPanel or FileZilla, you might not be able to succeed at all.
And this is where Secure Shell (SSH) comes in.
So, What is Secure Shell (SSH)?
Using Secure Shell (SSH), you can directly connect to your site’s web server via something called a Command Line Interface (CLI) and perform the following operations quickly and without ever experiencing timeouts:
- Manage files on your website by being able to create, edit, compress, extract, and delete files.
- Manage the settings of your web server
- Install, activate, and deactivate plugins and themes of your WordPress site using WP-CLI
- Update Core WordPress Software, plugins, and themes of your WordPress site using WP-CLI
- Import and Export the WordPress site’s database using WP-CLI
If you have no clue about what a Command Line Interface (CLI) means, I have written an in-depth article about it. Please read it so that you can effectively operate your site using SSH.
How to connect to your WordPress site’s web server Using SSH
You can achieve this in three easy steps:
- Open up the SSH client ( a Command Line Tool )
- Log into your web server using the
SSHCommand - Manage your website and its server using text commands.
Step 1: Open up your favourite SSH client ( a Command Line Tool )
An SSH client is simply a tool that lets you log into your web server and manage it using the SSH commands.
The SSH commands are typed in a command line tool like Terminal or Command Prompt.
So, any Command Line tool can be treated as an SSH client.
On Windows OS:
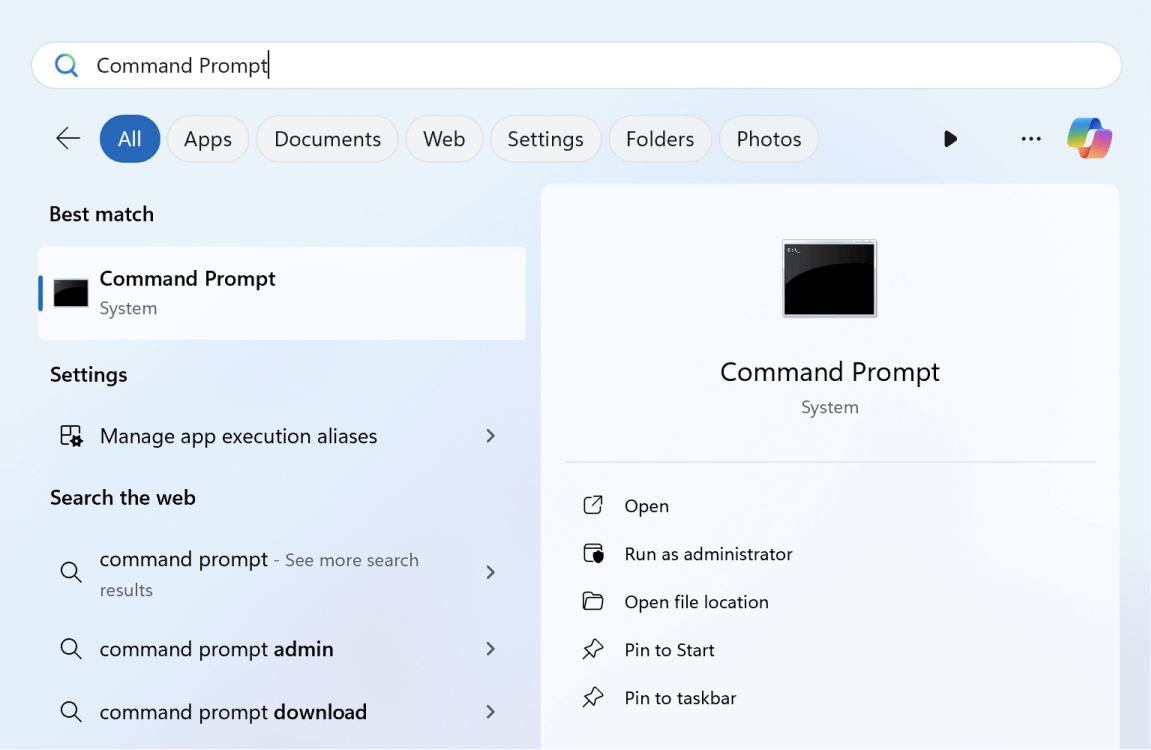
You can use built-in Command Prompt as the SSH client:
You open it up by searching for the command prompt in the “App Search bar”:
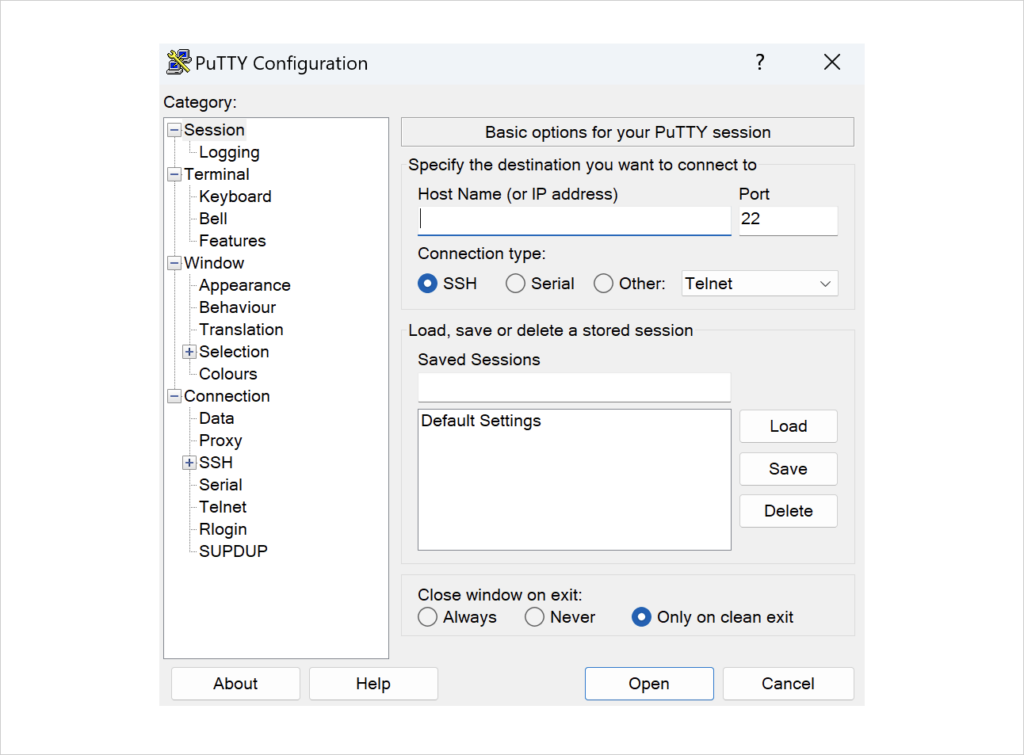
If you are not a fan of Command Prompt, then you must go with third-party software like PuTTY.
Download the PuTTY software and open it up:
On macOS and UNIX-based OS like Ubuntu, CentOS, etc.:
You can use the built-in “Terminal” app as the SSH Client:

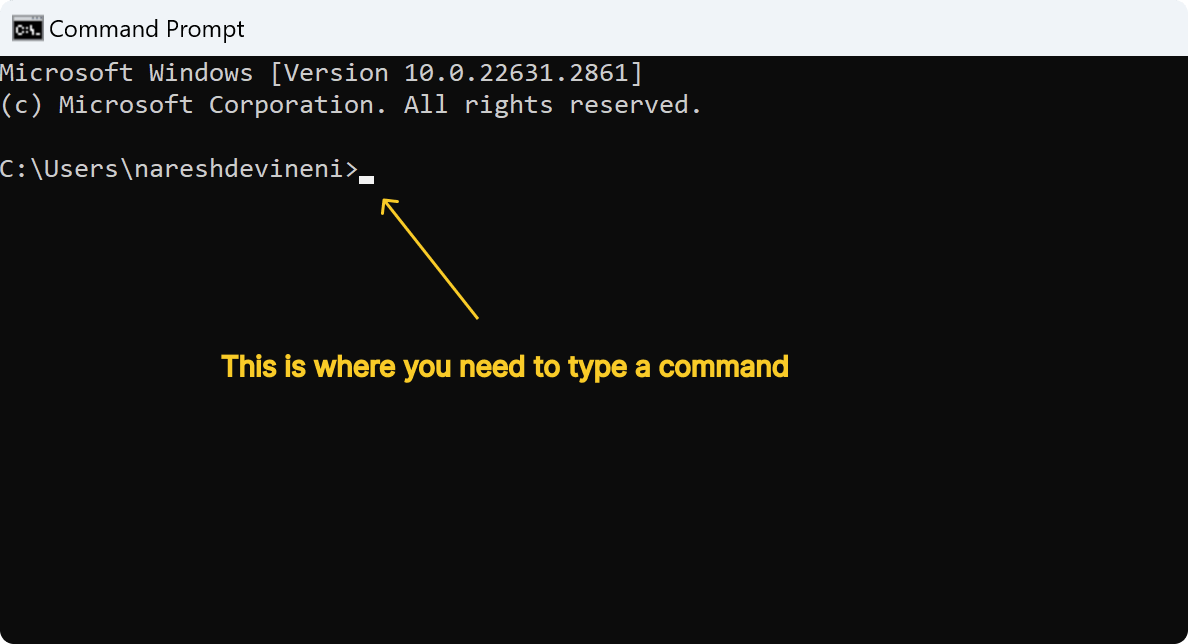
The “Terminal” app looks similar to this as soon as it opens up:

On macOS and UNIX-based OS, you don’t need third-party software like PuTTY because the built-in “Terminal” App is powerful enough.
Step 2: Log into your web server using the SSH Command
We protect our personal computers with a username and password, right?
We must log into our personal computer with a username and password before managing it.
As I said before, a web server is just like our personal computer with user accounts, file management, etc.
So, we must log into the web server with a username and password before managing it.
Not just that, we also need the IP address of your web server.
Simply put, to log into your web server using the SSH command, you need three things:
- Username of your web server
- Password of your web server
- IP Address of your web server
“Got it! But where do we get these credentials bro?”
Good question!
The web hosting company is responsible for giving us the credentials for our web server.
If you log into your web hosting account, you should be able to access these credentials.
But for some reason, if you can’t find them, please reach out to your web hosting support team for direction.
In my case, my hosting provider is CloudWays, and I found my web server credentials:

“I understand that we need a username and password, but why IP Address, bro?”
Another good question :D
There are so many web servers online, and the IP address will tell the SSH command which server to connect to.
“Oh cool!”
Yeah!
Anyway, now that we have access to the credentials, we can now connect to our web server in the following way:
ssh username@ip.addressAs you can see, as a first step towards connecting to your web server, the SSH command takes the username and IP Address of your webserver.
For example, in my case:
ssh master_rbrwzjcbva@45.55.137.71After you have put together the SSH command with your own server credentials, hit enter on your keyword.
If you are logging into your web server via SSH for the first time, you will asked the following question as a security measure:
“Are you sure you want to continue connecting (yes/no/[fingerprint])?”
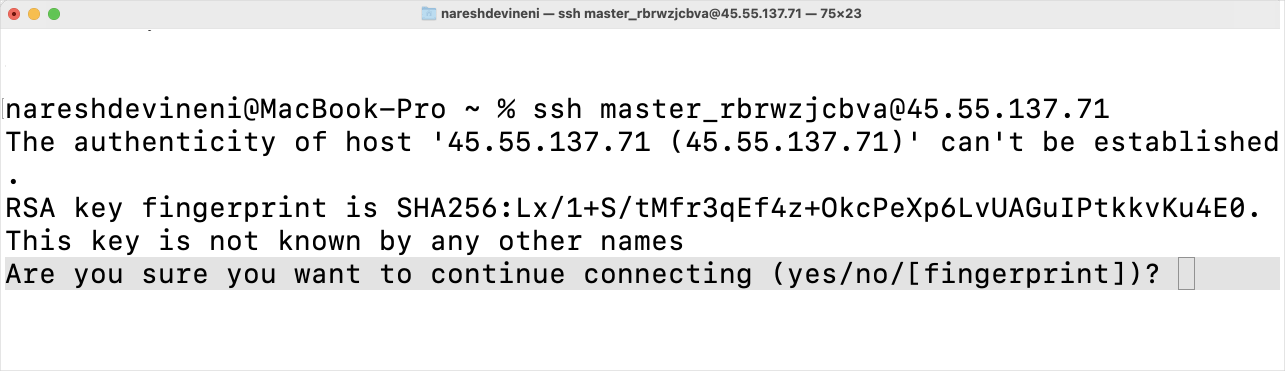
It is the SSH command’s way of saying to you, “Hey! I don’t trust the web server you’re trying to connect to. Do you want to take the risk and proceed forward?”
It is your own web server you’re trying to connect to, right?
So, give positive confirmation to the terminal by typing “yes” and hitting enter again.
Finally, you’ll be asked to type the password of your web server. So, type the password and hit enter.

That’s all.
That’s how you log into your web server using SSH, irrespective of the operating system you are using.
Step 3: Manage your website and its server using text commands.
You can now manage your web server and website by typing text-based commands.
For example, after logging in via SSH, I went into my WordPress installation folder and backed up the wp-content directory of my WordPress website by archiving the directory using the tar command:
cd Applications/my-portfolio
tar -czvf wp-content-backup.tar wp-content
Please read my “Just enough command line for website owners” article if you have very little experience with command line.
In the next lesson, we will learn about WP-CLI and perform the following actions:
- Install, activate, and deactivate plugins and themes of your WordPress site using WP-CLI
- Update Core WordPress Software, plugins, and themes of your WordPress site using WP-CLI
- Import and Export the WordPress site’s database using WP-CLI
I will see you in the next lesson.

 © 2026 UsableWP. A project by Naresh Devineni.