Theme options give us an ability to create some custom options in such a way that clients can easily
The following image is a screenshot of the theme options from an Old website that I developed for my client.

In the olden days of WordPress theme development, to create theme options, we used to depend on third-party theme options framework.
But you are learning WordPress in the Modern era. You no longer have to depend on third-party frameworks to create theme options. WordPress ships with an elegant Customize panel and Theme Customization API. And using this API, we can create a wide variety of theme options and attach them to the Customize Panel.
You can access the Customize panel by going to:
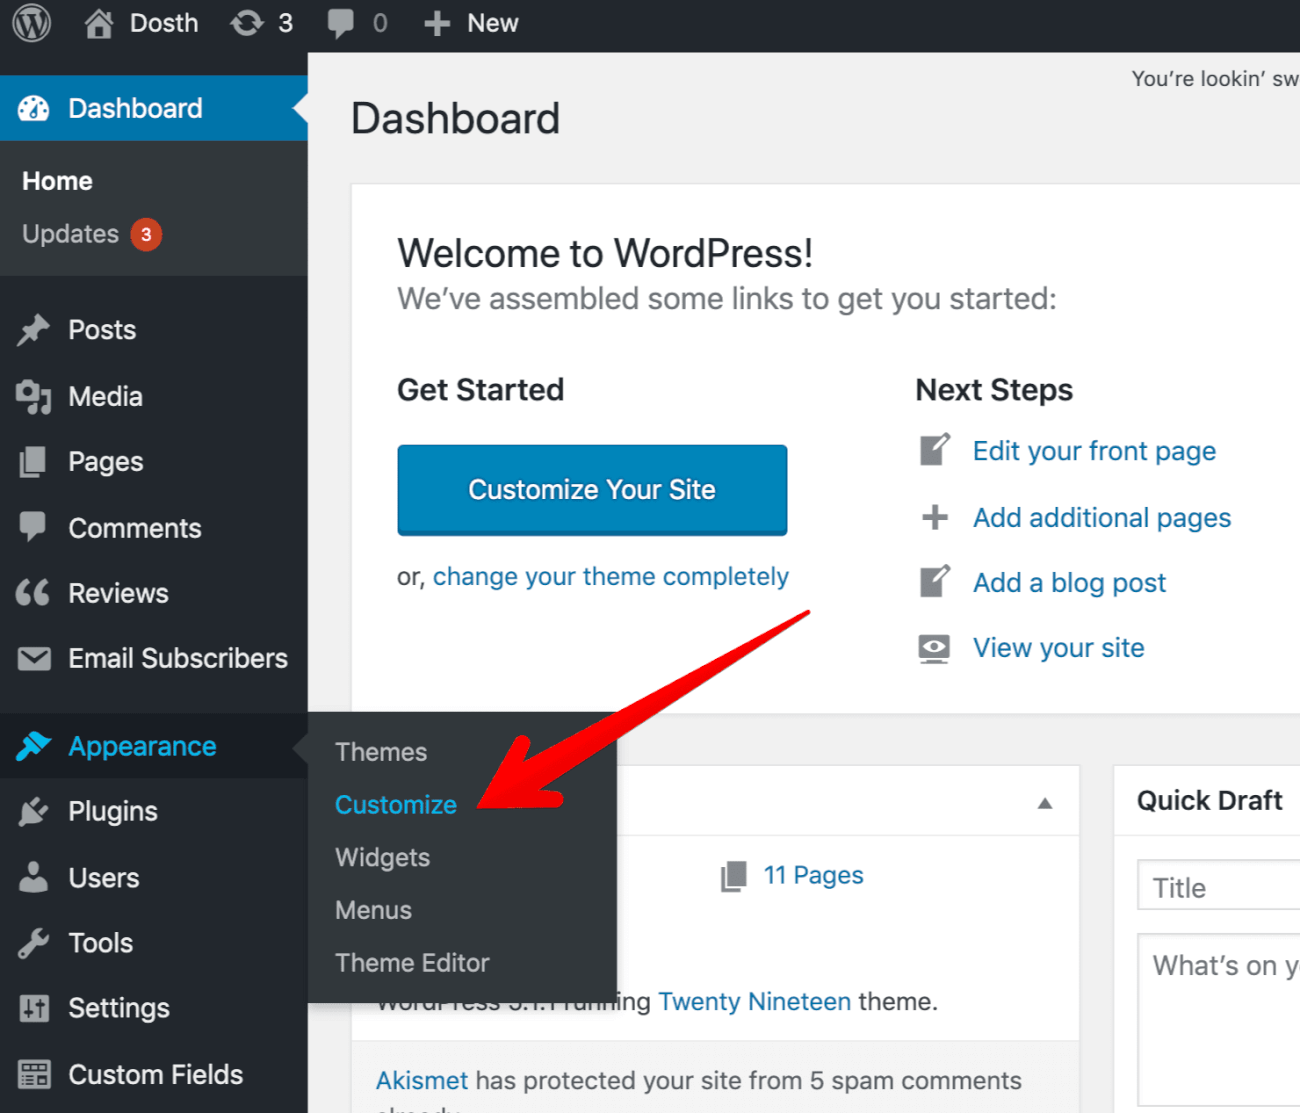
Admin Dashboard -> Appearance -> Customize Panel
We have already worked with the Customize Panel when we worked with the Logo of the site. But, let’s look into it in more depth.
From here onwards, I am going to call settings as options and vice versa. Please don’t get confused. They mean the same.
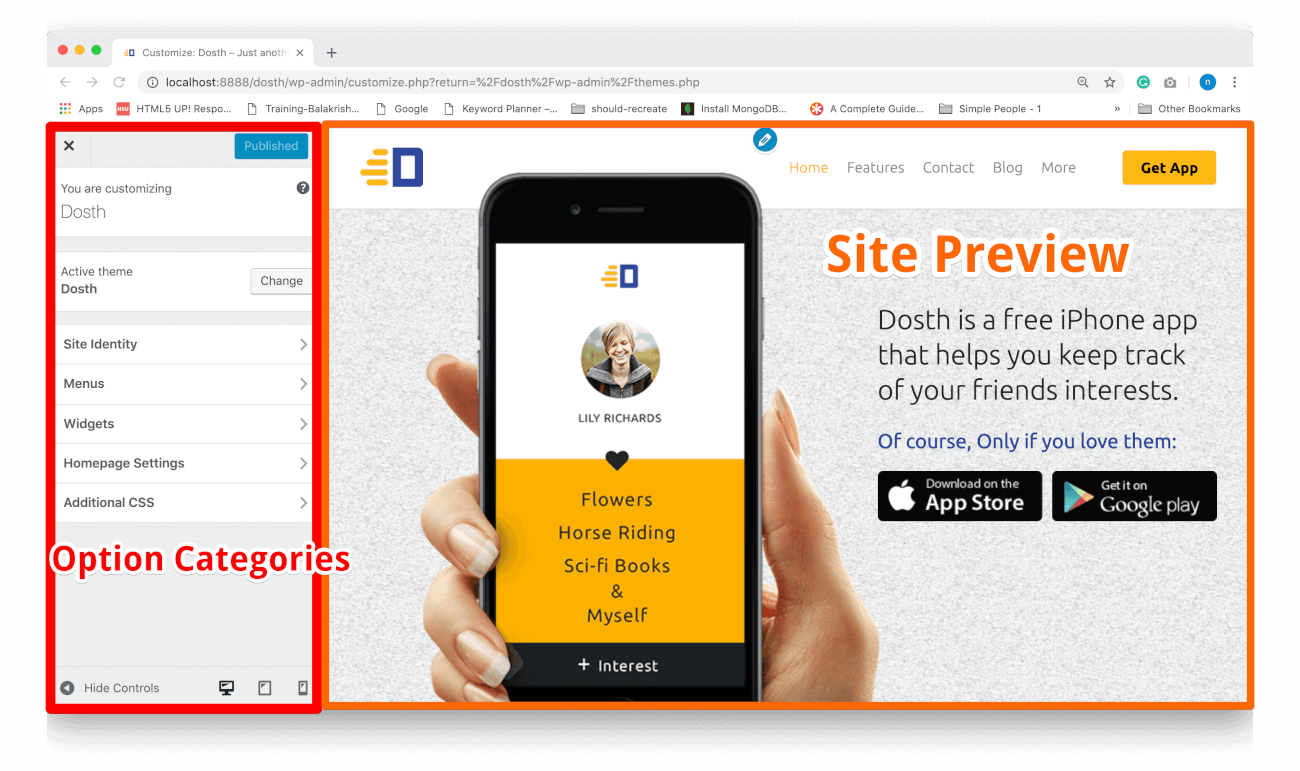
The Customize Panel is divided into two columns. Customization Settings are located on the left-hand side and when you change those settings, you can live preview the changes on the right-hand side of the screen.
For example, if you change the Site Logo setting by going into the “Site Identity” section, WordPress will immediately refresh the Site Preview portion of the Customize Panel with the new logo.
As you can see, the Settings on the left-hand side are categorized into multiple sections.
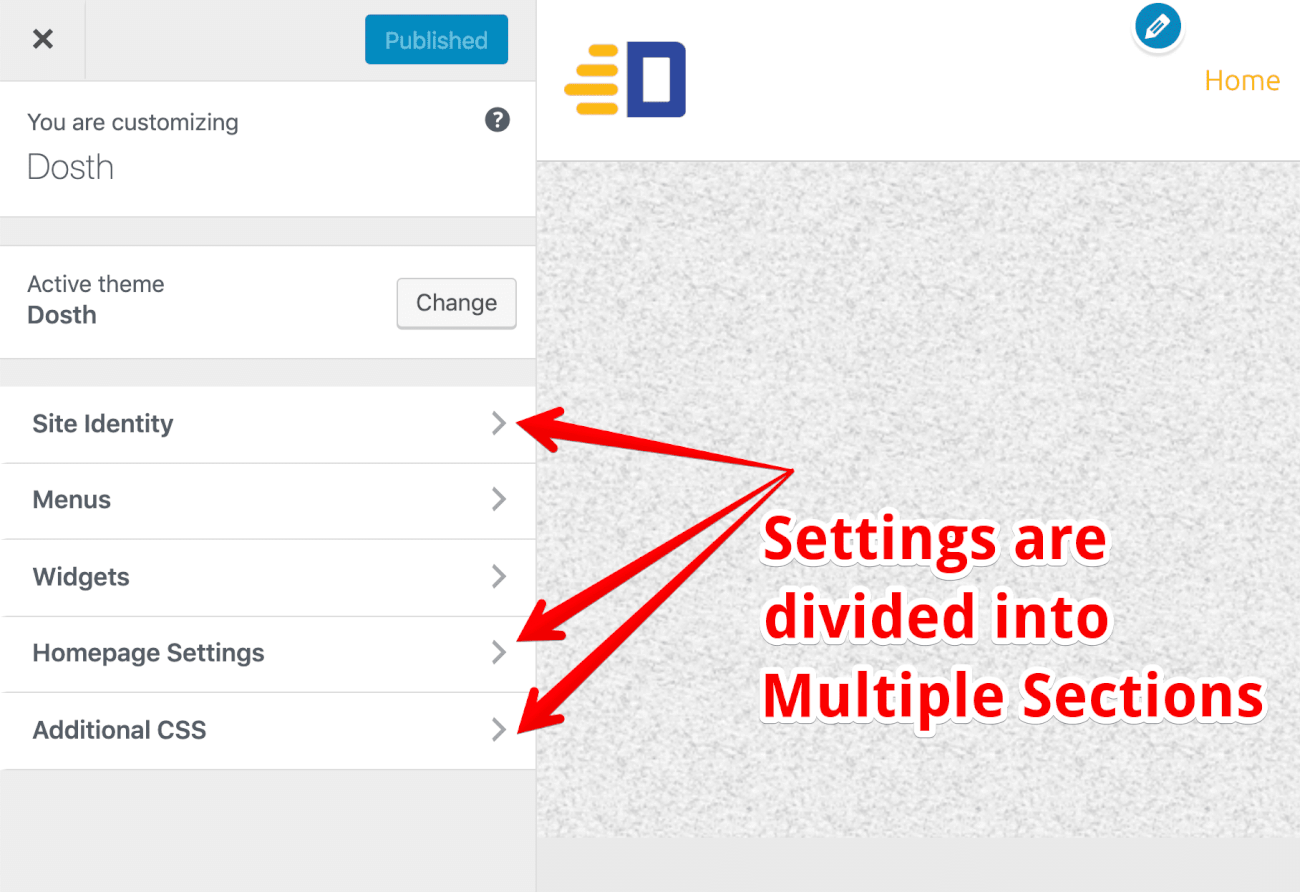
We can also combine multiple sections under one Panel.
The best example of a Panel with multiple sections is the Widgets Panel.
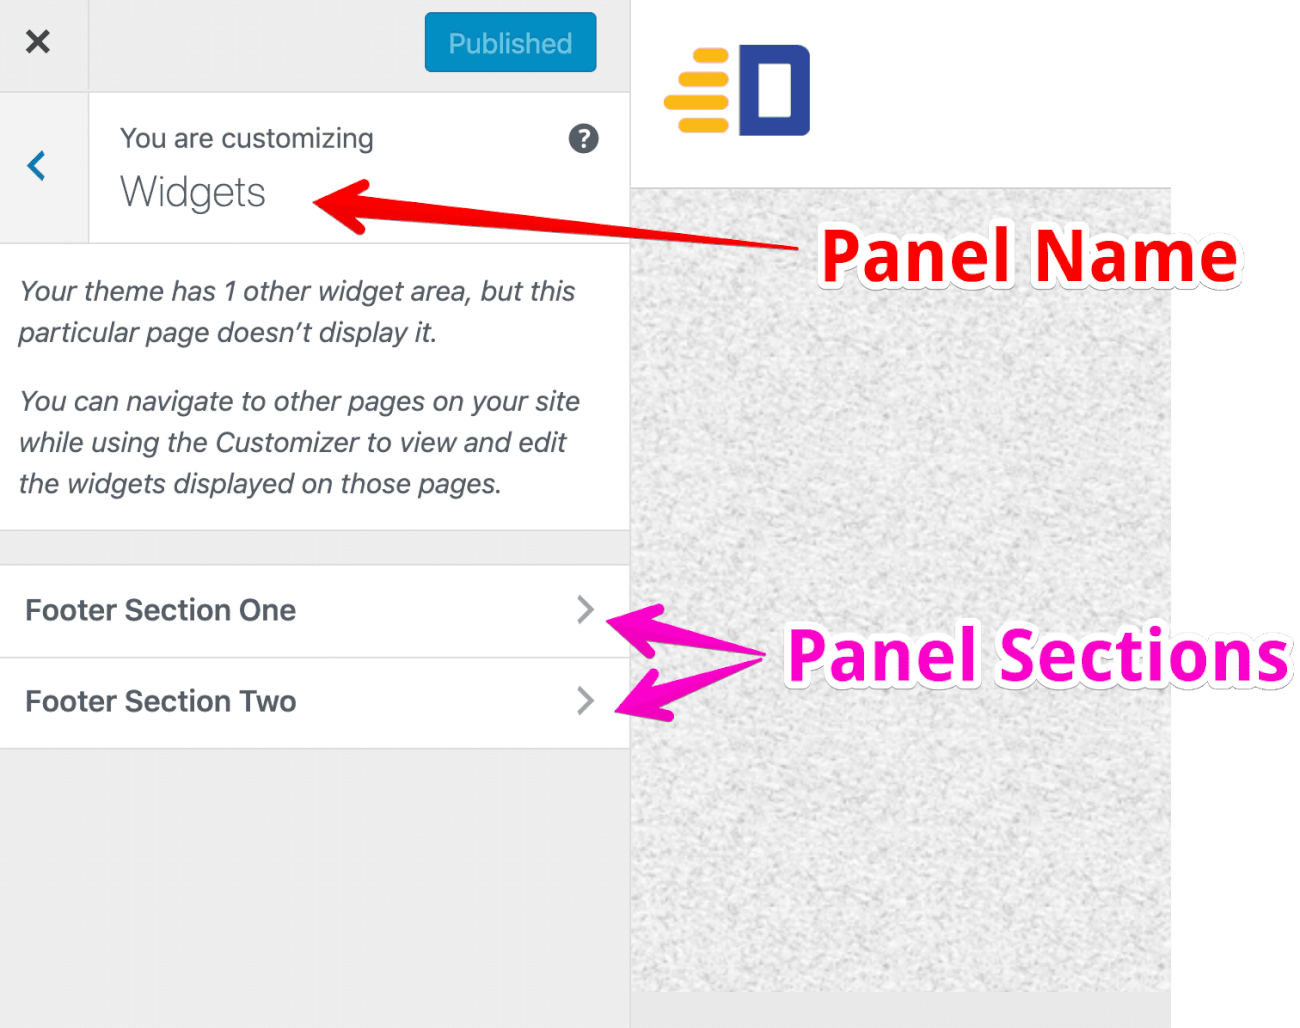
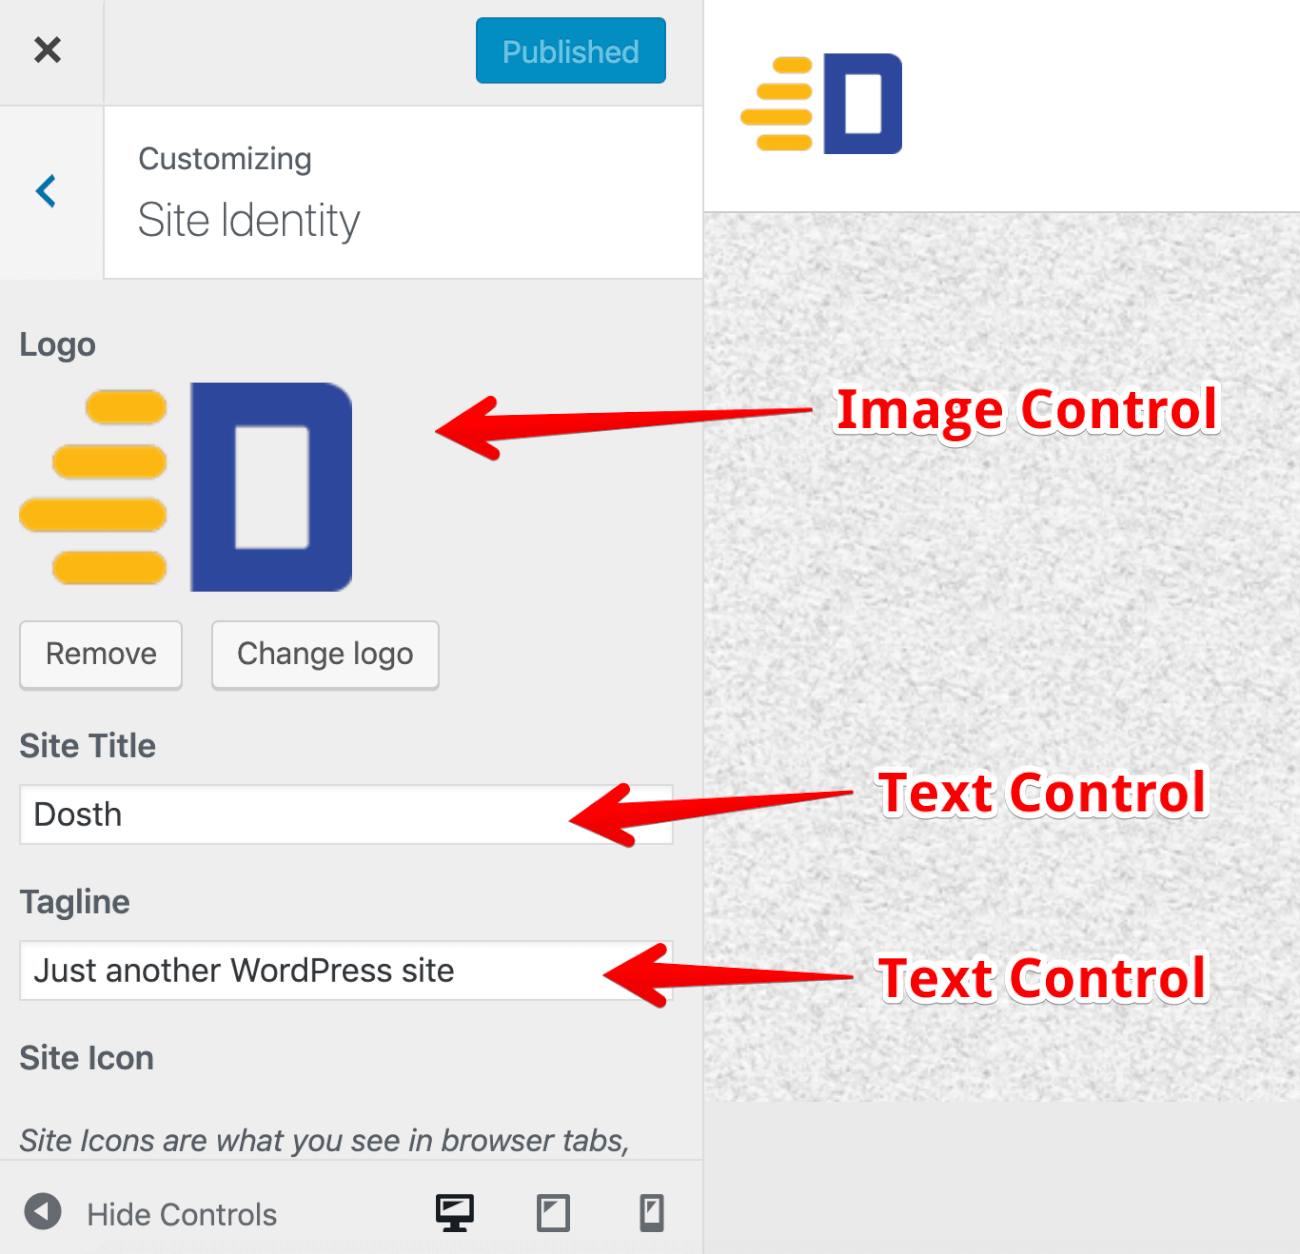
Each Section will have one or more settings. And each Setting is associated with a Control ( Form Field ) which helps us manage the Setting.
Simply put, we are using a Control ( Form Field ) to generate the value of the Setting. And we will be outputting this value inside our theme’s template files. In fact, we already did it. We outputted the Logo using the same process, right?
For example, You upload a logo using the Image Control for the “Logo” setting inside the “Site Identity” section. Once you upload the logo, WordPress will save the “Logo” setting with the URL of the uploaded logo image as its value.
The value of a particular setting is stored inside the wp_options table inside the WordPress database.
This will make more sense once we start creating settings their associated controls.
If we make any changes to the settings, don’t forget to click on the “Publish” button at the top-left side of the Customize panel to save those changes to the database.
And, that’s everything you need to know about the Customize Panel for now.
In the next lesson, we will set up the foundation to interact with the Customize Panel.