In the last lesson, we created the custom “Header Menu” and if we want to output this menu to the browser using our theme, we have to register and use a Display Location inside our theme and then assign this menu to that Display Location.
“Woah! Stop! What is a Display Location?”
Ah Sorry! A Display Location is nothing but a place inside our theme where we put the code that outputs a custom menu to the browser.
“I did not get it!”
Sorry, My Bad. Generally speaking, If you see the placement of navigation menus on any website, you’ll find them in the following four places.
And as a theme developer, we can control what elements go inside the above-mentioned sections of a webpage, right? And, one of these elements is a navigation menu And it is also our responsibility to give more control to the client over the placement of the menus on a webpage.
So, what we should do is, we have to register multiple Display Locations in our inside our theme, and at these Display Locations we allow the clients to display whatever the custom menu they create.
In other words, by creating Display Locations for menus inside our theme, we are telling our clients that “Hey! This theme allows you to output a menu inside the header, footer, etc. “
And the client/Administrator of the site can find these Display Locations when they are creating the Menu. They can find this option under Menu Settings section which is located directly underneath the Menu Structure section of a particular custom menu.
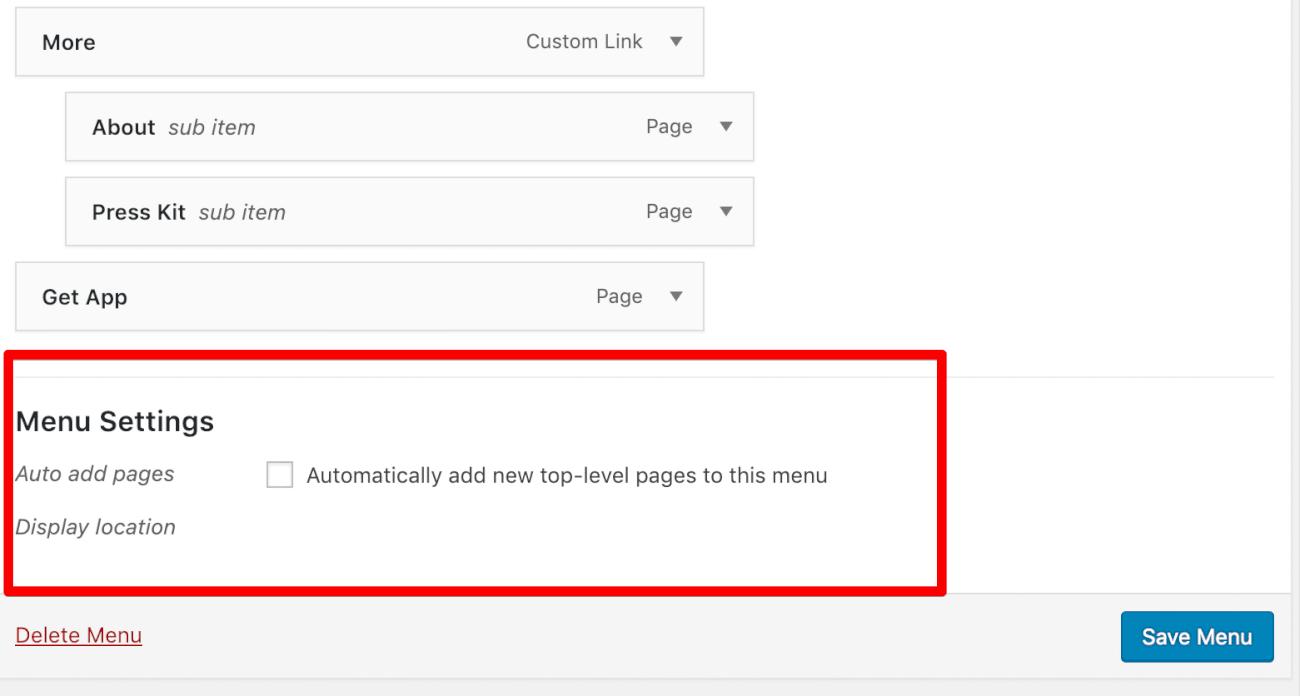
If you observe the above screenshot, right now, there are no Display Locations to select because we did not register them inside our theme yet.
And if you take a look at our Homepage Design, you can see two navigation menus. One in the Header and one in the Footer.
So, we will start by registering two display Locations inside our theme.
The register_nav_menus() WordPress function helps us to register multiple Display Locations at the same time.
It also enables theme support for custom menus. So you don’t have to use:
add_theme_support( 'menus' );
So, open up the functions.php file and remove the above code from the nd_dosth_theme_setup action:
Next, we need to register two Display Locations.
So, put the following code inside the nd_dosth_theme_setup action:
// Register Display Locations

register_nav_menus( array(
    'header'   => 'Display this menu in header',
    'footer'   => 'Display this menu in footer',
) );
Here is the final nd_dosth_theme_setup action after adding the above code.
function nd_dosth_theme_setup() {
// Add <title> tag support
add_theme_support( 'title-tag' );
// Add custom-logo support
add_theme_support( 'custom-logo' );
// Register Navigation Menus
register_nav_menus( array(
'header' => 'Display this menu in Header','footer' => 'Display this menu in Footer',
) );
}
add_action( 'after_setup_theme', 'nd_dosth_theme_setup');
Now, let’s break it down.
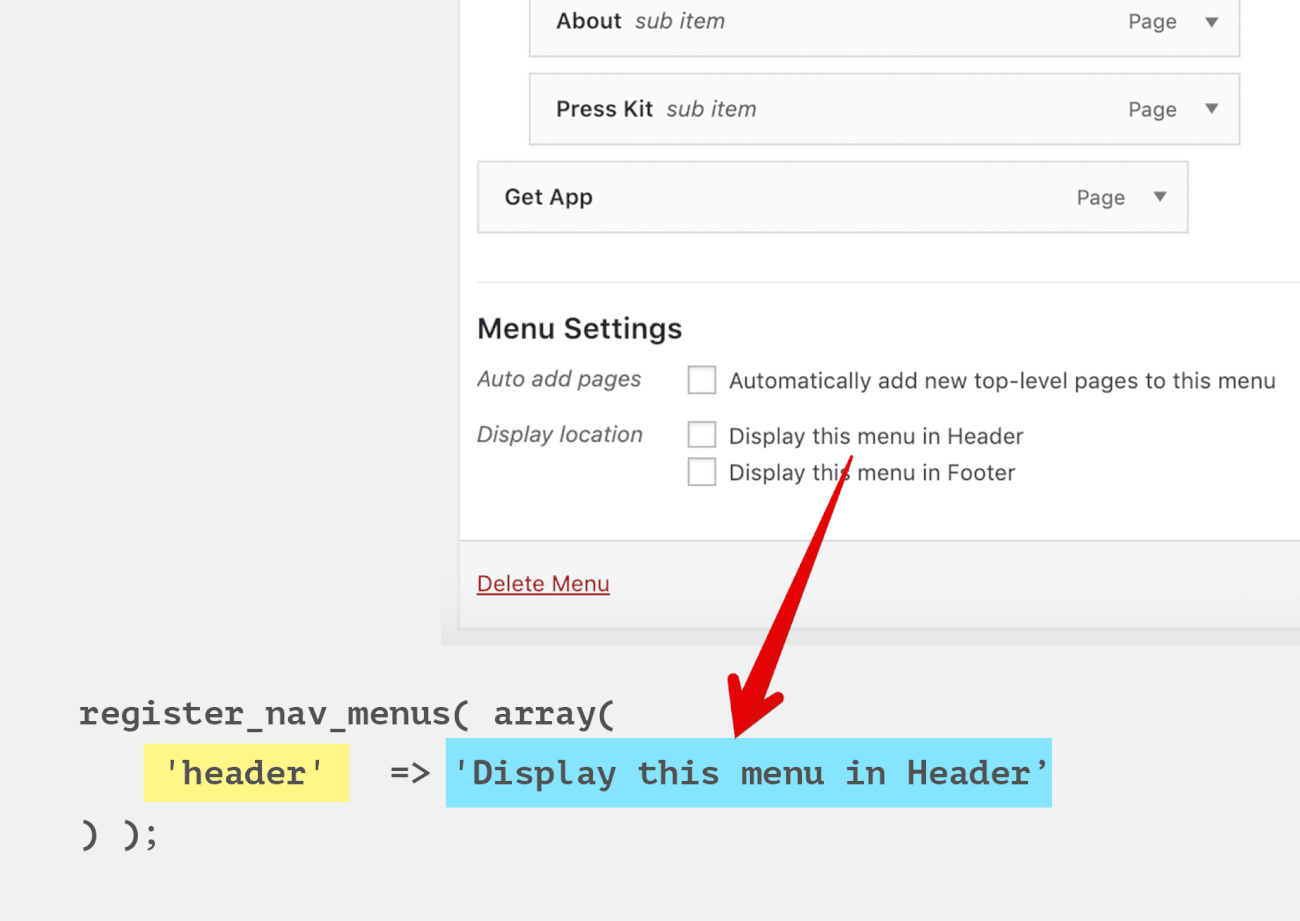
The register_nav_menus() function accepts an Associative array. Every item in this array will be registered as a theme’s Display Location. In our case, we are registering multiple Display Locations.
And, For each Display Location, we have to provide a self-descriptive Display Location ID as the key and a client-friendly description as the value to the key so that we can easily recognize and use them.
Both Display Location ID and Description must be a proper PHP string.
Now, just to confirm that WordPress is not throwing an error about the theme support for menus, Let’s go back to the Admin Dashboard -> Appearance -> Menus in the browser and check it out.
If you kept the Menus Panel in your browser tab opened, refresh it.
First of all, Pretty cool. No error.
And, to our surprise, we didn’t have to select the “Header Menu” manually. WordPress will automatically loaded this menu by default. This is because the “Header Menu” is the only menu we have created so far.
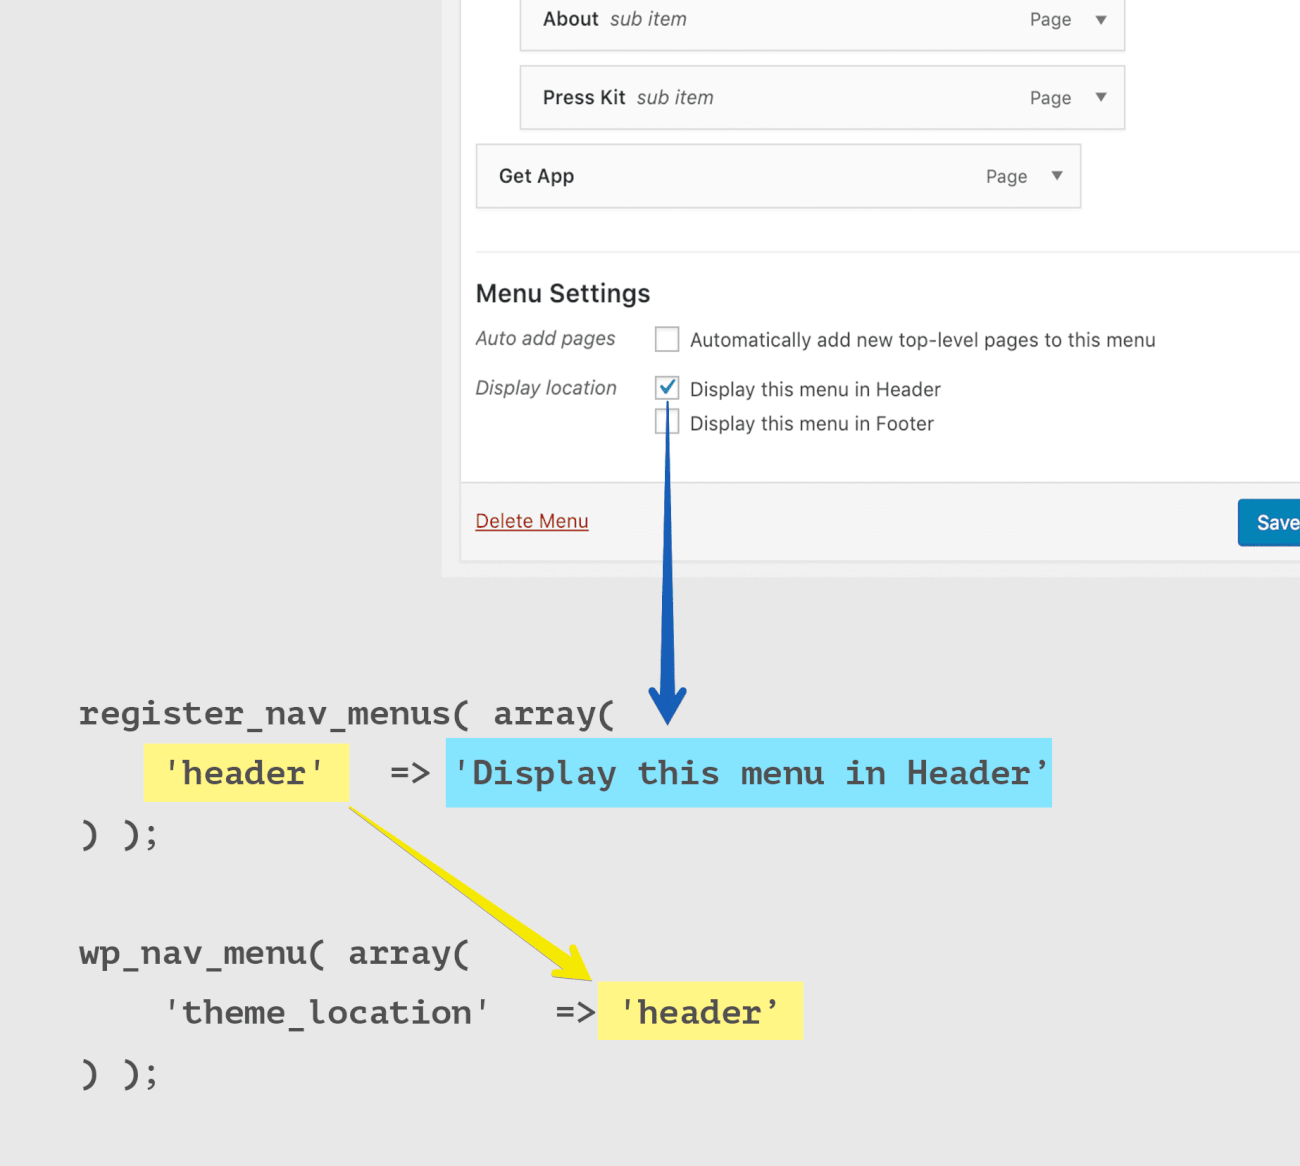
So, if you scroll down to the Menu Settings Section of the “Header Menu”, you’ll find our newly registered Display Locations as well.
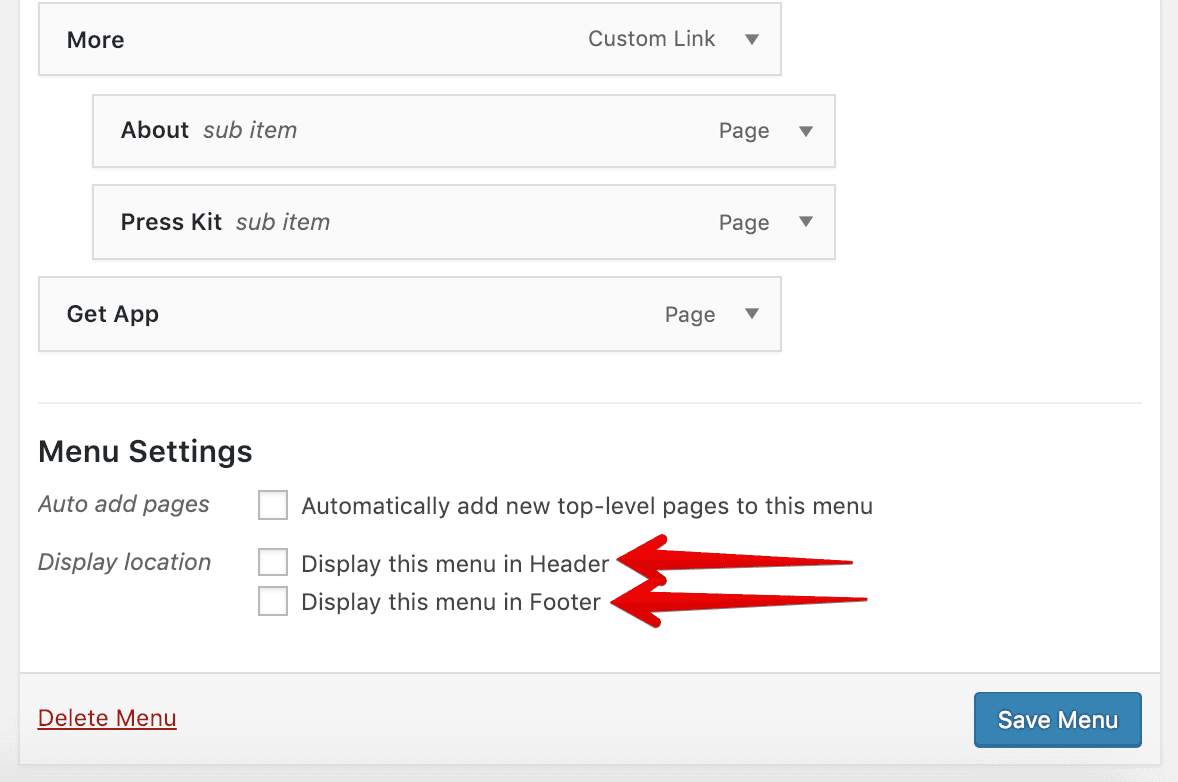
If you notice, WordPress is using the description of the Display Location instead of the ID.
This is why we have written a client-friendly description for Display Location.
So, where do you want to display this “Header Menu”?
“Now, you started asking stupid questions! According to the design, in the Header!”
Yes! So let’s go ahead and choose “Display this menu in Header” choice for Display Location option and save the menu.
“Hey! Is it possible to assign the “Header Menu” to multiple Display Locations?”
Of course, Yes. As long as a Display Location is not occupied by any other custom menu. And we have to deal with this pretty often. Most of the designs I get have the same Navigation items inside Header and Footer portions of a webpage.
Assigning a custom menu to a registered Display location doesn’t really output the menu to the browser. We have to manually create a Display Location inside our theme’s template files.
The wp_nav_menu() WordPress function acts as a Display Location. It also takes the responsibility of outputting a custom menu to the browser.
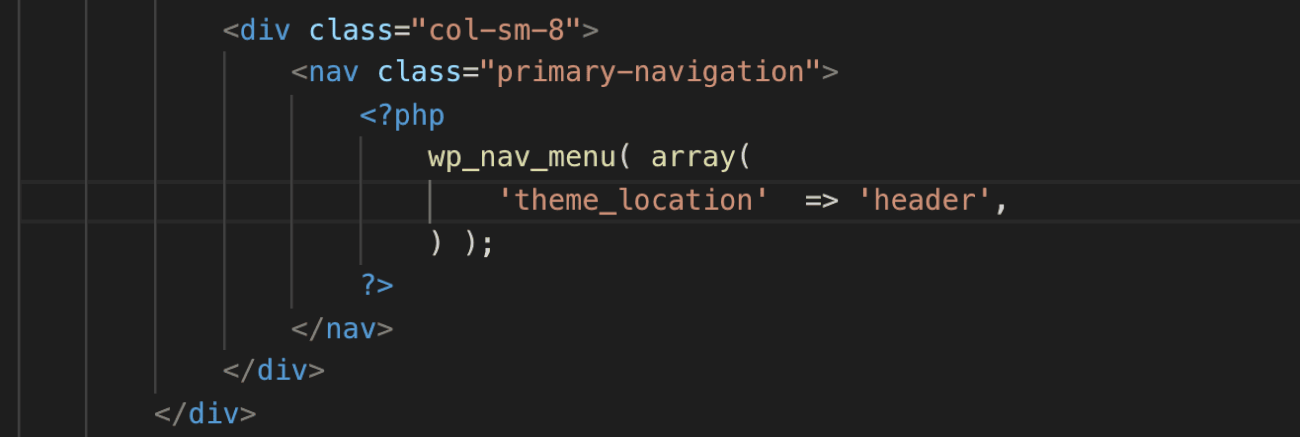
So, open up the header.php file and put the following code inside the <nav> element with the class name “primary-navigation”:
<?php
    wp_nav_menu( array(
        'theme_location'  => 'header',
    ) );
?>
As usual, let’s break it down.
Again, Nothing much is going on in the above code.
The wp_nav_menu() function accepts a single associative array with a lot of arguments. But out of all, “theme_location” is the most important argument.
The “theme_location” argument accepts a Display Location ID that we have registered.
In our case, we have provided “header” as the Display Location ID and The wp_nav_menu() function outputs whatever the custom menu that is assigned to the “header” Display Location ID to the browser.
Here is how everything is linked:
Makes Sense?
So, if everything works correctly, we must see the “header” navigation menu inside the header portion of the site. So, let’s switch back to the browser and visit the Homepage of our site.
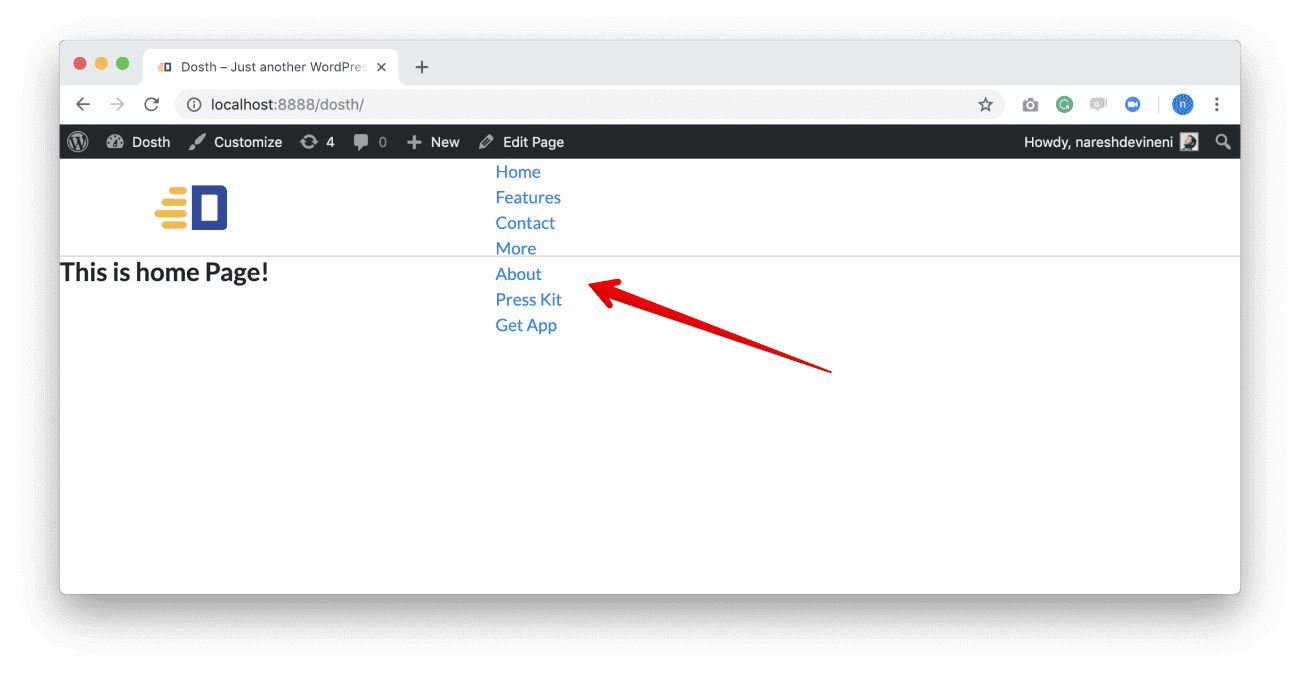
And Bingo! We linked everything perfectly. All thanks to the powerful WordPress menu system.
“Hey! Everything is ok, but you only taught us how to use the”theme_location” argument. What about the others? are they completely useless? “
No. They are useful. Most of them deal with the customization of the HTML markup of the menu. I will quickly talk about three other arguments that I regularly use. These might come in handy for you too.
Oh! we forgot to see what markup is getting generated for the navigation menu. Let’s take a look at it.
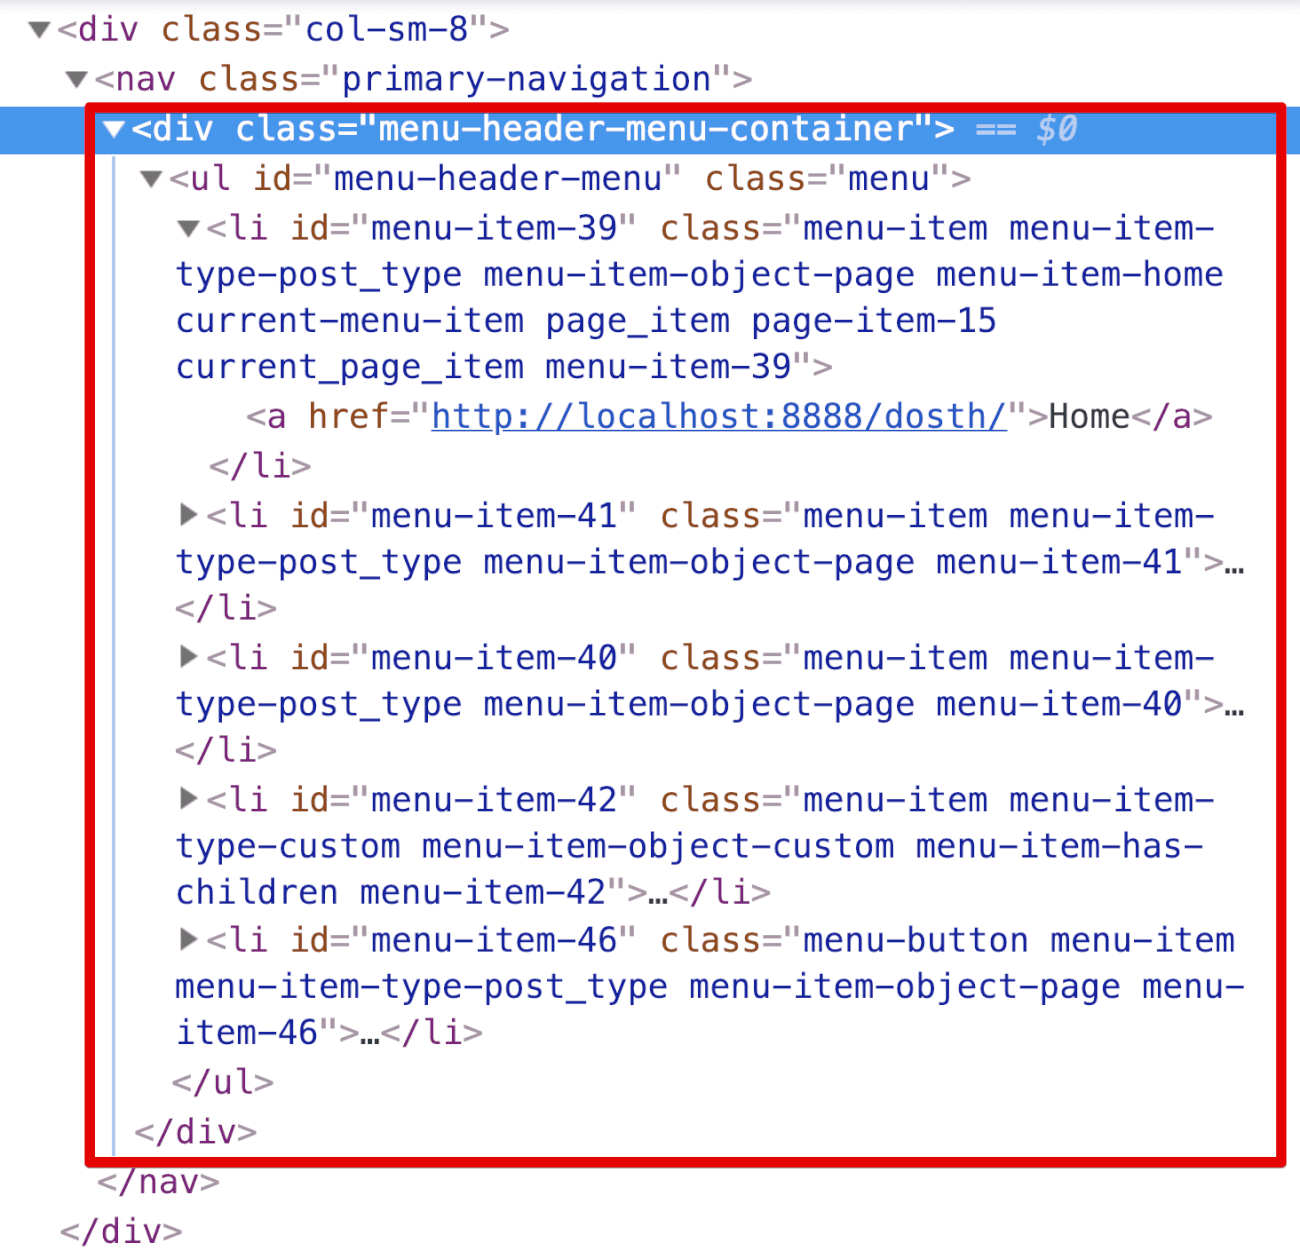
So, by default, WordPress is using an unordered list markup ( <ul></ul> ). And also there are tons of class names for every menu item.
This markup is totally fine. But what if we want to render our menu using the the ordered list markup ( <ol></ol> ) or perhaps just a basic <div> tag with a bunch of <a href='#'> tags?
The items_wrap argument allows us to do just that. But this argument is pretty limited to container level HTML elements.
What if you want more control over the markup?
You can change the entire structure of the of navigation menu with this argument. You can change every piece of it. How do you think the WordPress mega menus are built? Using this argument alone.
Now, practically explaining the above two arguments is out of scope for this book. So, I have written a multiple highly-detailed articles explaining these arguments individually.
This is better shown than explained.
This argument accepts numbers from 0 – 3 ( Ideally ) but some clients even want the fifth level sub-items.
If we set this argument to a value of 0, all the levels of menu items that are present in the Menu structure will get outputted to the browser. Period.
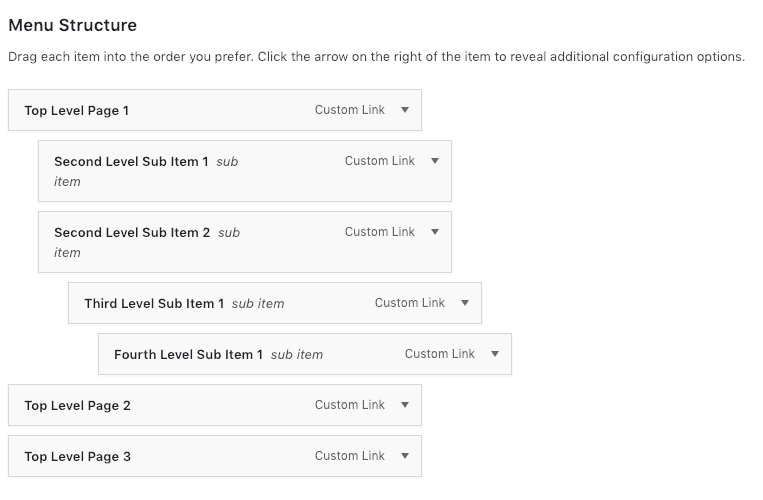
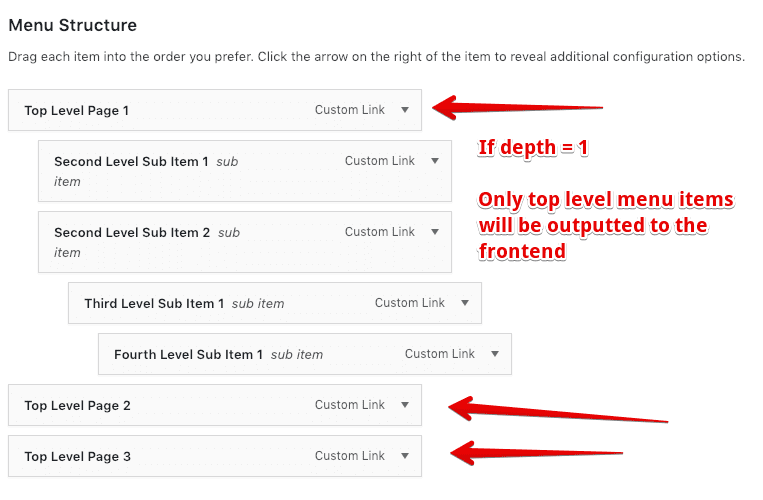
If we set this argument to a value of 1, only the top-level menu items will get outputted to the browser.
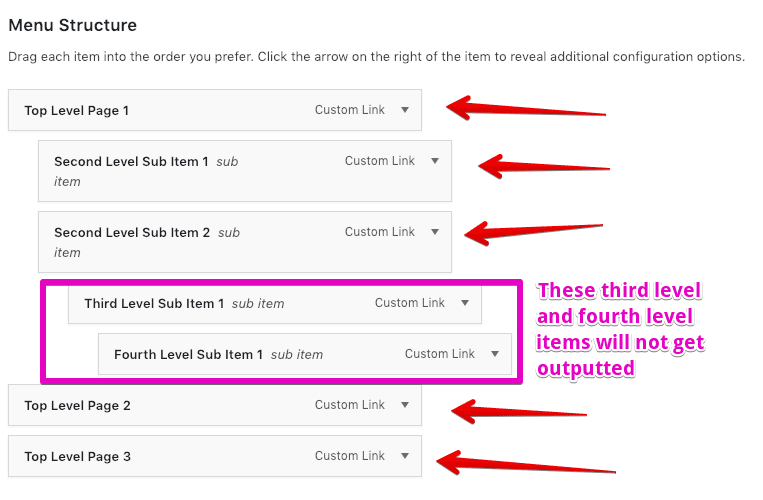
If we set this argument to a value of 2, along with the top-level menu items, second level menu items will get outputted to the browser too. But not the third level and fourth level menu items.
If we set this argument to a value of 3, WordPress will also output the third level menu items leaving behind the fourth level, if it exists. That’s all. You get the idea, right?
For more details about the other arguments, you can go to the function’s codex page.
Don’t worry, just play around them. If something goes wrong, just remove the problematic arguments from the array and keep it clean.
In the next lesson, We will make our first step towards making our theme “Translation Friendly”.
Why is the same content repeated?
By the way, You are Hero.. Thanks for this great tutorial