In WAMP, W stands for Windows, the operating system; A for Apache, the web server; M for MySQL, the database management system, and P for PHP, the dynamic programming language.
WAMP is a software that gives us an easy to use interface to start and stop our Apache and MySQL servers with one click. Not only that, it makes our life easy by letting us manage databases using PhpMyAdmin, a tool that provides to tons of options to play with databases.
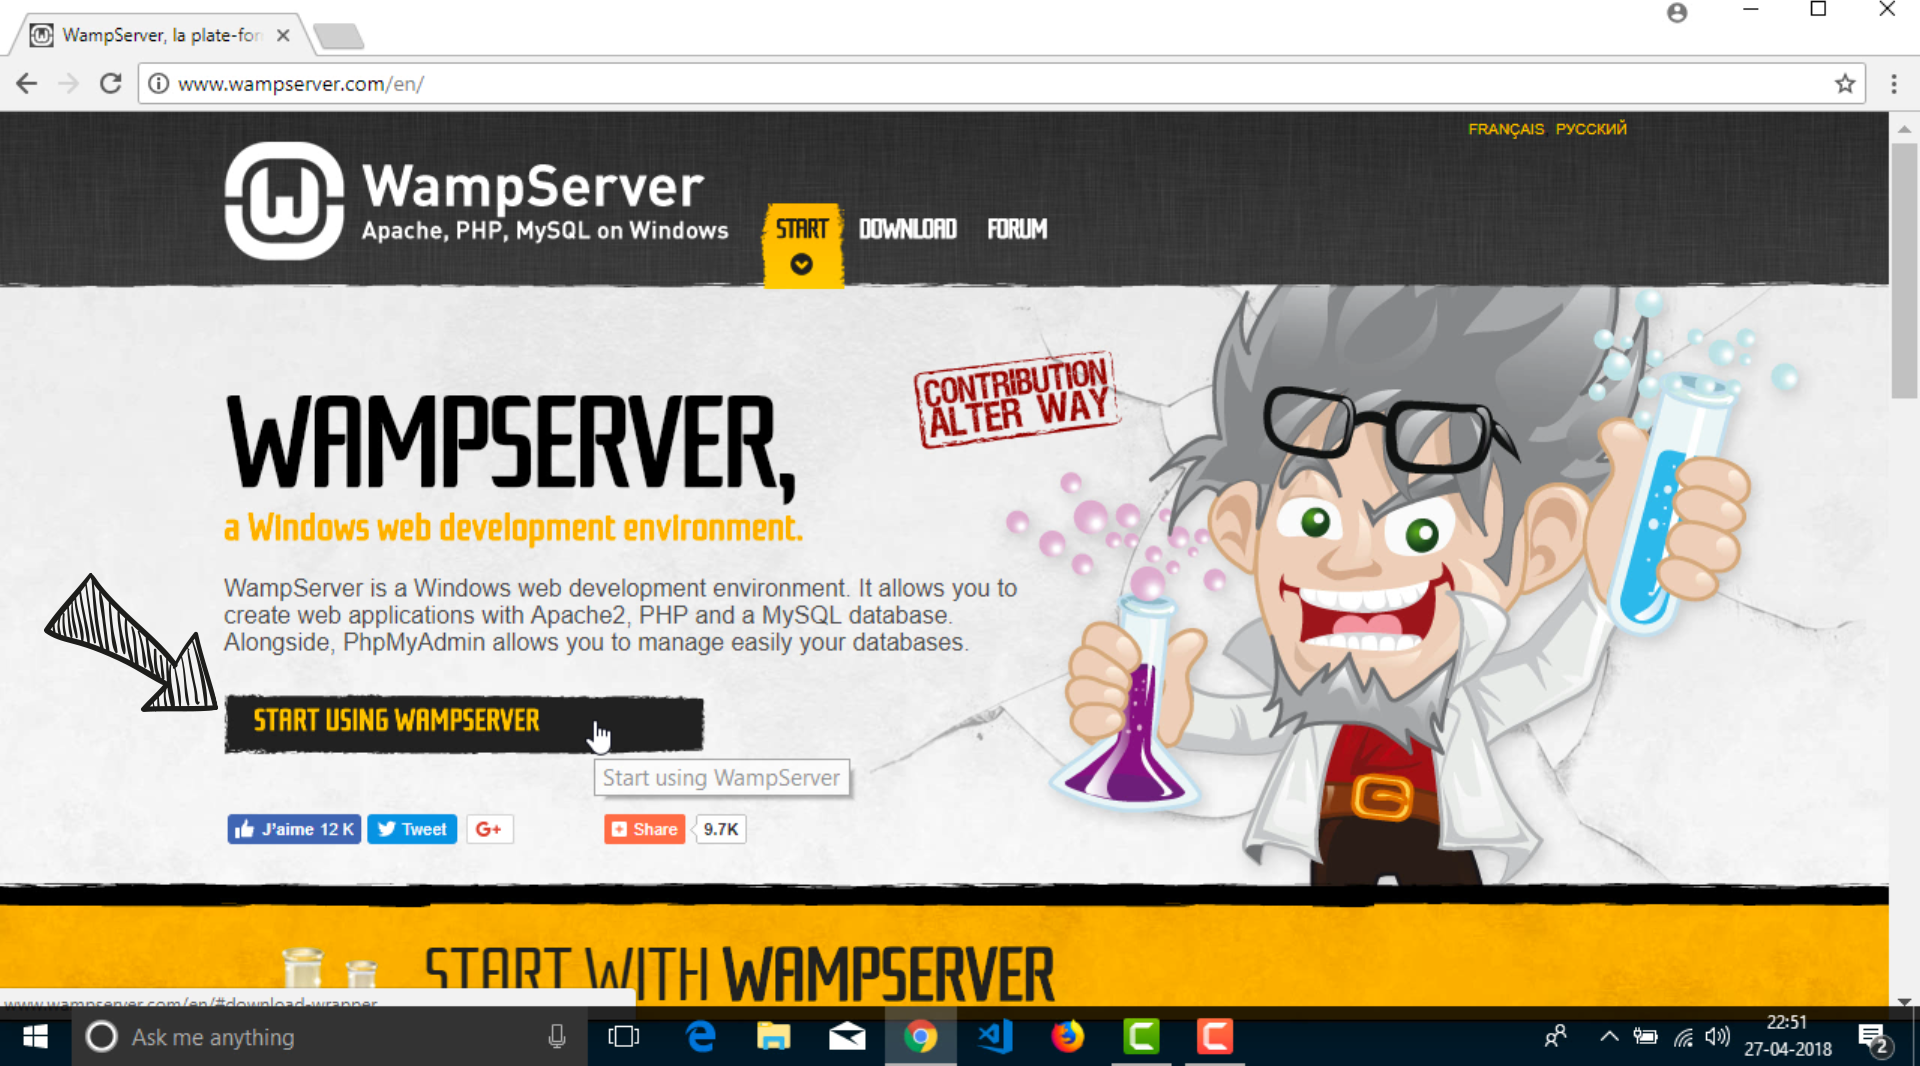
Now, let’s go ahead and Install WAMP. Open up your browser and fire up http://www.wampserver.com/en for if you are good with English or http://www.wampserver.com/ for the French version of the website. Click on the “Start using WAMP server” button.
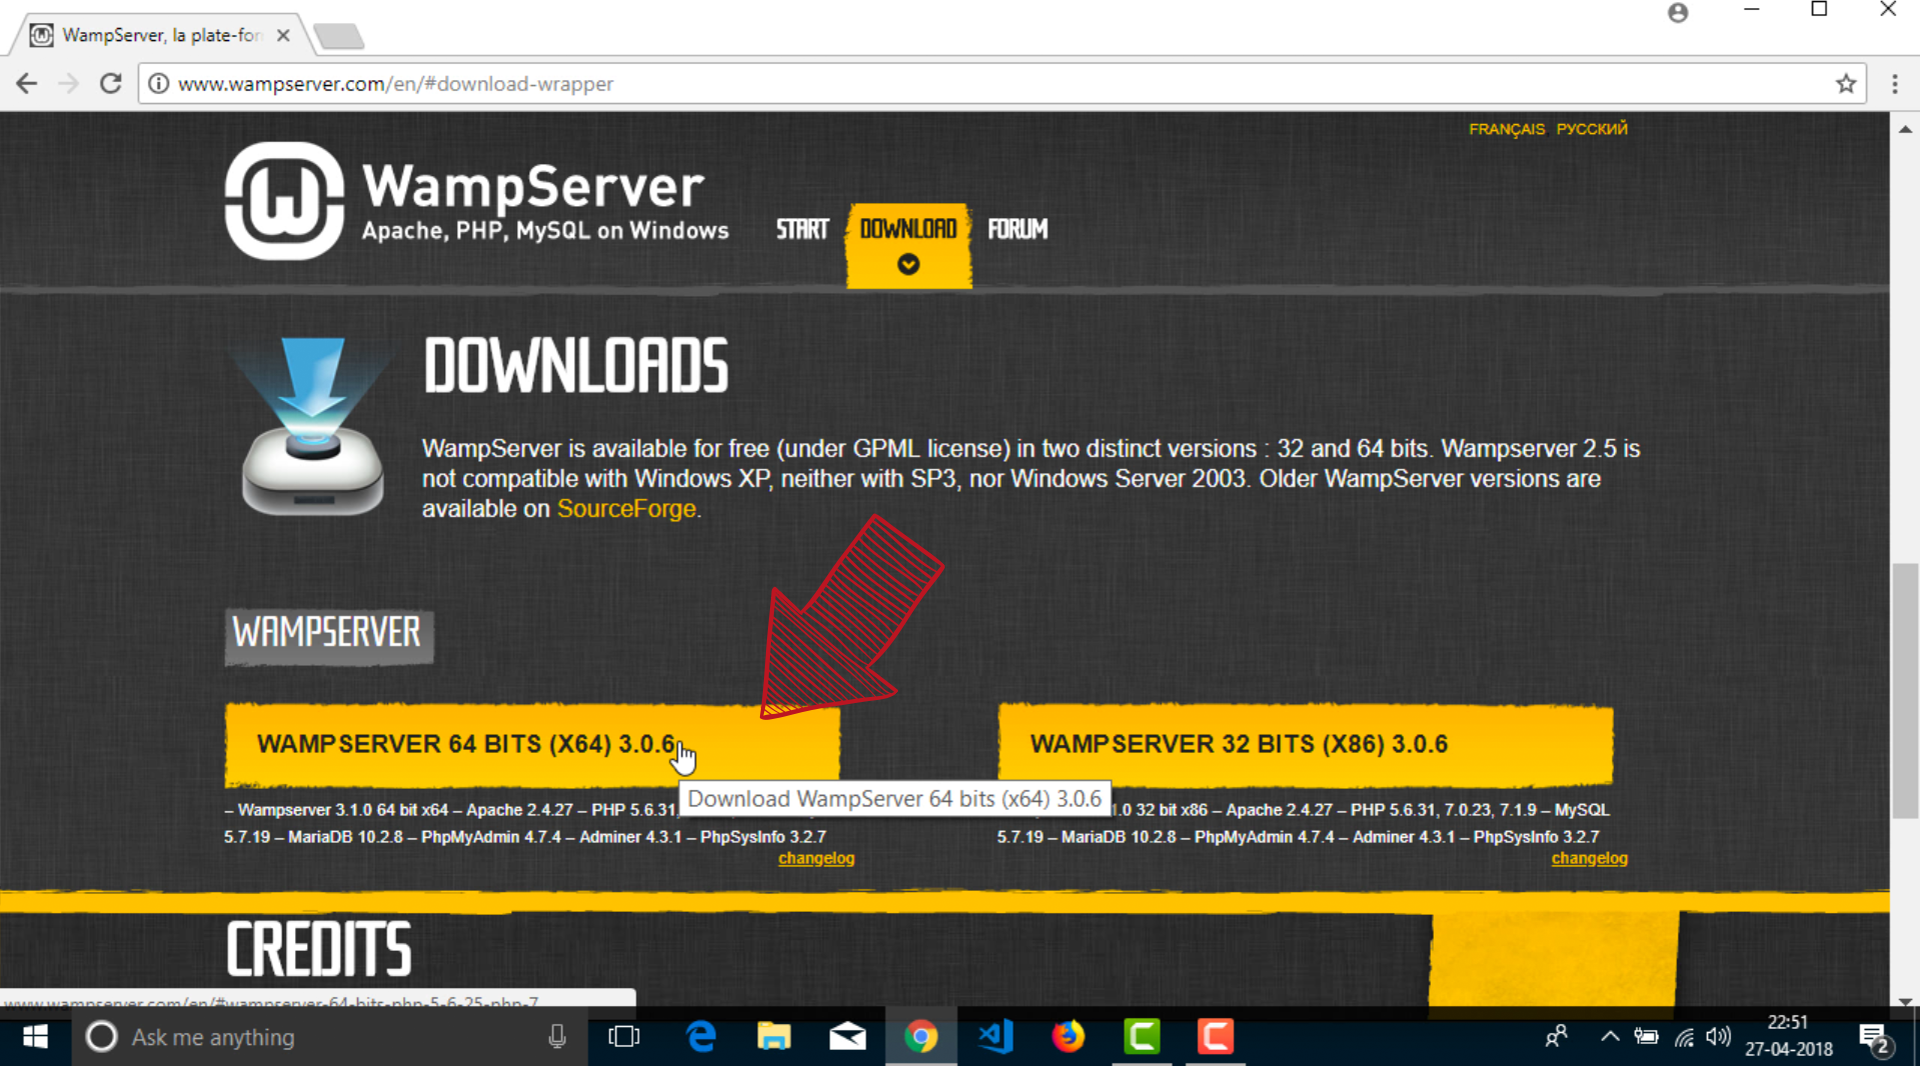
You will be taken to the downloads section on the same web page. If your Windows machine is 32bit, download the 32bit version of the WAMP, or you can go with the 64bit version. Mine is 64bit. So, I will hit on the “WAMP SERVER 64bits” download button.
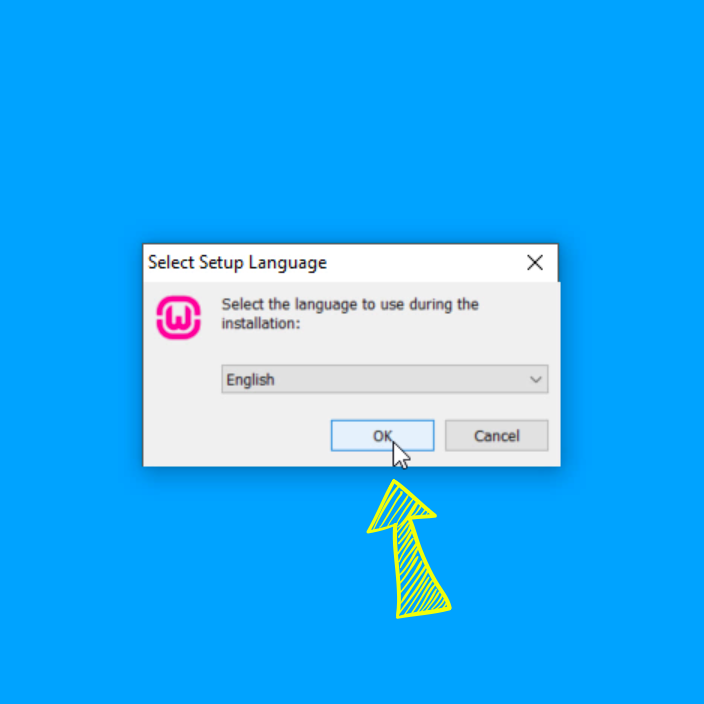
Once you have the download, click on the downloaded file to bring up the WAMP installation start screen. Select your preferred language and hit ok.
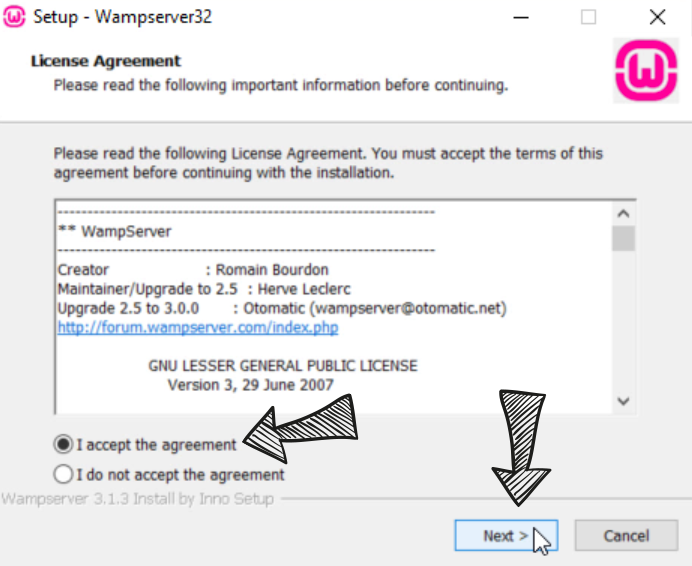
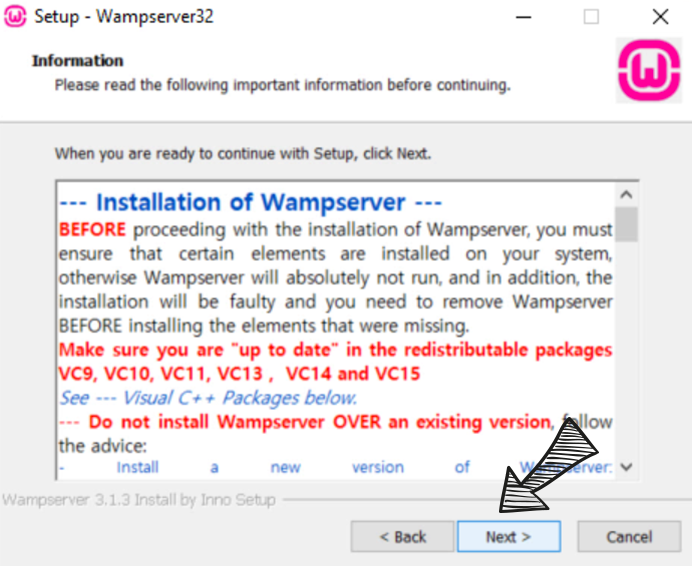
Once you have landed on License section, read the license, turn on the “I accept the agreement” radio button and hit the Next button to continue to the Information Section.
WAMP requires redistributable Visual C++ packages to work. So, in the Information section, it will gently inform us to install those packages if they are not already installed.
If you are using Windows 10 or Windows 8, chances are these packages are already installed on your Windows machine. If not, download them from the Microsoft website and hit Next button when you are ready.
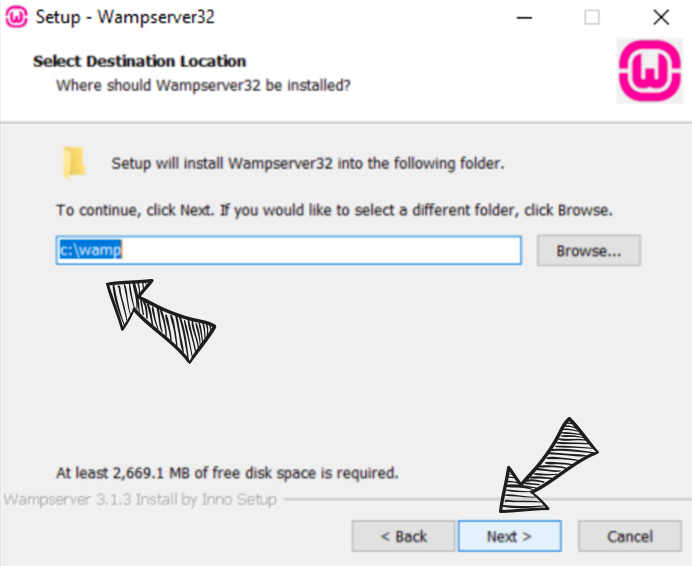
Now, it will ask us to Select a place on your hard disk to install the WAMP Server. By default, WAMP gets installed inside the directly on the C Drive instead of inside the Program Files folder, but you can install it where ever you want. I am ok with the Default location, so I will hit Next.
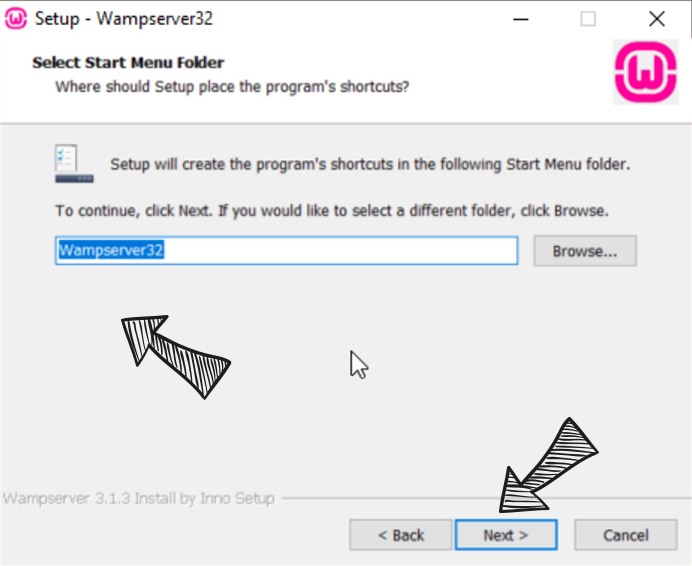
Next, it will ask you to select a location to place the WAMP shortcut. If you are ok with the default location, It will create the shortcut on your desktop. If you don’t want to clutter your desktop, choose a different location. WampServer32 is the name of the shortcut. You can name the shortcut whatever you want.
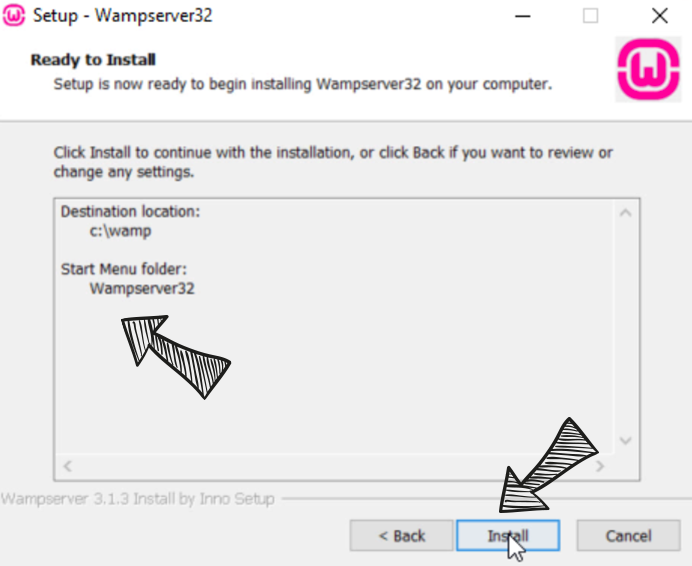
Once you hit the next button, WAMP installer will show you the glimpse of all the important settings you have chosen during the installation process. If you think that something is off, you can go back to any step by hitting the back button. My settings are looking good, So, I will hit the next button to continue the installation.
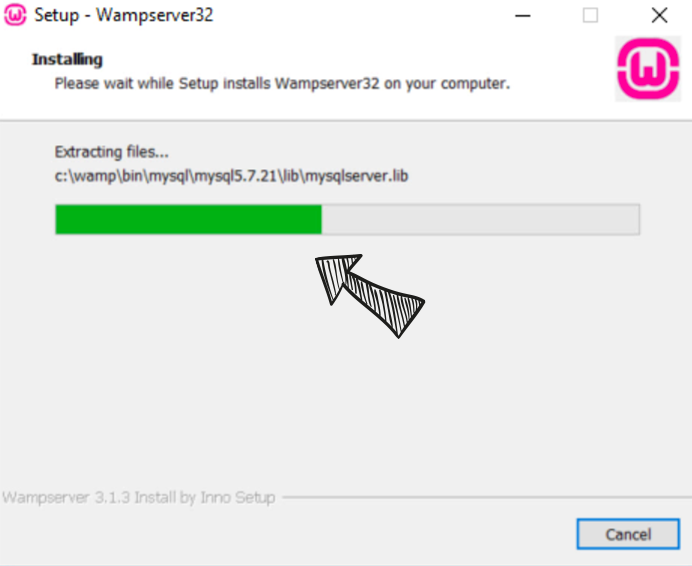
Now that everything is set, WAMP starts installing Apache and MySQL servers. WAMP is a big tool with hundreds of files, so it will take at least two to five minutes.
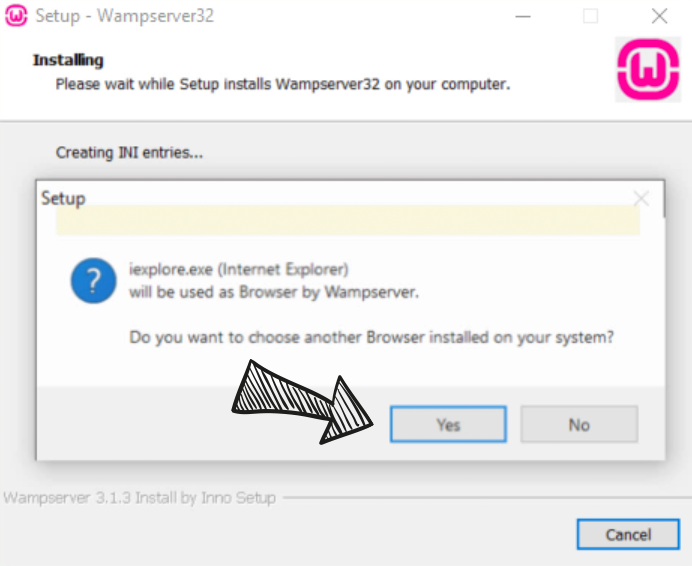
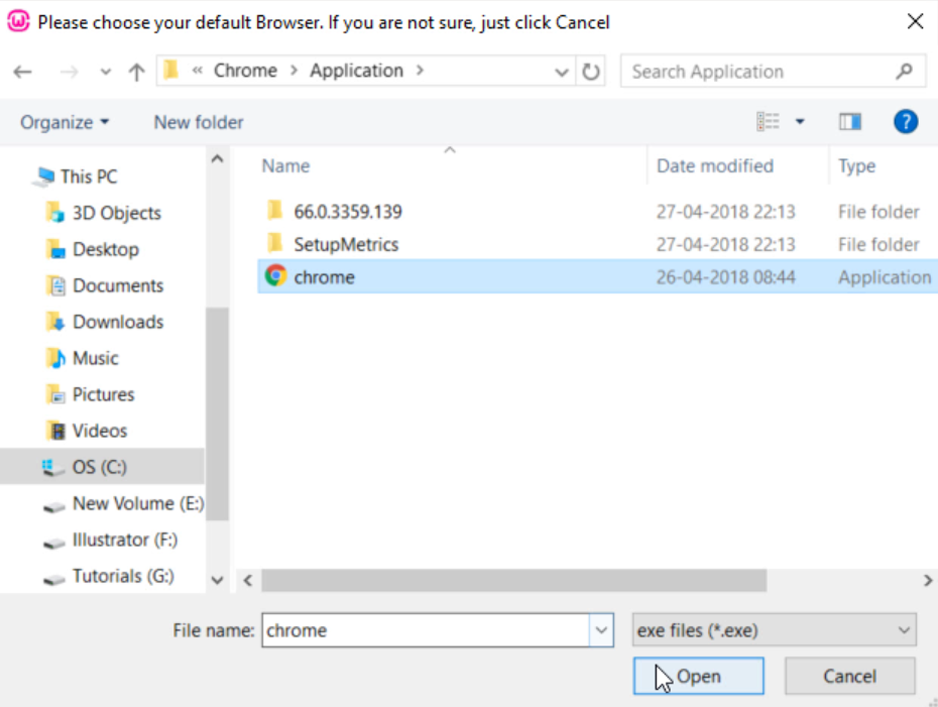
WAMP comes with a tiny yet easy to use interface to let us manage the web server and MySQL databases. So, from time to time WAMP uses the browser to open up tools like PhpMyAdmin and a Code editor to let us modify settings of PHP like maximum file upload size. Because most of us feel home with our favorite browser and addicted code editor, it allows to choose them ourselves. Of course, you will do just fine with the default ones.
Anyway, I am very picky, so, I will choose yes for choosing a different web browser and I will select Chrome and hit Open button.
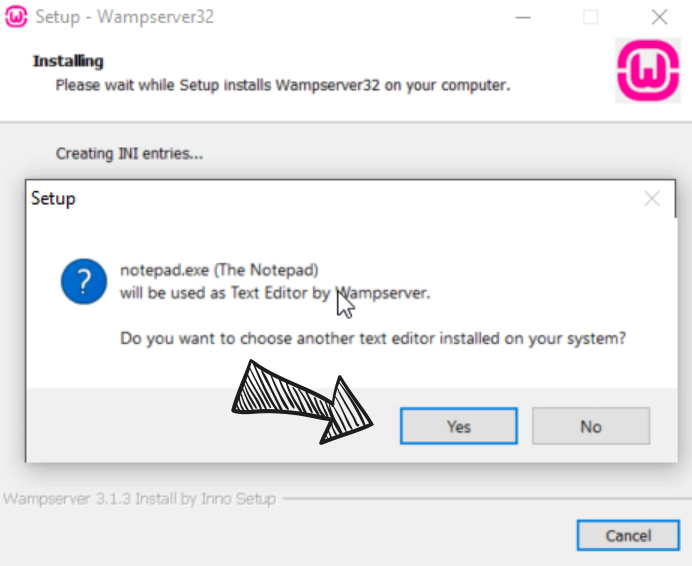
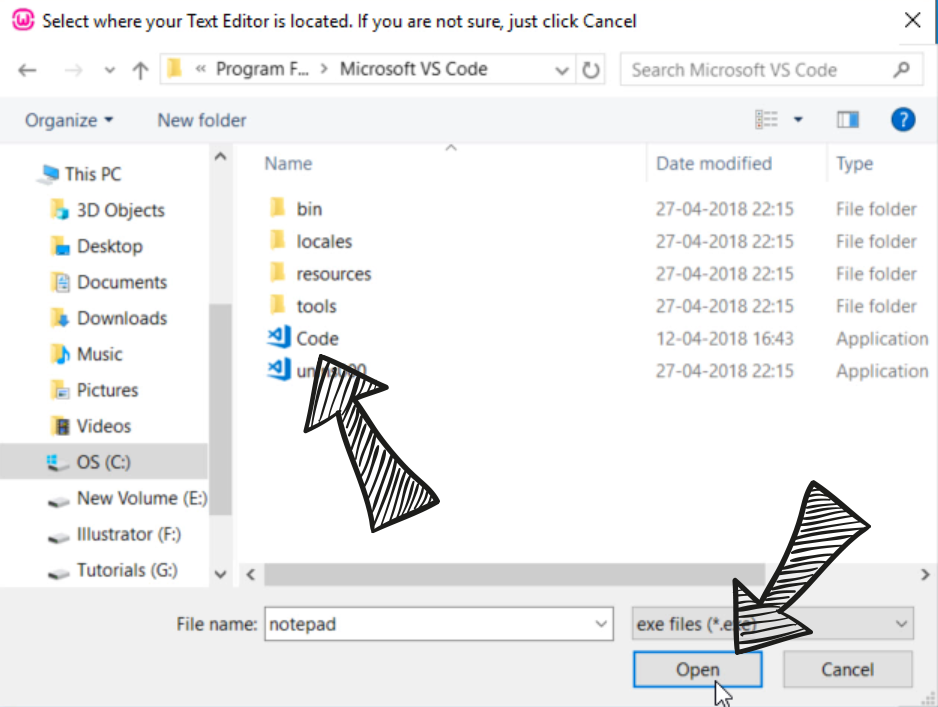
Next, WAMP installer asks us to choose a text editor, I will choose VS code and Hit Open.
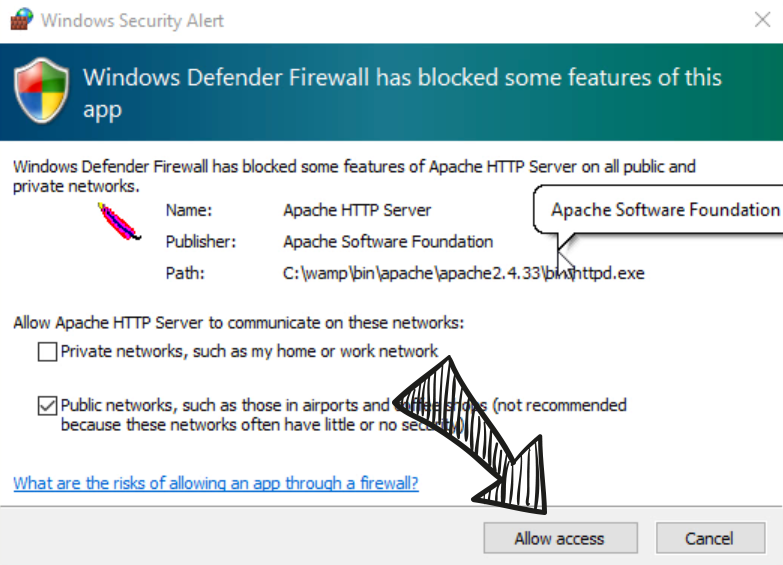
By default, Windows Defender Firewall will block some features of Apache Web Server for security reasons. WAMP installer detects that and asks us to unblock them. Choose Allow Access to finish the installation. If you cancel in this step, WAMP server Installation will fail. Don’t Worry, WAMP is trusted by millions of users around the World.
If for some reason, you did not see this security alert and you are installing WAMP for the first time on your Windows, then there is a problem. Even though your WAMP installation is successful, you can not start the Apache Server. So, after fixing the problem, you might have to re-install WAMP.
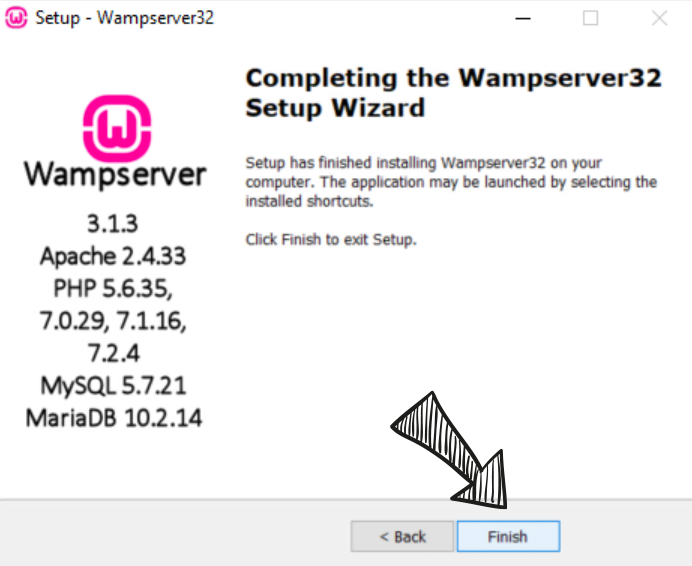
Finally, the WAMP installer will ask us to read how WAMP works. If you are interested go through the information once and Hit Next and then hit Finish to complete the installation.
Tada! Now as the installation is complete. Open Up the WAMP. After opening up, most of the Softwares will open up a Window, but, WAMP is different. It lives in the Icon Tray portion of the Task Bar at the bottom right-hand corner of the screen. Now, keep an eye on the colors of the WAMP icon.

The colors of the WAMP icon in the taskbar represents the state of the WAMP Server. It starts in red, that means it started booting up. Then it turns in to in Orange color, that means it is working Apache and MySQL servers. And finally, it turns to green saying “Hey! your server is ready, you can start working!”.
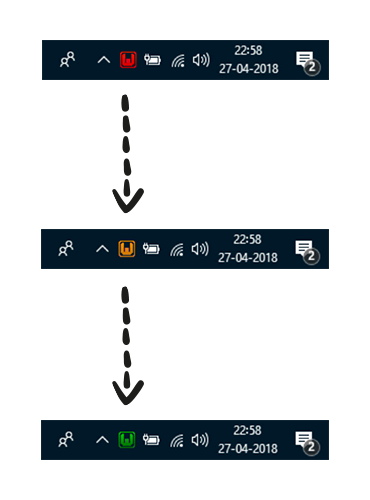
Remember, If something goes wrong, WAMP could get stuck in the Orange color indicating a serious problem. We have to find the problem and solve it to start using the server features.
Alright, now click on the Green WAMP Icon. As soon as you click on it, a neat little popup menu will open up with neatly organized options. We will come back to some of these options when the need comes.
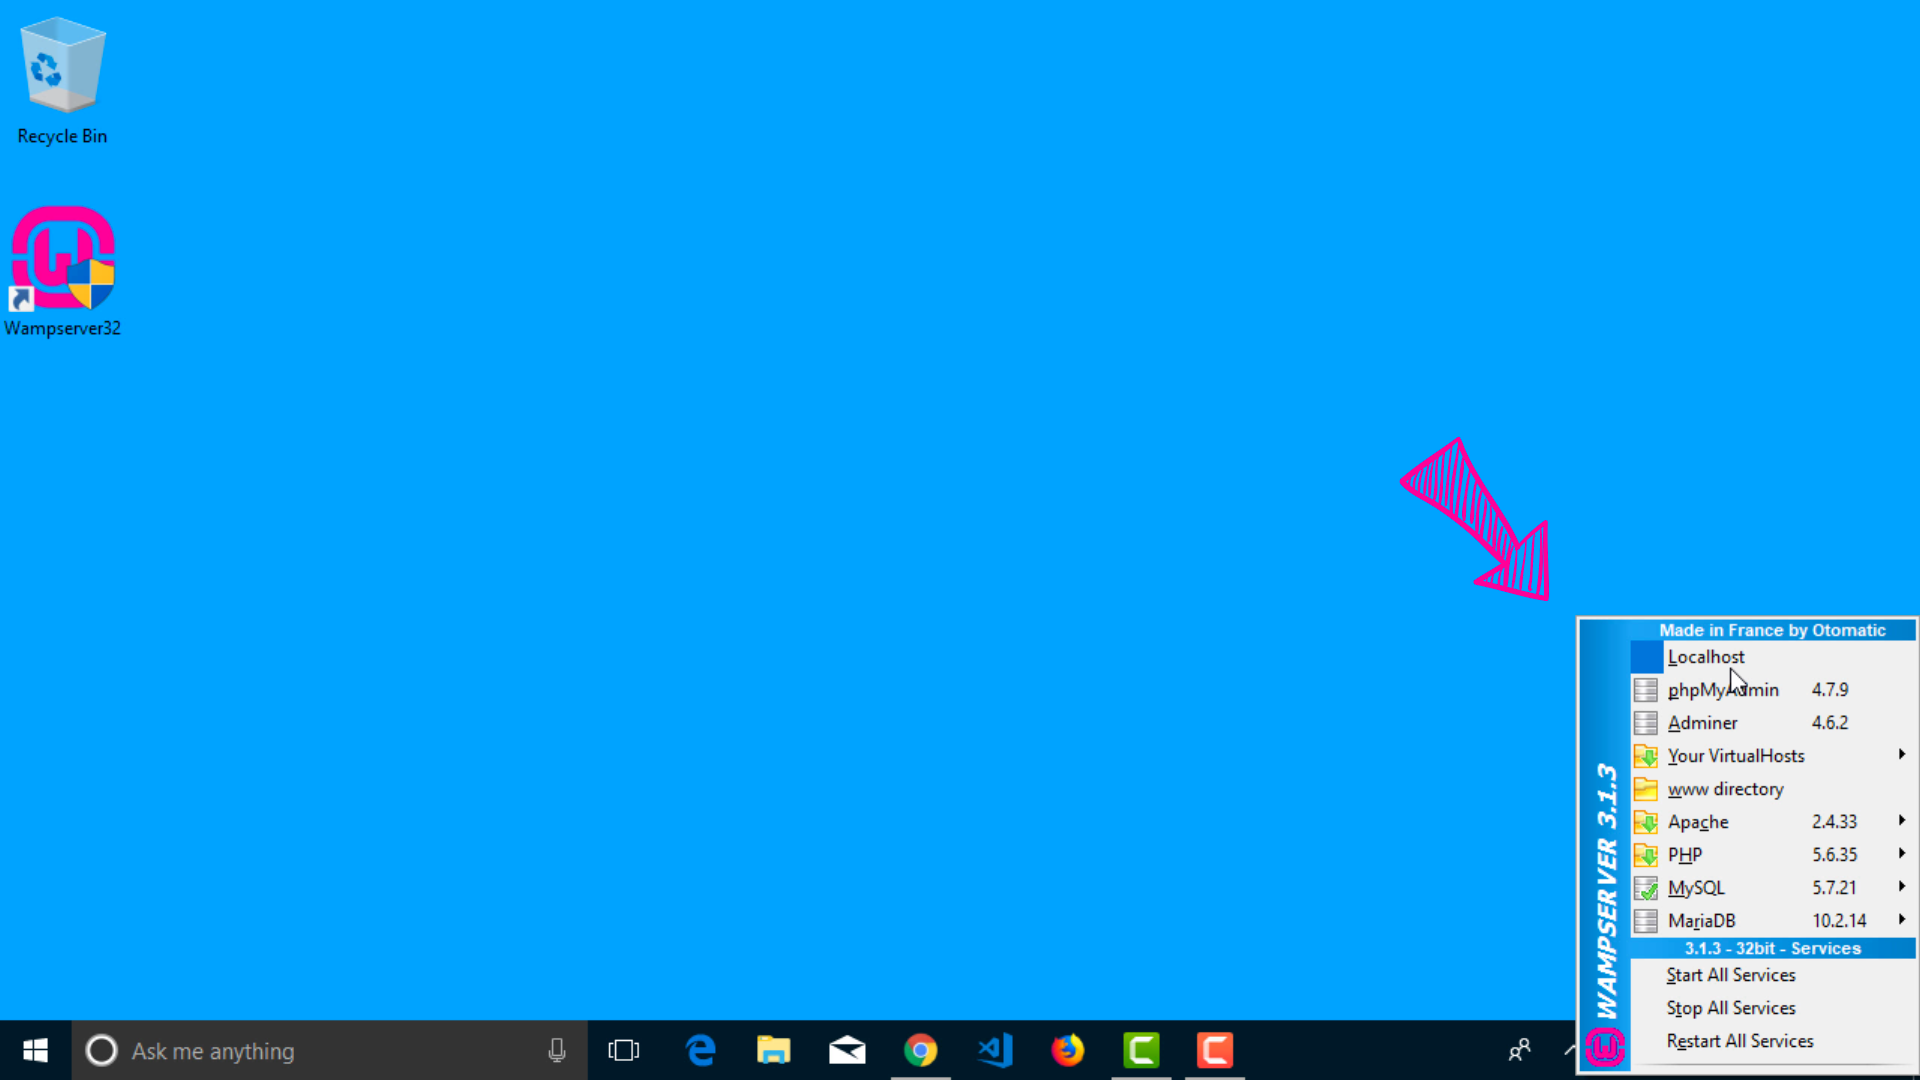
So, for now, let’s check if our server is running properly by typing http://localhost in our browser or you can click on the localhost host button in WAMP popup menu.
For now, It is working as expected and you can start working on your WordPress project. But that is not always the case. So, let’s take a look at some common problems of WAMP.
Although the following problems are still present in Windows 7 and Windows 8, these are fixed in Windows 10 (according to my experience). Remember, If you are facing any of these problems, WAMP icon would be stuck in orange color.
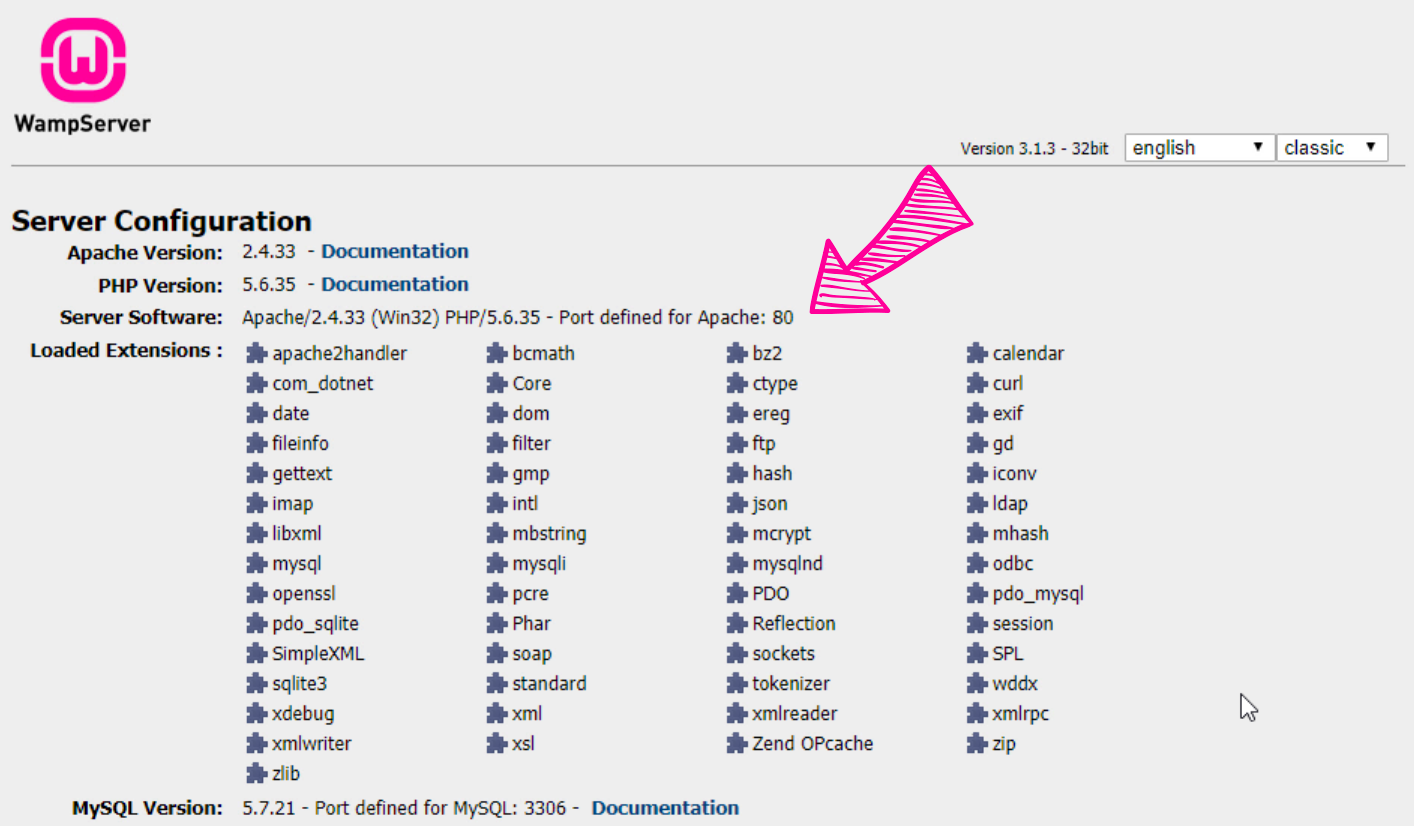
If there is a Port 80 error, WAMP would be stuck at Orange Icon State.
As you can see in the above image, WAMP’s Apache is using port:80 to accept requests from you. But if you use Skype for your video call needs, Skype uses port 80 for your video calls. So, Skype blocks port 80 for its own use making in not accessible to WAMP.
Solution: To solve this problem, You should quit Skype and restart the WAMP server by hitting on “Restart All Services” option from the WAMP popup menu.
If you remember, at the early stages of the installation, WAMP installer asked us to install necessary packages that WAMP depends on. If those packages are not available on your computer and you continued your installation, this is the error you will see when you try to start the WAMP server.
Solution: If you are using Windows 7 or Window 8, download Visual C++ Redistributable for Visual Studio 2012 Update 4 and Visual C++ Redistributable for Visual Studio 2015. If the problem still exists, download Microsoft Visual C++ 2010 Redistributable Package (x86) as well. Once you are done with the installation, restart the WAMP server and you would be good to go.
Alright, now that our server is up and running, In the next lesson, you’ll learn how to create a database for our WordPress Website.